Ollamaを使ってみる その3(Pythonでの利用、Node-RED、Gemma3:4B)
はじめに
今回はPythonでのOllamaの利用方法を確認して、サーバーとして実行できるようにしてみました。
これまでOllamaを利用するときは、Node-REDのollamaノードを利用していました。しかし、会話の内容を記憶させる方法が分からなかったり、データの送信形式に合わせる必要があったりで、何かと不便でした。
Pythonで利用できるようになれば、ノードにもまとめていこうと思っています。
▼PCは10万円ぐらいのゲーミングノートPCを利用しています。このPCでも十分にローカルLLMを実行できます。

ちょっと買い物:新しいノートPCとSSDの増設(ASUS TUF Gaming A15)
はじめに 今回はこれまで使っていたPCが壊れたので買い替えましたという話です。 以前はよく分からないGPUが載っていたノートPCを使っていたのですが、最近はUnreal E…

▼以前の記事はこちら
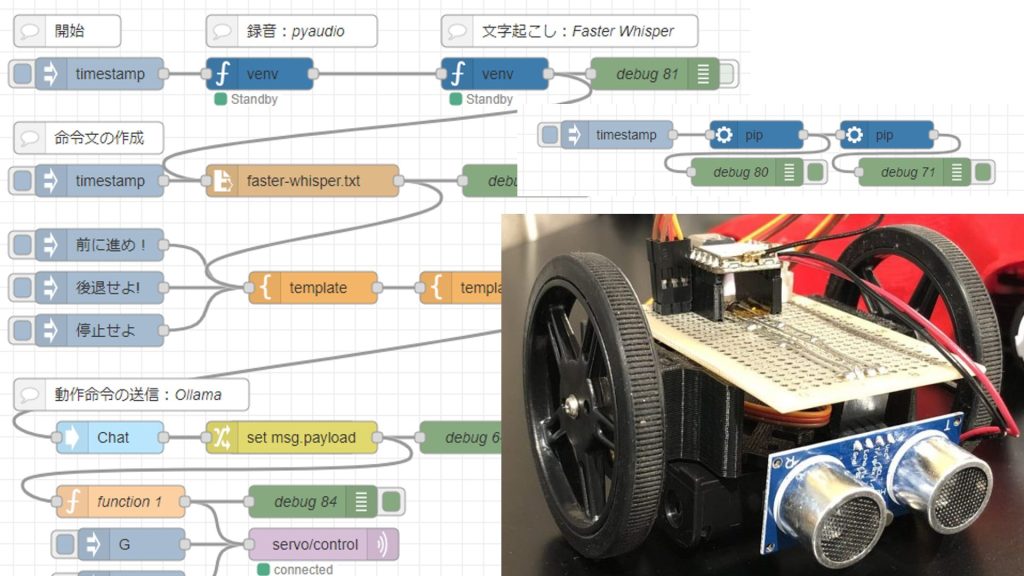
音声でロボットを操作してみる(Node-RED、Gemma2、Faster Whisper、XIAO ESP32C3)
はじめに 今回は音声でロボットの操作を試してみました。今まで試してきたことの、ちょっとしたまとめのような感じです。 音声でロボットを操作するにあたって、音声…
Ollamaを使ってみる その2(ローカルLLMでのコードの生成と実行、qwen2.5-coder、Node-RED)
はじめに 今回はローカルLLMでコードを生成して、そのまま実行できるようにNode-REDのフローを作成してみました。 ChatGPTとプロンプトでやり取りして生成したコード…
サンプルプログラムを試してみる
▼Ollama Python Libraryのリポジトリを参考に進めます。
https://github.com/ollama/ollama-python
まずはPythonの仮想環境を作成して、パッケージをインストールしました。
py -3.10 -m venv pyenv-ollama
cd .\pyenv-ollama\
.\Scripts\activate
pip install ollama
▼Pythonの仮想環境の作成については、以下の記事をご覧ください。
Pythonの仮想環境を作成する(venv、Windows)
はじめに 今回はPythonの仮想環境の作成についてまとめてみました。 Pythonを利用したNode-REDのノードを開発するときに仮想環境を詳しく調べていました。作成した仮…

ローカルLLMのモデルは、Gemma3:4bを利用しました。以下のコマンドでインストールしました。
ollama run gemma3:4b▼OllamaでのGemma3:4bのページはこちら
https://ollama.com/library/gemma3:4b
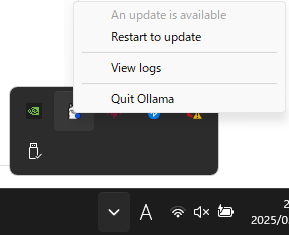
▼コマンドを実行すると、私のOllamaのバージョンが対応していないというエラーが表示されました。

Windowsの場合、Ollamaを起動するとタスクバーに表示されます。右クリックすると、Restart to updateという選択肢がありました。
▼これでアップデートすると、問題なくインストールできました。
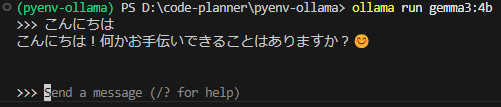
▼モデルをインストール後、プロンプトでやり取りできます。
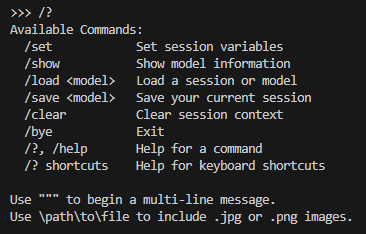
▼/byeと入力すると、終了できました。
サンプルプログラムをもとに、以下の簡単なコードを実行してみました。
from ollama import chat
from ollama import ChatResponse

response: ChatResponse = chat(model='gemma3:4b', messages=[
  {
    'role': 'user',
    'content': 'Why is the sky blue?',
  },
])
print(response['message']['content'])
▼英語で回答されました。情報源のURLも提示されています。

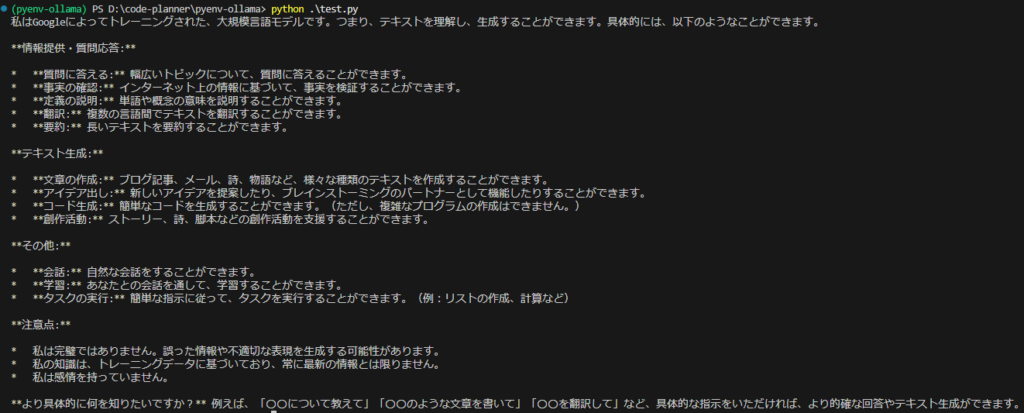
▼何ができるのかという質問をしてみました。一応複雑なプログラムの作成はできないという回答が返ってきています。日本語は自然ですね。
以下のプログラムでは、asyncioを利用して、結果が順次出力されました。
import asyncio
from ollama import AsyncClient

async def chat():
  message = {'role': 'user', 'content': 'こんにちは'}
  async for part in await AsyncClient().chat(model='gemma3:4b', messages=[message], stream=True):
    print(part['message']['content'], end='', flush=True)

asyncio.run(chat())
回答が長い場合は、こちらが使いやすそうです。
▼APIについては以下のページに詳しく書かれていました。
https://github.com/ollama/ollama/blob/main/docs/api.md
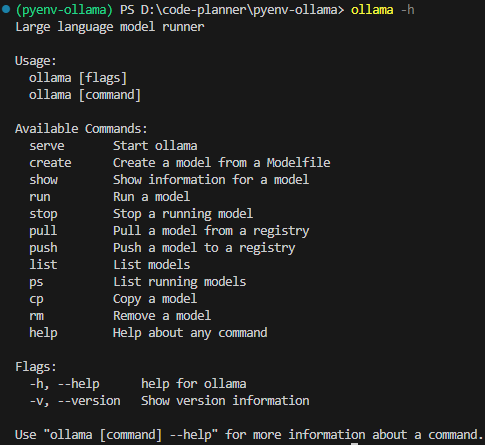
▼ollama -hでもコマンドのヘルプとして説明されていました。
PythonでTCPサーバーを立てる
これまではローカルLLMとやり取りする文をコード内に書いていましたが、動的にメッセージを受け取ることができるようにします。
方法はいろいろあると思いますが、今回はPythonでTCPサーバーを立てることにしました。
以下のプログラムをChatGPTに相談しながら書いてもらい、実行しました。
import socket
import ollama
import threading
import sys

HOST = '127.0.0.1'
PORT = 5001
MAX_HISTORY = 3
chat_history = []
server_socket = None
running = True

def chat_with_ollama(user_input):
    global chat_history

    # 履歴の長さを制限
    if len(chat_history) >= MAX_HISTORY:
        chat_history.pop(0)

    chat_history.append({'role': 'user', 'content': user_input})

    response = ollama.chat(model='gemma3:4b', messages=chat_history)
    chat_reply = response['message']['content']

    chat_history.append({'role': 'assistant', 'content': chat_reply})
    return chat_reply

def handle_client(client_socket):
    """ クライアントごとの処理 """
    global running
    with client_socket:
        print(f"Client connected: {client_socket.getpeername()}")
        while True:
            try:
                data = client_socket.recv(1024).decode().strip()
                if not data:
                    break
                if data.lower() == "bye":
                    print("Received 'bye', shutting down server...")
                    client_socket.sendall("Ollama Shutdown".encode())
                    running = False  # サーバーの実行を停止
                    break

                response = chat_with_ollama(data)
                client_socket.sendall(response.encode())
            except (ConnectionResetError, BrokenPipeError):
                break
        print("Client disconnected.")

def server_thread():
    """ サーバーをスレッドで実行 """
    global server_socket, running

    server_socket = socket.socket(socket.AF_INET, socket.SOCK_STREAM)
    server_socket.setsockopt(socket.SOL_SOCKET, socket.SO_REUSEADDR, 1)
    server_socket.bind((HOST, PORT))
    server_socket.listen()
    server_socket.settimeout(1.0)  # 1秒ごとに `Ctrl+C` チェック

    print(f"Listening on {HOST}:{PORT}...")

    try:
        while running:
            try:
                client_socket, addr = server_socket.accept()
                client_thread = threading.Thread(target=handle_client, args=(client_socket,))
                client_thread.start()
            except socket.timeout:
                continue  # タイムアウトしてもループを継続
    except Exception as e:
        print(f"Server error: {e}")
    finally:
        server_socket.close()
        print("Server shut down.")

def main():
    global running
    server = threading.Thread(target=server_thread)
    server.start()

    try:
        while running:
            pass  # メインスレッドを維持して `Ctrl+C` を待つ
    except KeyboardInterrupt:
        print("\nShutting down server...")
        running = False  # サーバーの実行を停止
        server.join()  # スレッドを待機
        sys.exit(0)

if __name__ == "__main__":
    main()
やり取りが長くなるとデータが大きくなっていくので、MAX_HISTORYでいくつまでやり取りを記憶しておくかを指定できます。
通信の確認は、Node-REDのtcp requestノードを利用しました。injectノードでメッセージを指定し、PythonのTCPサーバーのポートに送信するだけです。
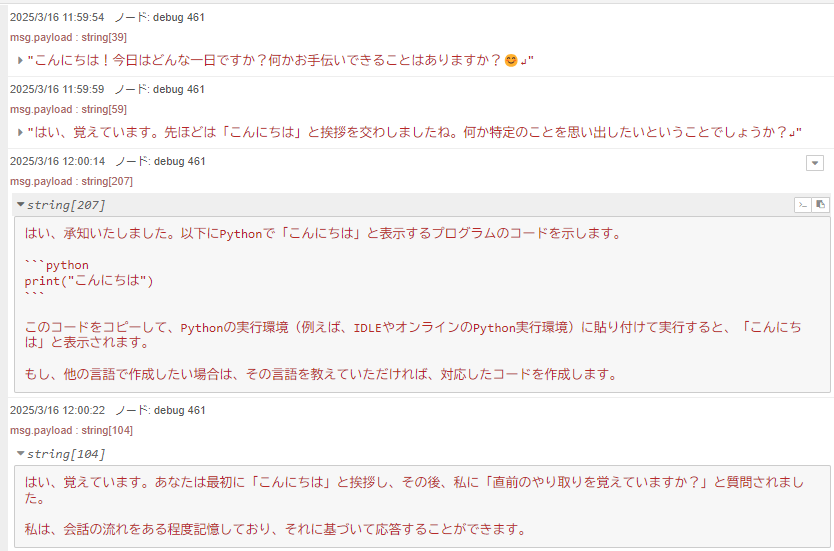
▼メッセージの送受信をすることができました!これまでのやり取りも覚えているようです。
▼chat_historyの内容を見ると、これまでの内容も含まれています。

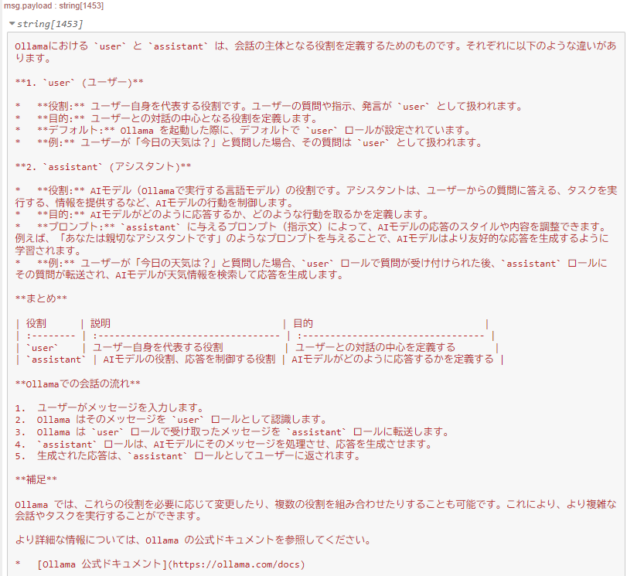
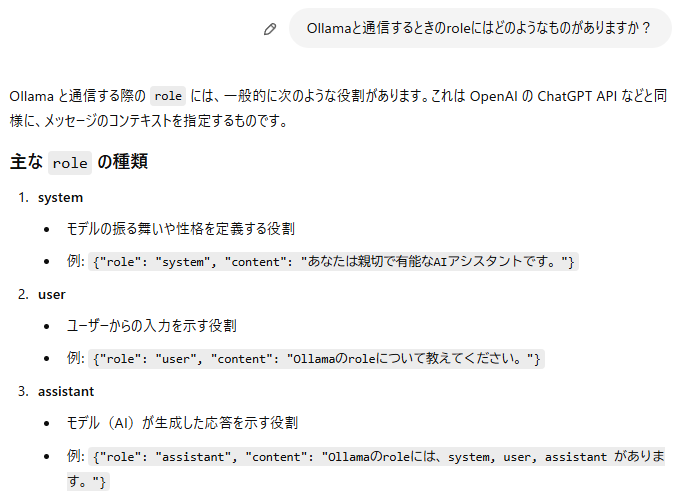
roleにassistantかuserが入っていたのですが、どういう役割の違いなのか聞いてみました。
▼ユーザー自身の質問か、AIの回答かという違いだそうです。
▼ChatGPTに聞いたときは、以下のように回答されました。
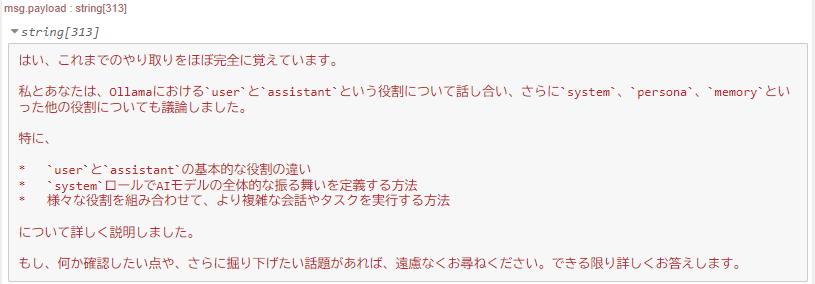
この後、他のroleについても聞いたのですが、これまでのやり取りを覚えているか聞いてみました。
▼ちゃんと覚えているようでした。
Node-REDで実行する
先程のPythonのコードを、Node-REDで実行します。
Node-REDでのPythonの実行は、私が開発したpython-venvノードを利用しています。Pythonの仮想環境を作成して、Node-REDのノードとしてコードを実行できます。
▼年末に開発の変遷を書きました。
https://qiita.com/background/items/d2e05e8d85427761a609
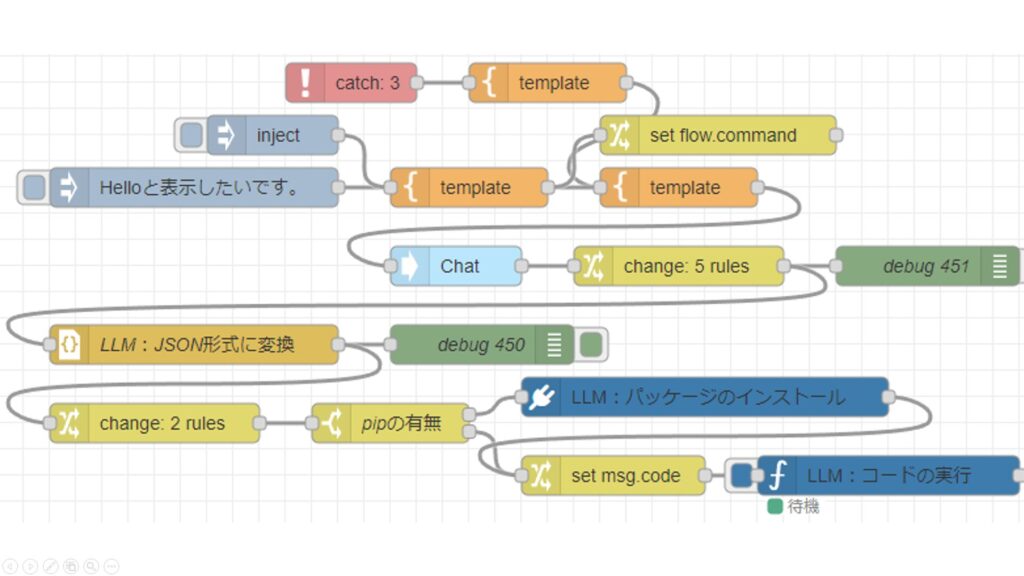
▼フローはこちら
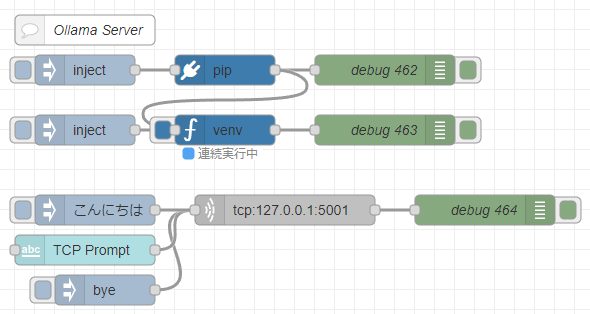
[{"id":"7543d889d219314b","type":"venv","z":"22eb2b8f4786695c","venvconfig":"015784e9e3e0310a","name":"","code":"import socket\nimport ollama\nimport threading\nimport sys\n\nHOST = '127.0.0.1'\nPORT = 5001\nMAX_HISTORY = 20\nchat_history = []\nserver_socket = None\nrunning = True\n\ndef chat_with_ollama(user_input):\n global chat_history\n \n # 履歴の長さを制限\n if len(chat_history) >= MAX_HISTORY:\n chat_history.pop(0)\n\n chat_history.append({'role': 'user', 'content': user_input})\n \n response = ollama.chat(model='gemma3:4b', messages=chat_history)\n chat_reply = response['message']['content']\n \n chat_history.append({'role': 'assistant', 'content': chat_reply})\n print(chat_history)\n return chat_reply\n\ndef handle_client(client_socket):\n \"\"\" クライアントごとの処理 \"\"\"\n global running\n with client_socket:\n print(f\"Client connected: {client_socket.getpeername()}\")\n while True:\n try:\n data = client_socket.recv(1024).decode().strip()\n if not data:\n break\n if data.lower() == \"bye\":\n print(\"Received 'bye', shutting down server...\")\n client_socket.sendall(\"Ollama Shutdown\".encode())\n running = False # サーバーの実行を停止\n break\n\n response = chat_with_ollama(data)\n client_socket.sendall(response.encode())\n except (ConnectionResetError, BrokenPipeError):\n break\n print(\"Client disconnected.\")\n\ndef server_thread():\n \"\"\" サーバーをスレッドで実行 \"\"\"\n global server_socket, running\n\n server_socket = socket.socket(socket.AF_INET, socket.SOCK_STREAM)\n server_socket.setsockopt(socket.SOL_SOCKET, socket.SO_REUSEADDR, 1)\n server_socket.bind((HOST, PORT))\n server_socket.listen()\n server_socket.settimeout(1.0) # 1秒ごとに `Ctrl+C` チェック\n\n print(f\"Listening on {HOST}:{PORT}...\")\n\n try:\n while running:\n try:\n client_socket, addr = server_socket.accept()\n client_thread = threading.Thread(target=handle_client, args=(client_socket,))\n client_thread.start()\n except socket.timeout:\n continue # タイムアウトしてもループを継続\n except Exception as e:\n print(f\"Server error: {e}\")\n finally:\n server_socket.close()\n print(\"Server shut down.\")\n\ndef main():\n global running\n server = threading.Thread(target=server_thread)\n server.start()\n\n try:\n while running:\n pass # メインスレッドを維持して `Ctrl+C` を待つ\n except KeyboardInterrupt:\n print(\"\\nShutting down server...\")\n running = False # サーバーの実行を停止\n server.join() # スレッドを待機\n sys.exit(0)\n\nif __name__ == \"__main__\":\n main()\n","continuous":true,"x":550,"y":4420,"wires":[["f2c4cc31c97b0dcd"]]},{"id":"f5cfc55ca9620bf2","type":"pip","z":"22eb2b8f4786695c","venvconfig":"015784e9e3e0310a","name":"","arg":"ollama","action":"install","tail":false,"x":550,"y":4360,"wires":[["83b25cbb4dcf01e4","7543d889d219314b"]]},{"id":"bb18e75a33f0f375","type":"inject","z":"22eb2b8f4786695c","name":"","props":[],"repeat":"","crontab":"","once":false,"onceDelay":0.1,"topic":"","x":410,"y":4360,"wires":[["f5cfc55ca9620bf2"]]},{"id":"83b25cbb4dcf01e4","type":"debug","z":"22eb2b8f4786695c","name":"debug 462","active":true,"tosidebar":true,"console":false,"tostatus":false,"complete":"false","statusVal":"","statusType":"auto","x":710,"y":4360,"wires":[]},{"id":"9d13eadce7ba2dea","type":"inject","z":"22eb2b8f4786695c","name":"","props":[],"repeat":"","crontab":"","once":false,"onceDelay":0.1,"topic":"","x":410,"y":4420,"wires":[["7543d889d219314b"]]},{"id":"f2c4cc31c97b0dcd","type":"debug","z":"22eb2b8f4786695c","name":"debug 463","active":true,"tosidebar":true,"console":false,"tostatus":false,"complete":"false","statusVal":"","statusType":"auto","x":710,"y":4420,"wires":[]},{"id":"57fcea4b5aa2328a","type":"comment","z":"22eb2b8f4786695c","name":"Ollama Server","info":"","x":410,"y":4320,"wires":[]},{"id":"9c47865553875349","type":"inject","z":"22eb2b8f4786695c","name":"","props":[{"p":"payload"}],"repeat":"","crontab":"","once":false,"onceDelay":0.1,"topic":"","payload":"bye","payloadType":"str","x":430,"y":4580,"wires":[["d81bba47fda884db"]]},{"id":"8a50f535ccd79fc5","type":"ui_text_input","z":"22eb2b8f4786695c","name":"","label":"TCP Prompt","tooltip":"","group":"4d30f575f823d2bc","order":7,"width":0,"height":0,"passthru":true,"mode":"text","delay":"0","topic":"topic","sendOnBlur":true,"className":"","topicType":"msg","x":410,"y":4540,"wires":[["d81bba47fda884db"]]},{"id":"930a483a4ca15f5e","type":"inject","z":"22eb2b8f4786695c","name":"","props":[{"p":"payload"}],"repeat":"","crontab":"","once":false,"onceDelay":0.1,"topic":"","payload":"こんにちは","payloadType":"str","x":420,"y":4500,"wires":[["d81bba47fda884db"]]},{"id":"d81bba47fda884db","type":"tcp request","z":"22eb2b8f4786695c","name":"","server":"127.0.0.1","port":"5001","out":"time","ret":"string","splitc":"0","newline":"","trim":false,"tls":"","x":610,"y":4500,"wires":[["254fd2239e5cf0ce"]]},{"id":"254fd2239e5cf0ce","type":"debug","z":"22eb2b8f4786695c","name":"debug 464","active":true,"tosidebar":true,"console":false,"tostatus":false,"complete":"false","statusVal":"","statusType":"auto","x":810,"y":4500,"wires":[]},{"id":"015784e9e3e0310a","type":"venv-config","venvname":"AI","version":"3.10"},{"id":"4d30f575f823d2bc","type":"ui_group","name":"Prompt","tab":"d614838b0ce41e7f","order":1,"disp":true,"width":12,"collapse":false,"className":""},{"id":"d614838b0ce41e7f","type":"ui_tab","name":"AI","icon":"dashboard","order":1,"disabled":false,"hidden":false}]pipノードでollamaをインストールし、venvノードでコードを実行しています。
▼Pythonで実行していたときと同様に利用できました。
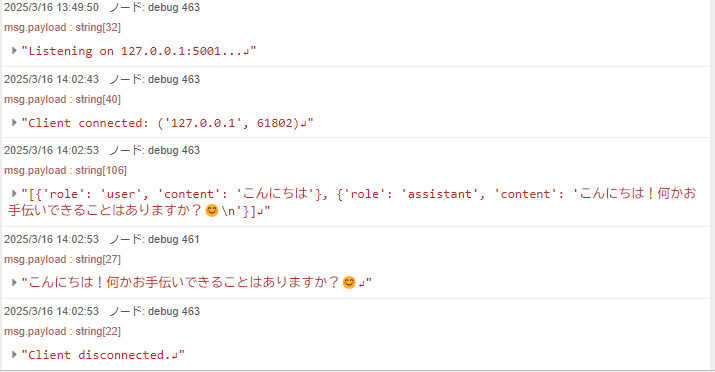
ダッシュボードのtext inputノードで入力した文字に対する応答も返ってきます。他のノードと組み合わせると、便利に使えそうです。
最後に
Node-REDでも、これまでの会話の内容を保持したローカルLLMとやり取りができるようになりました。この後、ローカルLLMどうしで会話させていました。
これまで試してきた技術とも相性が良さそうです。現状ではメッセージでのやり取りのみですが、マルチモーダルAIも試してみたいですね。
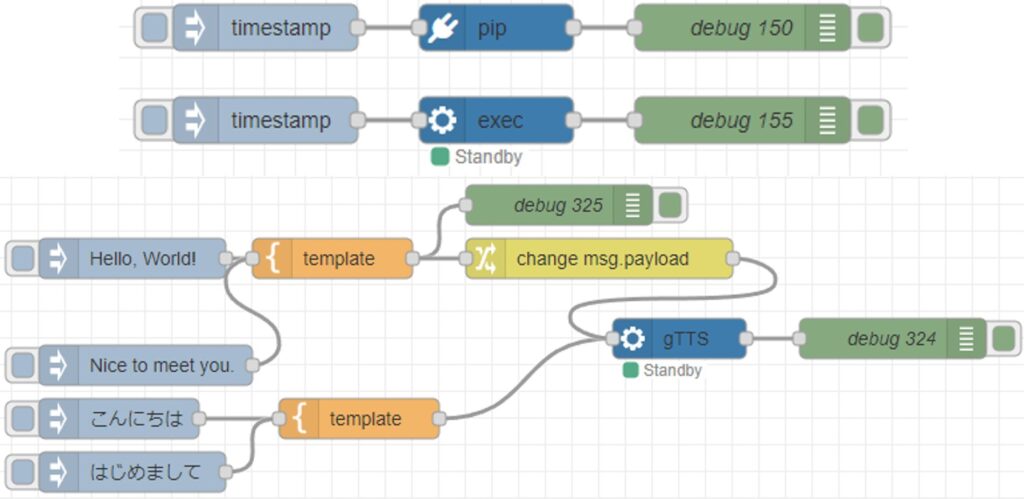
▼音声入力、音声合成などの技術要素はあります。ノードをつなぐだけで組み合わせることができそうです。
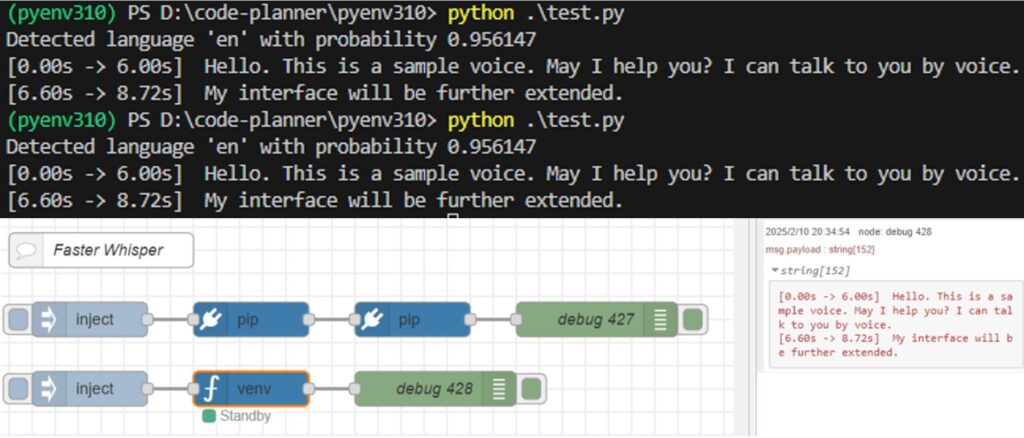
Faster Whisperを使ってみる(GPUでの実行、Python、Node-RED)
はじめに 今回はFaster Whisperを利用して文字起こしをしてみました。 Open AIのWhisperによる文字起こしよりも高速ということで試したことがあったのですが、以前はC…
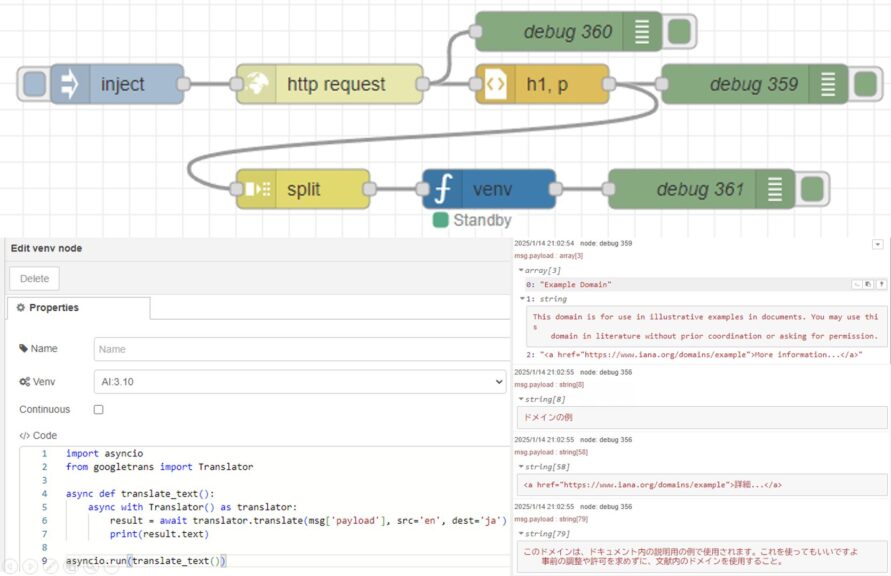
Pythonでテキストを翻訳する(Googletrans、Node-RED)
はじめに 今回はPythonでGoogletransを利用した翻訳を試してみました。 書いてはいないのですが、これまで翻訳するのにdeep-translatorも使ったことがあります。他に…
PythonでgTTSを使ってみる(音声合成、Node-RED)
はじめに 今回はPythonでgTTS(Google Text-to-Speech)を使ってみました。 以前VoiceVoxも使ったことがあるのですが、英語も話すことができて、ローカル環境での音声の…