Pythonで画像に対する文字認識 その1(EasyOCR、Node-RED)
はじめに
今回はEasyOCRを利用して、画像に対する文字認識を試してみました。
OCR系のソフトウェアはいろいろあって、Tesseractも使ってみたのですが、リアルタイムでの処理はEasyOCRでGPUを利用したときの方が速いという印象でした。ロボットに搭載するときはリアルタイム性が大事なので、今回はEasyOCRを利用しています。
▼PCは10万円ぐらいで購入したゲーミングノートPCを利用しています。Windows 11の環境です。
ちょっと買い物:新しいノートPCとSSDの増設(ASUS TUF Gaming A15)
はじめに 今回はこれまで使っていたPCが壊れたので買い替えましたという話です。 以前はよく分からないGPUが載っていたノートPCを使っていたのですが、最近はUnreal E…


▼以前の記事はこちら
Pythonで検索してローカルLLMで要約してみる(Ollama、Node-RED)
はじめに 今回は情報収集を自動化したかったので、Pythonで検索するプログラムを試してみました。 いつも通りNode-REDで実行できるようにして、他のノードと組み合わ…
Faster Whisperを使ってみる(GPUでの実行、Python、Node-RED)
はじめに 今回はFaster Whisperを利用して文字起こしをしてみました。 Open AIのWhisperによる文字起こしよりも高速ということで試したことがあったのですが、以前はC…
サンプルプログラムを試してみる
▼GitHubのリポジトリはこちら
https://github.com/JaidedAI/EasyOCR
リポジトリのexamplesフォルダにあった画像に対する検出を試してみました。後で他の処理とつなげやすいように、Node-REDで実行しました。
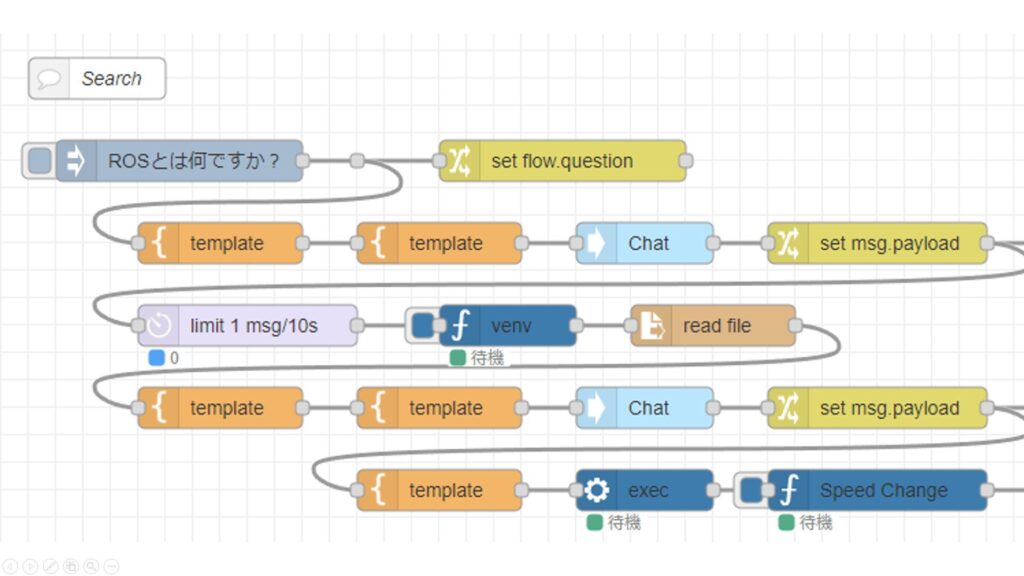
Node-REDでのPythonの実行は、私が開発したpython-venvノードを利用しています。Pythonの仮想環境を作成して、Node-REDのノードとしてコードを実行できます。
▼年末に開発の変遷を書きました。
https://qiita.com/background/items/d2e05e8d85427761a609
▼フローはこちら
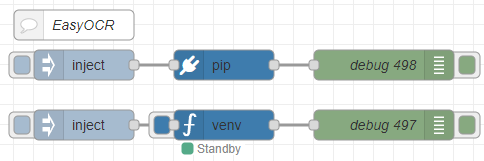
[{"id":"ab8b8f1c9268bd5d","type":"inject","z":"22eb2b8f4786695c","name":"","props":[],"repeat":"","crontab":"","once":false,"onceDelay":0.1,"topic":"","x":1670,"y":5160,"wires":[["51acb05020d7cfc6"]]},{"id":"52591f1d7b841cb4","type":"debug","z":"22eb2b8f4786695c","name":"debug 497","active":true,"tosidebar":true,"console":false,"tostatus":false,"complete":"false","statusVal":"","statusType":"auto","x":1970,"y":5160,"wires":[]},{"id":"51acb05020d7cfc6","type":"venv","z":"22eb2b8f4786695c","venvconfig":"015784e9e3e0310a","name":"","code":"import easyocr\nreader = easyocr.Reader(['ja','en']) # this needs to run only once to load the model into memory\nresult = reader.readtext('japanese.jpg', detail = 0)\nprint(result)","continuous":true,"x":1810,"y":5160,"wires":[["52591f1d7b841cb4"]]},{"id":"68628c5f9a74045a","type":"inject","z":"22eb2b8f4786695c","name":"","props":[],"repeat":"","crontab":"","once":false,"onceDelay":0.1,"topic":"","x":1670,"y":5100,"wires":[["766be88958c2dc88"]]},{"id":"c86aacdcde1a4936","type":"debug","z":"22eb2b8f4786695c","name":"debug 498","active":true,"tosidebar":true,"console":false,"tostatus":false,"complete":"false","statusVal":"","statusType":"auto","x":1970,"y":5100,"wires":[]},{"id":"766be88958c2dc88","type":"pip","z":"22eb2b8f4786695c","venvconfig":"015784e9e3e0310a","name":"","arg":"easyocr","action":"install","tail":false,"x":1810,"y":5100,"wires":[["c86aacdcde1a4936"]]},{"id":"1c2f22ce893dc276","type":"comment","z":"22eb2b8f4786695c","name":"EasyOCR","info":"","x":1660,"y":5060,"wires":[]},{"id":"015784e9e3e0310a","type":"venv-config","venvname":"AI","version":"3.10"}]pipノードでパッケージをインストールし、venvノードでコードを実行しています。
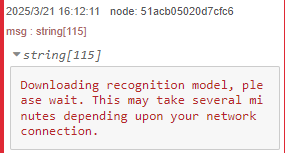
▼初回はモデルのダウンロードがあるようでした。
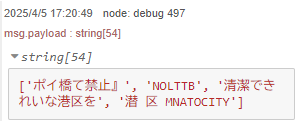
▼検出結果が表示されました。
リアルタイム検出を試してみる
ChatGPTに相談しながら、カメラの映像に対してリアルタイムに文字認識を行うコードを書いてもらいました。
▼フローはこちら

[{"id":"be623682b80adf45","type":"inject","z":"22eb2b8f4786695c","name":"","props":[],"repeat":"","crontab":"","once":false,"onceDelay":0.1,"topic":"","x":1670,"y":5440,"wires":[["ab79b655be32b76e"]]},{"id":"ef1fc126fdc67a72","type":"debug","z":"22eb2b8f4786695c","name":"debug 501","active":true,"tosidebar":true,"console":false,"tostatus":false,"complete":"false","statusVal":"","statusType":"auto","x":1970,"y":5440,"wires":[]},{"id":"ab79b655be32b76e","type":"venv","z":"22eb2b8f4786695c","venvconfig":"015784e9e3e0310a","name":"","code":"import cv2\nimport easyocr\n\n# EasyOCRのリーダーを作成(GPU使用)\nreader = easyocr.Reader(['ja', 'en'], gpu=True)\n\n# カメラを起動\ncap = cv2.VideoCapture(1)\n\nwhile True:\n # フレームを取得\n ret, frame = cap.read()\n if not ret:\n break\n\n # 画像サイズを縮小(処理速度向上)\n scale = 0.5\n frame_resized = cv2.resize(frame, None, fx=scale, fy=scale)\n\n # EasyOCRでテキスト検出\n results = reader.readtext(frame_resized)\n\n # 検出した情報を保存するリスト\n detections = []\n\n for bbox, text, prob in results:\n # バウンディングボックスの座標を元のサイズに変換\n (top_left, top_right, bottom_right, bottom_left) = bbox\n top_left = tuple(map(int, [x / scale for x in top_left]))\n bottom_right = tuple(map(int, [x / scale for x in bottom_right]))\n\n # 辞書形式でデータ保存\n detection = {\n \"text\": text,\n \"confidence\": round(prob, 2),\n \"bbox\": {\n \"top_left\": top_left,\n \"bottom_right\": bottom_right\n }\n }\n detections.append(detection)\n\n # バウンディングボックスを描画\n cv2.rectangle(frame, top_left, bottom_right, (0, 255, 0), 2)\n\n # 結果を出力(ロボットの状況判断に使いやすい形式)\n if detections:\n print(detections)\n\n # 画面に表示\n cv2.imshow(\"Real-Time OCR\", frame)\n\n # 'q'キーで終了\n if cv2.waitKey(1) & 0xFF == ord('q'):\n break\n\n# 後処理\ncap.release()\ncv2.destroyAllWindows()\n","continuous":true,"x":1810,"y":5440,"wires":[["ef1fc126fdc67a72"]]},{"id":"015784e9e3e0310a","type":"venv-config","venvname":"AI","version":"3.10"}]▼GPUを利用して実行するようにしているのですが、パッケージのインストールはYOLOのときに行ったままかもしれません。
YOLOで物体検出 その4(GPUの設定、CUDA 12.6)
はじめに 今回はGPUを利用したYOLOの物体検出を試してみました。 Ultralyticsのドキュメントではオプションで切り替えることができるようでしたが、GPUだとエラーが出…
実際に実行してみました。
▼文字が小さかったり、カメラを傾けると検出できていませんでした。ピントが合っていないという可能性もあります。
▼検出することができました。座標も出力されています。
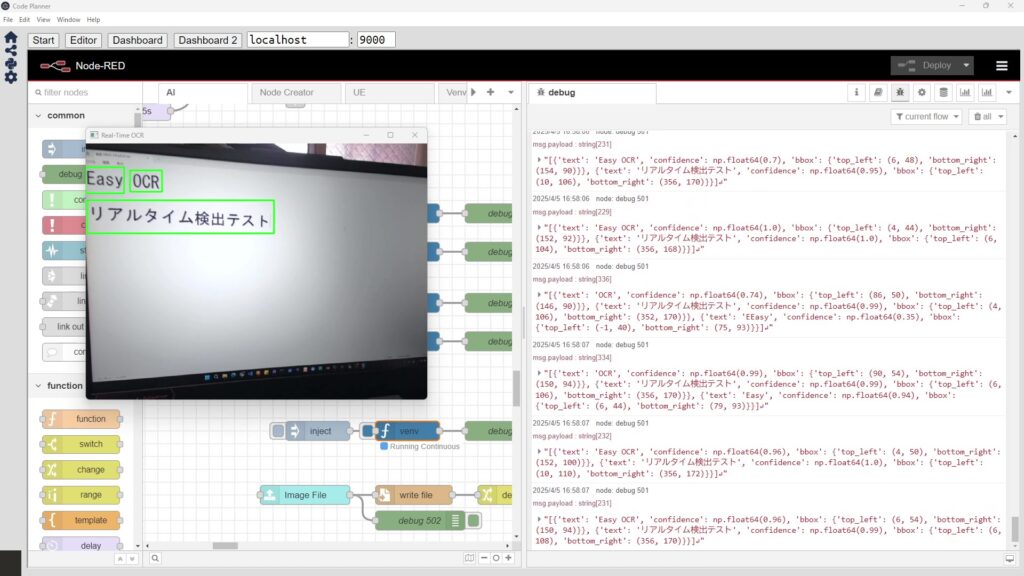
人間のように文字を認識することができるという感じではないですが、近づけば利用できそうです。
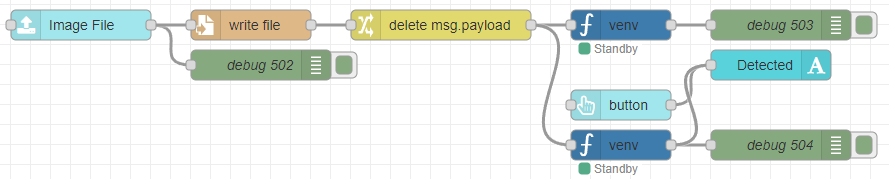
Node-REDのノードと組み合わせる
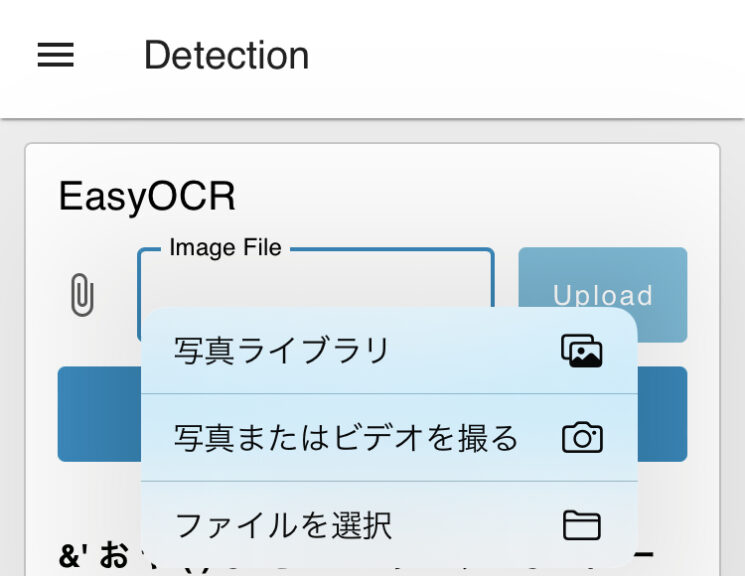
Node-REDのDashboard 2.0にファイルのアップロードを行うことができるノードがあったので、試してみました。
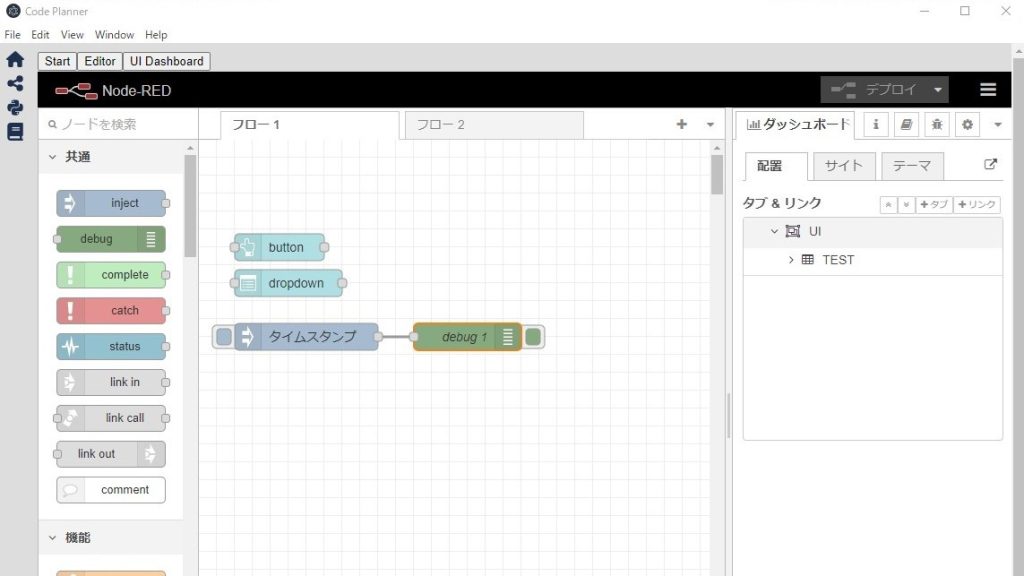
▼フローはこちら
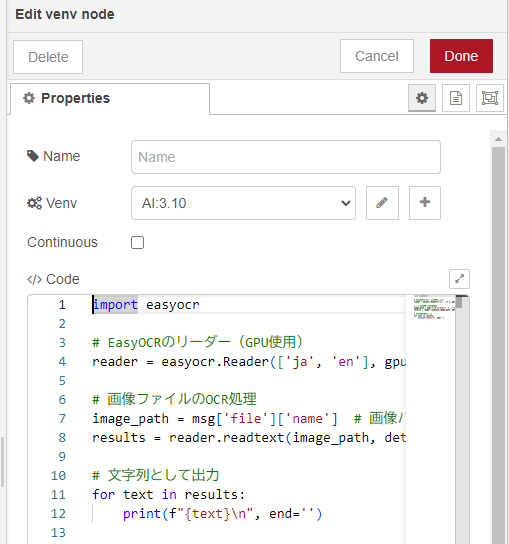
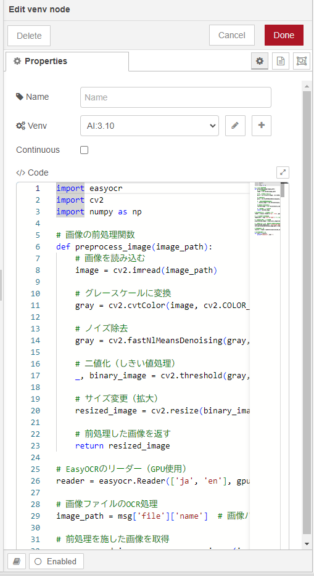
[{"id":"de65b33ef65b664a","type":"ui-file-input","z":"22eb2b8f4786695c","group":"5b61894784d153dc","name":"","order":2,"width":0,"height":0,"topic":"topic","topicType":"msg","label":"Image File","icon":"paperclip","allowMultiple":false,"accept":"","className":"","x":1650,"y":5540,"wires":[["82a4b71fdab324fe","0dbc0d221e20ea71"]]},{"id":"0dbc0d221e20ea71","type":"file","z":"22eb2b8f4786695c","name":"","filename":"file.name","filenameType":"msg","appendNewline":true,"createDir":true,"overwriteFile":"true","encoding":"none","x":1820,"y":5540,"wires":[["ac97631b10166266"]]},{"id":"82a4b71fdab324fe","type":"debug","z":"22eb2b8f4786695c","name":"debug 502","active":true,"tosidebar":true,"console":false,"tostatus":false,"complete":"true","targetType":"full","statusVal":"","statusType":"auto","x":1830,"y":5580,"wires":[]},{"id":"73522a73e80f97ef","type":"debug","z":"22eb2b8f4786695c","name":"debug 503","active":true,"tosidebar":true,"console":false,"tostatus":false,"complete":"false","statusVal":"","statusType":"auto","x":2350,"y":5540,"wires":[]},{"id":"48a5f9b42fe1b4b6","type":"venv","z":"22eb2b8f4786695c","venvconfig":"015784e9e3e0310a","name":"","code":"import easyocr\n\n# EasyOCRのリーダー(GPU使用)\nreader = easyocr.Reader(['ja', 'en'], gpu=True)\n\n# 画像ファイルのOCR処理\nimage_path = msg['file']['name'] # 画像パスを取得\nresults = reader.readtext(image_path, detail=0) # detail=0 で文字のみ取得\n\n# 文字列として出力\nfor text in results:\n print(f\"{text}\\n\", end='')\n","continuous":false,"x":2190,"y":5540,"wires":[["73522a73e80f97ef"]]},{"id":"ac97631b10166266","type":"change","z":"22eb2b8f4786695c","name":"","rules":[{"t":"delete","p":"payload","pt":"msg"}],"action":"","property":"","from":"","to":"","reg":false,"x":2010,"y":5540,"wires":[["48a5f9b42fe1b4b6","ae8ae8f4453c7652"]]},{"id":"45ff17b9119baf32","type":"ui-text","z":"22eb2b8f4786695c","group":"5b61894784d153dc","order":4,"width":0,"height":0,"name":"","label":"Detected","format":"{{msg.payload}}","layout":"col-center","style":false,"font":"","fontSize":16,"color":"#717171","wrapText":true,"className":"","x":2340,"y":5580,"wires":[]},{"id":"d1d9632cd29dcefb","type":"ui-button","z":"22eb2b8f4786695c","group":"5b61894784d153dc","name":"","label":"button","order":3,"width":0,"height":0,"emulateClick":false,"tooltip":"","color":"","bgcolor":"","className":"","icon":"","iconPosition":"left","payload":"","payloadType":"str","topic":"topic","topicType":"msg","buttonColor":"","textColor":"","iconColor":"","enableClick":true,"enablePointerdown":false,"pointerdownPayload":"","pointerdownPayloadType":"str","enablePointerup":false,"pointerupPayload":"","pointerupPayloadType":"str","x":2190,"y":5620,"wires":[["45ff17b9119baf32"]]},{"id":"ae8ae8f4453c7652","type":"venv","z":"22eb2b8f4786695c","venvconfig":"015784e9e3e0310a","name":"","code":"import easyocr\nimport cv2\nimport numpy as np\n\n# 画像の前処理関数\ndef preprocess_image(image_path):\n # 画像を読み込む\n image = cv2.imread(image_path)\n\n # グレースケールに変換\n gray = cv2.cvtColor(image, cv2.COLOR_BGR2GRAY)\n\n # ノイズ除去\n gray = cv2.fastNlMeansDenoising(gray, None, 30, 7, 21)\n\n # 二値化(しきい値処理)\n _, binary_image = cv2.threshold(gray, 150, 255, cv2.THRESH_BINARY)\n\n # サイズ変更(拡大)\n resized_image = cv2.resize(binary_image, None, fx=1.5, fy=1.5, interpolation=cv2.INTER_CUBIC)\n\n # 前処理した画像を返す\n return resized_image\n\n# EasyOCRのリーダー(GPU使用)\nreader = easyocr.Reader(['ja', 'en'], gpu=True)\n\n# 画像ファイルのOCR処理\nimage_path = msg['file']['name'] # 画像パスを取得\n\n# 前処理を施した画像を取得\npreprocessed_image = preprocess_image(image_path)\n\n# 前処理後の画像を一時的に保存してOCR処理を行う(後で削除することも可能)\npreprocessed_image_path = 'processed_image.jpg'\ncv2.imwrite(preprocessed_image_path, preprocessed_image)\n\n# OCR処理を行う\nresults = reader.readtext(preprocessed_image_path, detail=0) # detail=0 で文字のみ取得\n\n# 文字列として出力\nfor text in results:\n print(f\"{text}\\n\", end='')\n","continuous":false,"x":2190,"y":5660,"wires":[["25ab6b29149609cb","45ff17b9119baf32"]]},{"id":"25ab6b29149609cb","type":"debug","z":"22eb2b8f4786695c","name":"debug 504","active":true,"tosidebar":true,"console":false,"tostatus":false,"complete":"false","statusVal":"","statusType":"auto","x":2350,"y":5660,"wires":[]},{"id":"5b61894784d153dc","type":"ui-group","name":"EasyOCR","page":"42252fd6f309916f","width":"6","height":"1","order":2,"showTitle":true,"className":"","visible":"true","disabled":"false","groupType":"default"},{"id":"015784e9e3e0310a","type":"venv-config","venvname":"AI","version":"3.10"},{"id":"42252fd6f309916f","type":"ui-page","name":"Detection","ui":"ba89d595c555beb9","path":"/page3","icon":"home","layout":"grid","theme":"e2c9a4f37a42314e","breakpoints":[{"name":"Default","px":"0","cols":"3"},{"name":"Tablet","px":"576","cols":"6"},{"name":"Small Desktop","px":"768","cols":"9"},{"name":"Desktop","px":"1024","cols":"12"}],"order":3,"className":"","visible":"true","disabled":"false"},{"id":"ba89d595c555beb9","type":"ui-base","name":"My Dashboard","path":"/dashboard","appIcon":"","includeClientData":true,"acceptsClientConfig":["ui-notification","ui-control"],"showPathInSidebar":false,"headerContent":"page","navigationStyle":"default","titleBarStyle":"default","showReconnectNotification":true,"notificationDisplayTime":"1","showDisconnectNotification":true},{"id":"e2c9a4f37a42314e","type":"ui-theme","name":"Default Theme","colors":{"surface":"#ffffff","primary":"#0094CE","bgPage":"#eeeeee","groupBg":"#ffffff","groupOutline":"#cccccc"},"sizes":{"density":"default","pagePadding":"12px","groupGap":"12px","groupBorderRadius":"4px","widgetGap":"12px"}}]ダッシュボード画面からファイルをアップロード後、保存して、そのファイルに対してEasyOCRを実行するようになっています。
▼Pythonのコードは二通り用意していて、上のvenvノードはシンプルな処理です。
▼下のvenvノードは二値化してから処理するようにしています。
実際に実行してみました。
▼スマートフォンのブラウザからアクセスできます。
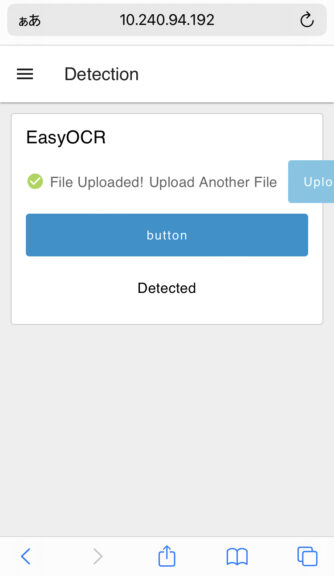
▼スマートフォンで撮影した画像をアップロードすることができます。
なおアップロードできるファイルのデータサイズには制限があるようです。設定ファイルでその制限を編集できました。
▼以下のページに書かれていました。
https://dashboard.flowfuse.com/user/template-examples.html#file-upload
settings.jsonに、以下のように追加するように書かれていました。
dashboard: {
    maxHttpBufferSize: 1e8 // size in bytes, example: 100 MB
}
私はNode-REDをExpressで起動しているので、そのコードの中に追加しました。
// 設定オブジェクトの生成 - 他のオプションについてはデフォルトの 'settings.js' ファイルを参照してください
var settings = {
    httpAdminRoot: "/red",
    httpNodeRoot: "/api",
    userDir: path.join(__dirname, '.nodered'),
    dashboard: {
        maxHttpBufferSize: 1e8 // size in bytes, example: 100 MB
    }
};
▼ExpressでNode-REDを起動する方法についてはこちら
Node-REDをアプリケーションに組み込む その1(Electron、Express)
はじめに 今回はElectronで作成しているアプリケーションに、Node-REDを組み込んでみました。 Node-REDのユーザーガイドに、Expressアプリケーションへの組み込みのサ…
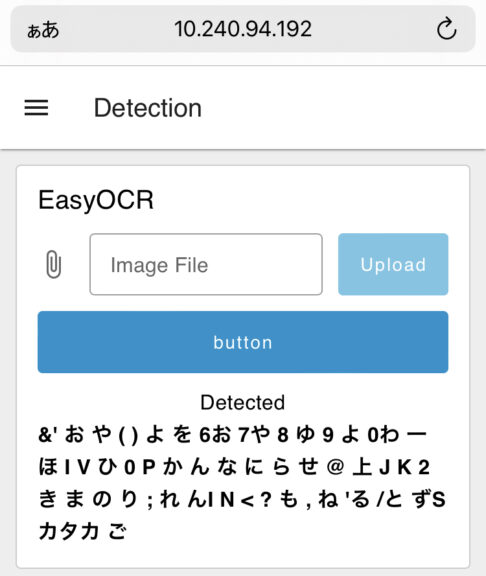
スマートフォンの画面をスクリーンショットして、アップロードしてみました。
▼二値化後の画像は以下のようになります。
▼処理が終わると、検出した文字が表示されます。

他にも画像を撮影してEasyOCRを実行してみました。
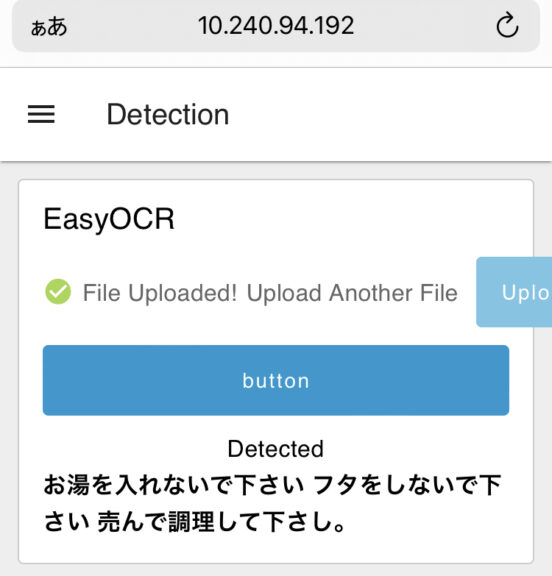
▼こちらは確かカップ麺にそっくりな容器の画像だったと思います。
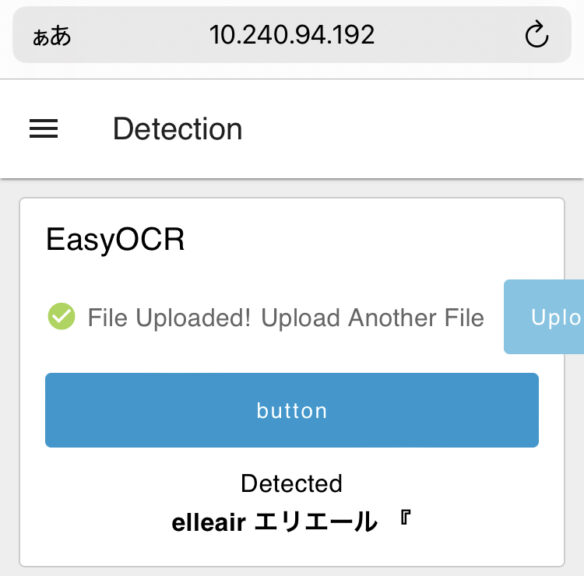
▼こちらはティッシュの箱です。
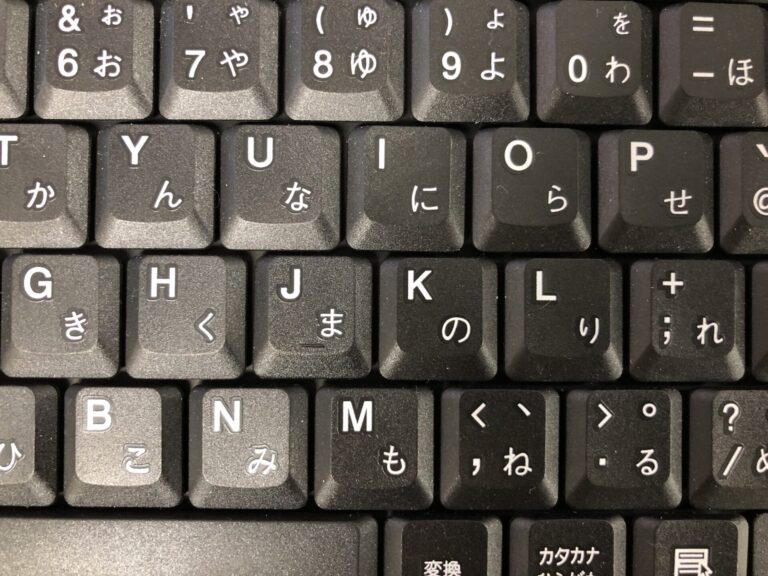
▼キーボードの画像をアップロードしてみました。
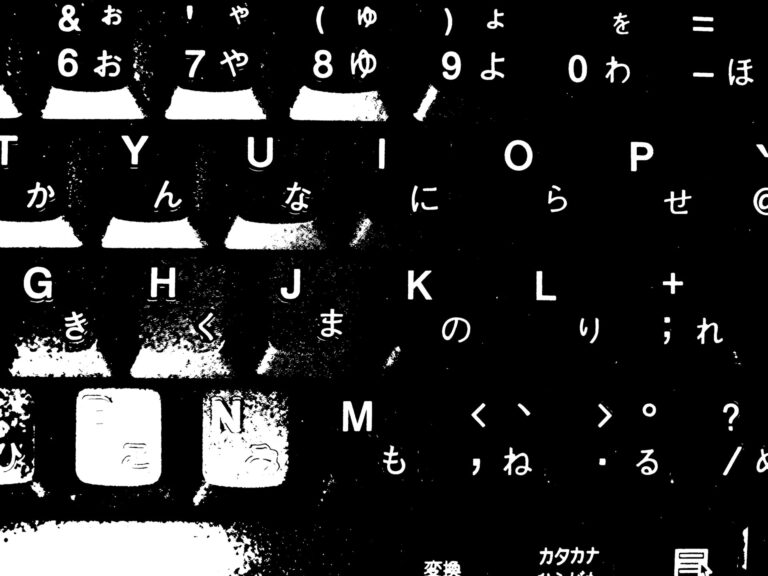
▼二値化した画像はこちら
▼順序はもちろんバラバラですが、検出しています。
検出は簡単にできますが、精度はそれほど高くないという印象です。
最後に
EasyOCRを利用して、画像からテキストを抽出することができました。全体的に精度は低そうなのですが、日本語だからというのもあるかもしれません。
多少文脈が取れていないところは、ローカルLLMで補正するのもよさそうだなと思っています。ロボットでリアルタイムに認識するときは、ロボット自体を近づける必要もありそうです。