Trying Out Raspberry Pi Zero 2 Part 1 (Xfce, Vivaldi, and Node-RED)
Introduction
In this post, I tried using the Raspberry Pi Zero 2. I picked one up at Maker Faire Tokyo 2023, where they were being sold at the venue.
I initially tried installing the standard Raspberry Pi OS desktop environment, but it tended to run hot and sluggish. My impression is that it is naturally slower than the PCs I use daily or the Raspberry Pi 4. I plan to use it primarily via CUI (Command Line Interface) and switch to GUI (Graphical User Interface) only when necessary.
▼Switch Science product page (currently sold out):
Raspberry Pi Zero 2 W — スイッチサイエンス
512 MBのRAMと、Raspberry Pi RP3A0 SiP(Broadcom BCM2710A1ベース)を搭載した小型SBCです。

▼Also available on Amazon.

▼Previous articles:
ちょっと振り返り:いろいろ参加しました(MFT2023、ハッカソン、執筆など)
はじめに 今回は最近あちこちのイベントに参加していたことの振り返りです。9月を過ぎたあたりから、イベントがものすごく増えたような印象があります。この記事を書い…

Designing a Case for Raspberry Pi Zero (3D Printing)
Info This article is translated from Japanese to English. Introduction In this post, I tried creating a case for the Raspberry Pi Zero using a 3D printer.Perha…
Environment Setup
Installing the OS
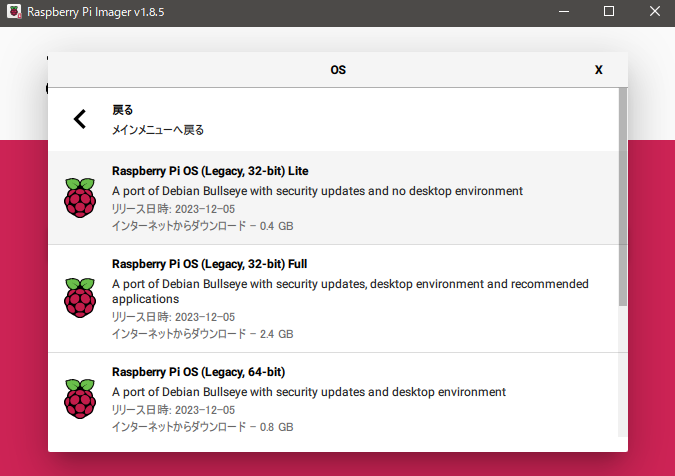
I installed Raspberry Pi OS Lite, which does not come with a desktop environment. I will install the GUI manually later.
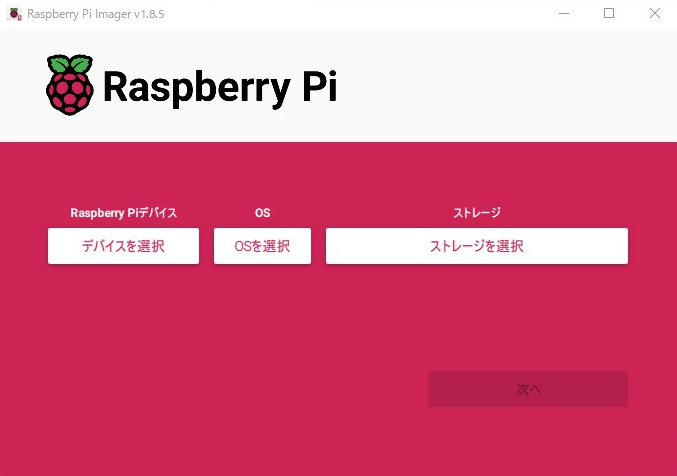
▼The Raspberry Pi Imager has changed quite a bit. After selecting the device, I was prompted to configure settings like the SSID.
▼I installed the 32-bit version of Raspberry Pi OS Lite.
Connecting to Wi-Fi
I encountered an error when running sudo apt update, so I suspected I wasn't connected to the Wi-Fi. I investigated using the nmcli command.
▼I received an error stating that NetworkManager was not running:
Error: NetworkManager is not running.
▼I resolved it by referring to this article:
https://genchan.net/it/server/13988
▼I started the service with the following command and checked the status:
 service NetworkManager start
 nmcli connection show
As expected, I wasn't connected to Wi-Fi yet, so I proceeded to connect.
▼I referred to the official Red Hat documentation:
▼Turn on the Wi-Fi radio, list available SSIDs, and connect. (Replace with your own):
 nmcli radio wifi on
 nmcli device wifi list
 nmcli device wifi connect <SSID name> --ask
Building the Desktop Environment
Installing Xfce
Since I wanted to use Node-RED later, I set up a desktop environment. I chose to install Xfce.
▼Xfce homepage:
▼I followed the detailed instructions on the Arch Wiki:
https://wiki.archlinux.jp/index.php/Xfce#.E3.82.A4.E3.83.B3.E3.82.B9.E3.83.88.E3.83.BC.E3.83.AB
▼I installed xfce4 and xfce4-goodies using the following:
 sudo apt install xfce4
 sudo apt isntall xfce4-goodies
During execution, I got an "Unable to fetch some archives" error advising me to run sudo apt-get update. After doing so and retrying the installation, it finished without errors.
You can launch the desktop using the command startxfce4.
▼However, I initially encountered this error:
Failed to execute child process "dbus-launch"
▼I solved this by installing dbus-x11 as suggested in this Ubuntu forum post:
sudo apt install dbus-x11
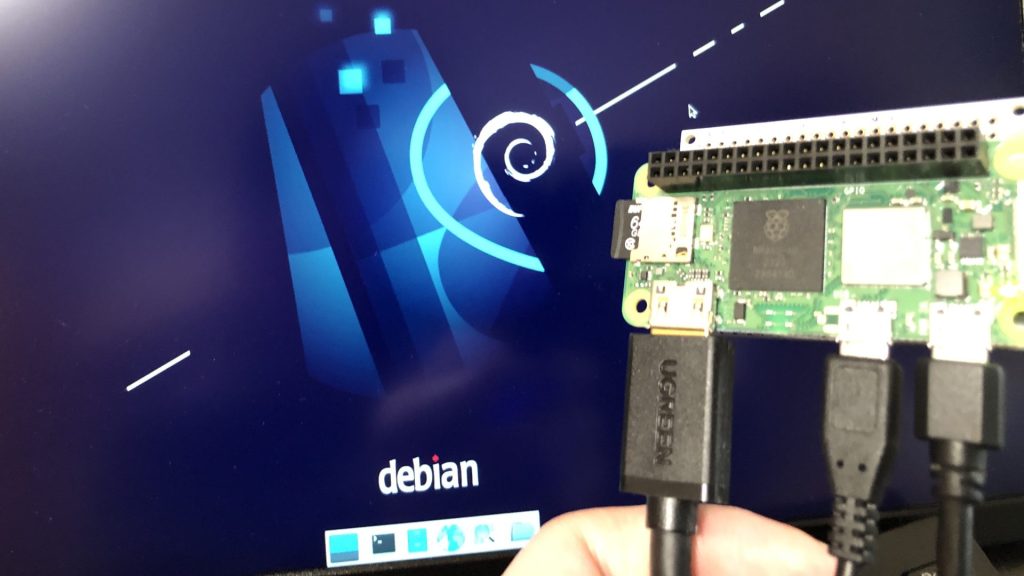
▼It works! It is now displaying on a screen connected via HDMI.
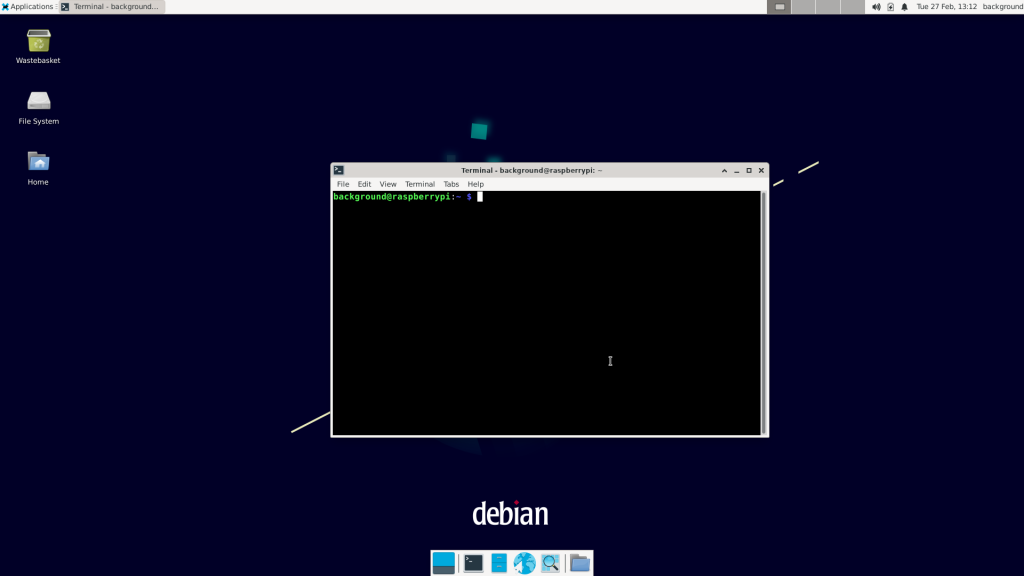
▼I was even able to take a screenshot using the keyboard button.
Installing a Web Browser
In Xfce, clicking the browser button resulted in an error saying no browser was installed.
I first tried installing Chromium, but it was incredibly slow! Looking for something more lightweight, I decided to try Vivaldi.
Ultimately, I found that the browser only became usable after adjusting the "Swap" settings mentioned later.
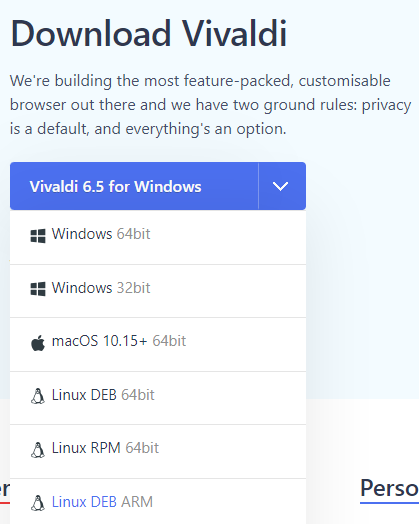
▼Download Vivaldi here:
https://vivaldi.com/ja/download/?platform=linux
I downloaded it on a separate PC, copied it to a USB drive, and moved it to the Zero 2 desktop.
▼I downloaded the "Linux DEB ARM" version.
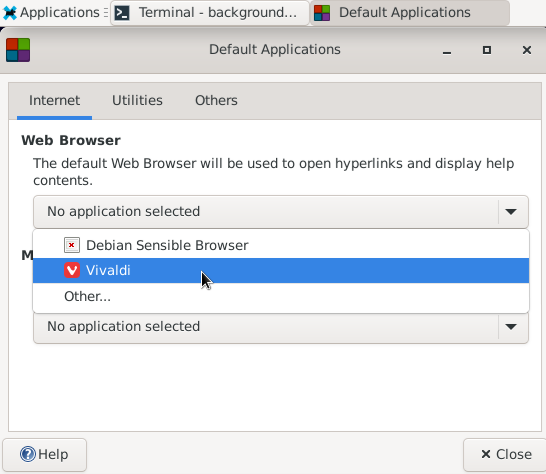
I installed it using sudo apt install while specifying the file path. Then, I set it as the default browser in Default Applications.
▼Found in Applications -> Settings.

▼I set the default to Vivaldi.
Configuring Swap Settings
This was my first time hearing the term "Memory Swap." It seems it allows you to use your storage (SD card) as virtual memory when you run out of actual RAM.
▼I found several helpful resources on the topic:
【ITエンジニアの豆知識】メモリの SWAP、ホントに理解してる…? | 株式会社ビヨンド
メモリの SWAP という単語は聞いたことがある、どういうものかも何となく分かる。でも何となくのままで済ませていませんか?SWAP がどういうロジックで発生し、内部でどう…
▼I followed one article suggesting to turn off Swap by deleting dphys-swapfile, but the system became even slower.
https://ponkichi.blog/raspberry-setup/
In that state, I couldn't even open the browser. I reinstalled dphys-swapfile and expanded the swap area instead.
▼By expanding the swap area based on this blog post (Japanese), I was finally able to open the browser:
https://lang-ship.com/blog/work/raspberry-pi-zero-2-w-3/
Since the Zero 2 has very little RAM to begin with, it seems it simply won't function properly without an expanded swap file.
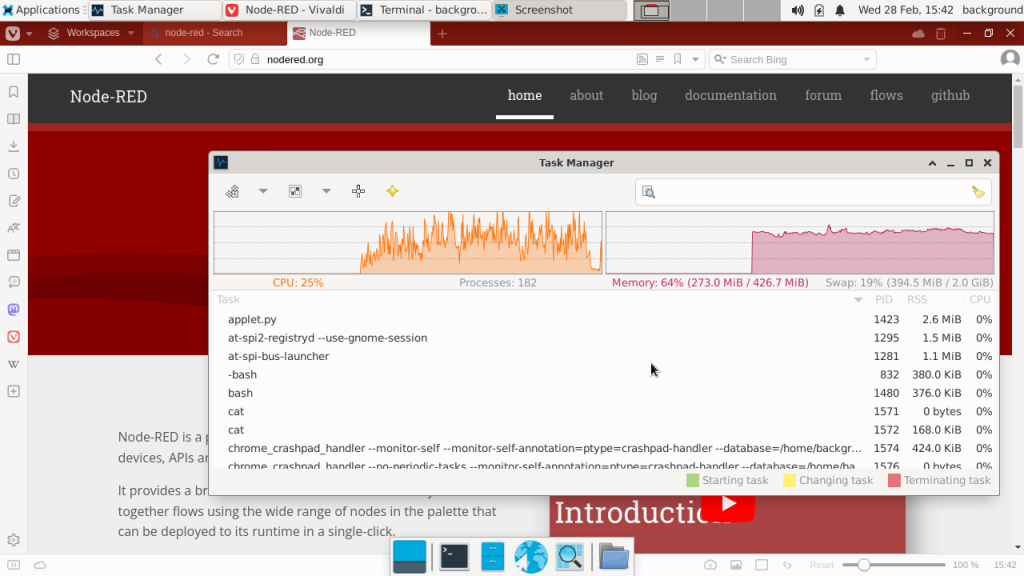
▼While the browser was open, I checked the Task Manager; memory usage was around 60%.
Installing Node-RED
I installed Node-RED by following the official Raspberry Pi guide.
▼Detailed documentation:
https://nodered.org/docs/getting-started/raspberrypi
▼Installation command:
bash <(curl -sL https://raw.githubusercontent.com/node-red/linux-installers/master/deb/update-nodejs-and-nodered)
▼As noted on the same page, I used the following command to start Node-RED. This tells the system to free up unused memory more aggressively:
node-red-pi --max-old-space-size=256
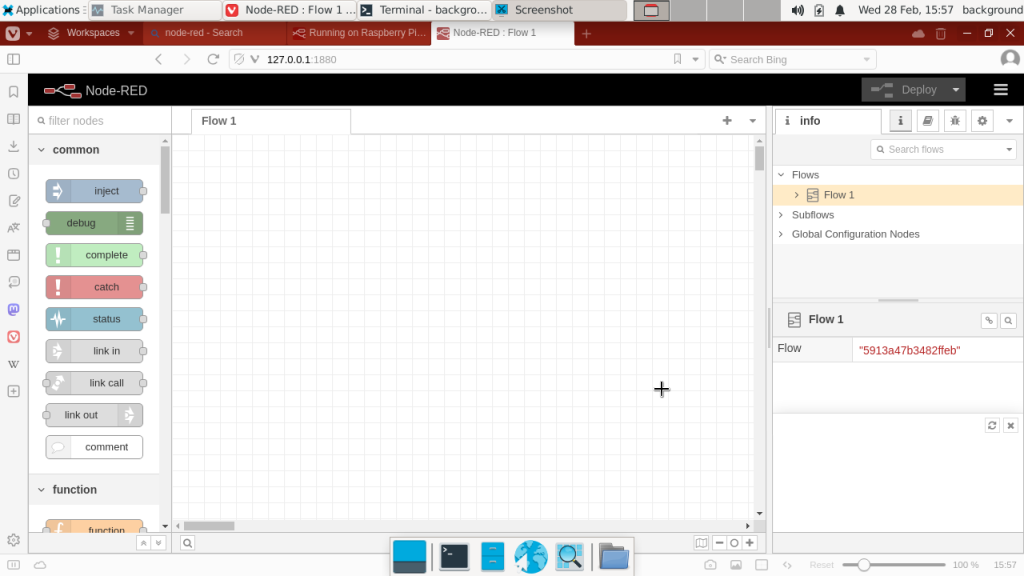
▼The Node-RED editor screen appeared!
After this, I launched an MQTT broker on the Zero 2's Node-RED and performed MQTT communication with Node-RED on Windows. Even if the browser UI feels a bit slow, the communication itself works perfectly.
▼You can use the following command to make Node-RED start automatically when the Zero 2 boots up:
sudo systemctl enable nodered.service
Powering Off
In a desktop environment, you can turn off the power via the mouse, but since I primarily use CUI, I use commands to shut down.
▼The shutdown manual page:
https://manpages.ubuntu.com/manpages/impish/ja/man8/shutdown.8.html
▼To power off immediately, use:
sudo shutdown -h now
Finally
I’ve been entering commands somewhat symptomatically, so there might be better ways to do this…
However, I won't know unless I try using the browser and other tools myself, so I'll keep experimenting.
Overall, the operation is slow, but that is to be expected compared to a standard PC. In that regard, the Pi 400 was much faster with the browser.
Because the Zero 2 is a great size for embedding while still running an OS, I want to use it alongside various I/O devices.