Using Moddable SDK Part 1 (MCP23017, Moddable SDK 5.12.0)
Introduction
This time, I tried using the MCP23017 sample included in the Moddable SDK.
With the release of Moddable SDK 5.12.0, the MCP23017 driver was updated. While one of the contributors of Node-RED MCU was researching the MCP23017, they happened to come across one of my previous articles.
▼ I had previously used the MCP23017 in the following article:
Expanding Microcontroller Pins with an I/O Expander Part 2 (MCP23017)
Info This article is translated from Japanese to English. Introduction Previously, I used an I/O Expander called MCP23S08, but this time, I tried the MCP23017.…
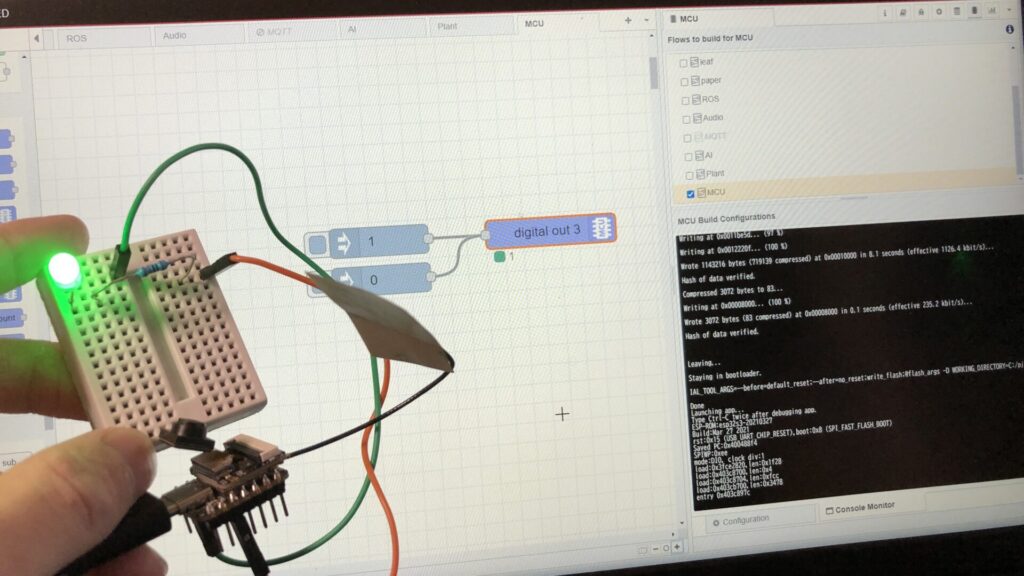
If the Moddable SDK sample runs properly, it should be possible to create a Node-RED node based on it, so I decided to test it first. Along the way, I also updated my Moddable SDK and ESP-IDF environments.
▼ Here are my earlier related posts:
Moddable Twoを使ってみる(Moddable SDK、Node-RED MCU、ESP32)
はじめに 今回はModdable Twoを使ってみました。Moddableが開発したボードで、ESP32とディスプレイが搭載されています。 Node-RED MCUで使っていましたが、Moddable S…
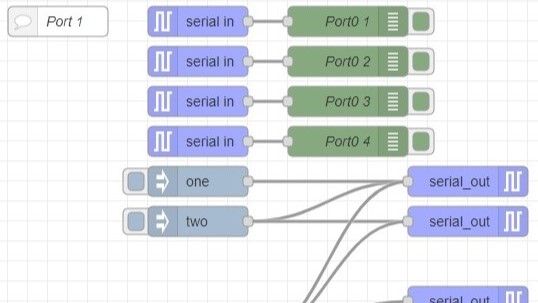
Node-RED MCU用のノードを作成してみる その3(Serialノード)
はじめに 今回はNode-RED MCU用のSerialノードを作成してみました。デバッガツールとは元々シリアル通信を行っているのですが、他のポートでのシリアル通信を行うことが…
Setting Up the Environment
Updating Moddable SDK
▼ I followed the instructions on the following page to set up the environment:
https://github.com/Moddable-OpenSource/moddable/blob/public/documentation/Moddable%20SDK%20-%20Getting%20Started.md#win-instructions
▼ I’m using a gaming laptop that cost around 100,000 yen, running Windows 11.
ちょっと買い物:新しいノートPCとSSDの増設(ASUS TUF Gaming A15)
はじめに 今回はこれまで使っていたPCが壊れたので買い替えましたという話です。 以前はよく分からないGPUが載っていたノートPCを使っていたのですが、最近はUnreal E…


Since I’ve already been using the Moddable SDK for Node-RED MCU, some parts were preinstalled on my system.
▼ The last time I set up the environment was in the following article:
Node-RED MCUの環境を構築する(Moddable SDK 5.4.1、ESP-IDF v5.3.1対応版、Windows 11)
はじめに 今回はNode-RED MCUの環境を構築してみました。 PCを買い替えたので、久々にインストールしました。カメラへの対応も進んでいるようなので、試したいなと思…
First, I verified that the required components were installed using the Visual Studio Installer.
▼ Under Desktop development with C++, I made sure the Windows 10 SDK (10.0.0.19041.0) was selected.

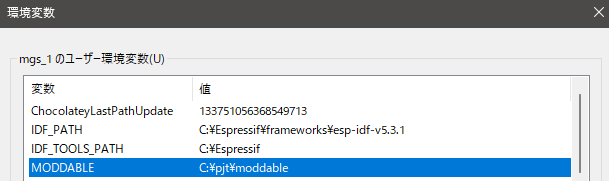
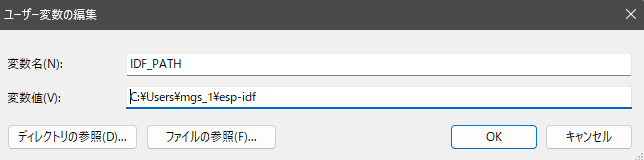
▼ I also confirmed that the MODDABLE environment variable was set correctly.
To update the Moddable SDK, I navigated to the directory and ran the update command:
cd C:\pjt\moddable
git pull
▼ I verified that the path was included in the system Path variable.

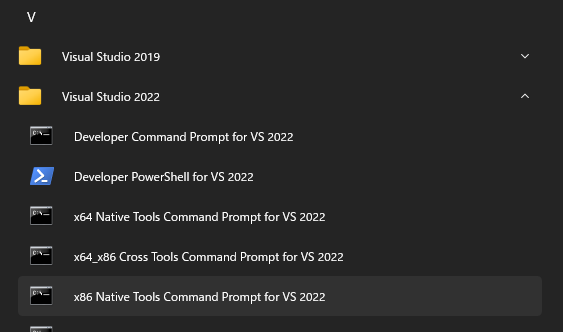
To build, I opened the x86 Native Tools Command Prompt for VS 2022.
▼ This can be found under Visual Studio 2022.
Then, I ran the following commands to build and launch xsbug:
cd %MODDABLE%\build\makefiles\win
build
xsbug
▼ xsbug launched successfully.
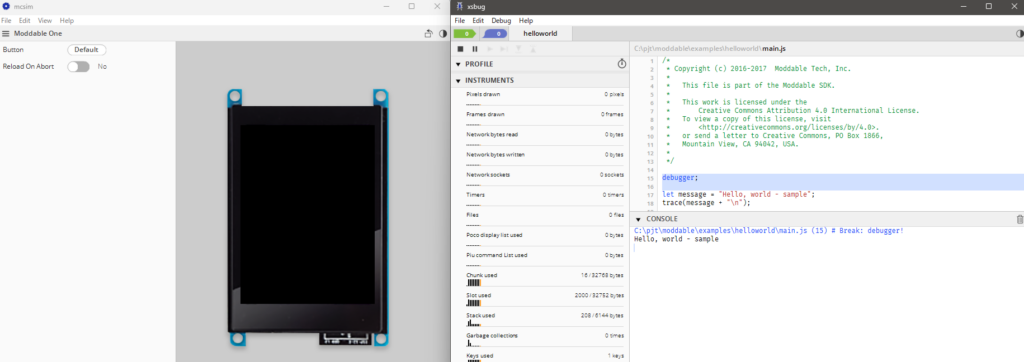
I then ran a sample:
cd %MODDABLE%\examples\helloworld
mcconfig -d -m -p win
▼ The sample executed without issues, and pressing the Start button displayed Hello, world.
Updating ESP-IDF
▼ I followed the instructions here:
https://github.com/Moddable-OpenSource/moddable/blob/public/documentation/devices/esp32.md#win-instructions
Previously, I installed ESP-IDF using an installer, but now the documentation recommends cloning via git.
I cloned version 5.5.1 into my user directory:
git clone -b v5.5.1 --recursive https://github.com/espressif/esp-idf.gitThen I updated my environment variables accordingly.
▼ Previously, I had configured the environment for version 5.3.1.

▼ I updated it to point to the newly cloned directory.
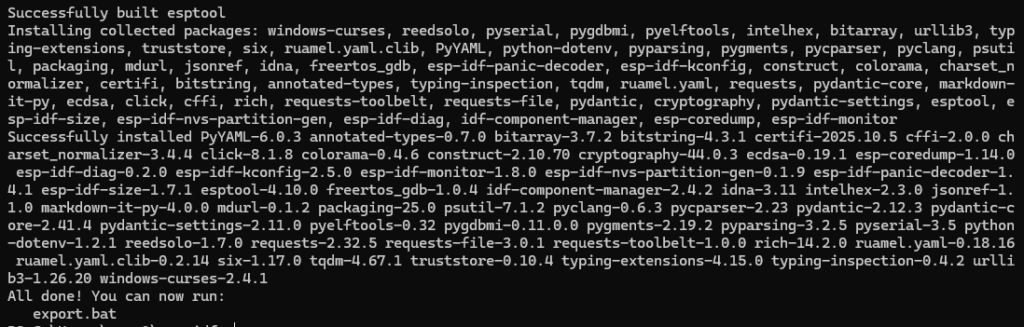
After that, I ran the installation script:
cd esp-idf
install.bat
▼ The installation completed successfully.
Controlling LEDs
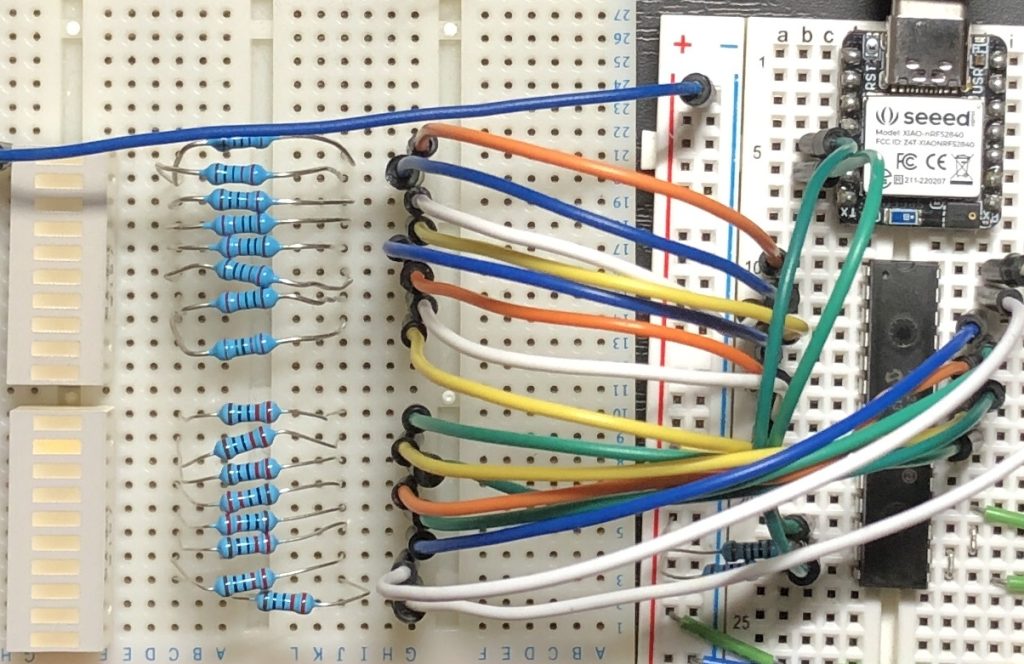
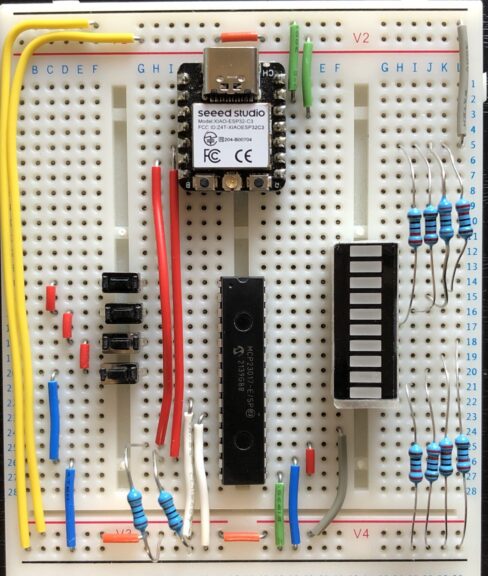
Before running the program, I started with the wiring setup.
▼ I purchased the MCP23017 from Akizuki Denshi. A datasheet is also available:
https://akizukidenshi.com/catalog/g/g109486
▼ It’s also available on Amazon, though it’s a bit more expensive there.

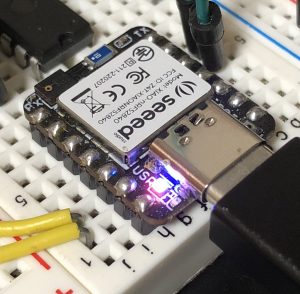
For the microcontroller, I used the Seeed Studio XIAO ESP32C3.
▼ For I2C communication, SDA is on pin 6, and SCL is on pin 7:
https://www.switch-science.com/products/8348

All address pins were connected to GND.
▼ The wiring was done as shown below.
After completing the wiring, I uploaded the program and tested the behavior.
▼ ESP32 flashing instructions can be found here:
https://github.com/Moddable-OpenSource/moddable/blob/public/documentation/devices/esp32.md#win-instructions
▼ The list of supported device names is available here. For the XIAO ESP32C3, use:esp32/xiao_esp32c3
https://github.com/Moddable-OpenSource/moddable/blob/public/documentation/devices/esp32.md#platforms
▼ The MCP23017 sample for Moddable SDK can be found here:
https://github.com/Moddable-OpenSource/moddable/tree/ec3d8103a891127fa0448ddd6dd83c6bdacd57bc/examples/drivers/mcp23017
▼ The documentation was also useful:
https://github.com/Moddable-OpenSource/moddable/blob/ec3d8103a891127fa0448ddd6dd83c6bdacd57bc/documentation/drivers/MCP230XX/MCP230XX.md
I slightly modified the sample code. It was necessary to specify the I2C pins and enable the internal pull-up resistor for the input pin.
Here’s the modified code — it sequentially lights LEDs on pins 0–7, and holding pin 8 pauses the flow.
import Timer from "timer";
import Digital from "pins/digital";
import { MCP23017 } from "MCP230XX";

export default function() {
	const expander = new MCP23017({
		address: 0x20,
		inputs: 0b0000000100000000,
		sda: 6,
		scl: 7,
		pullups: 0b0000000100000000,
	});

	const button = expander[8];  // GPB0 (button input)

	let ports = { a: 0x88, b: 0x00 };
	let indicator = 0;
	let delay = 120;
	let last = Date.now();

	expander.write(0x0000);
	button.mode(Digital.Input);

	Timer.repeat(() => {
		let state = expander.read();
		let buttonPressed = ((state >> 8) & 0x01) === 0;

		if (!buttonPressed) {
			ports.a = ((ports.a << 1) | (ports.a >> 7)) & 0xFF;
		}

		let now = Date.now();
		if (now >= last + delay) {
			last = now;
			if (buttonPressed) {
				indicator ^= 1;
			}
		}

		ports.b = (indicator << 8);
		expander.write(ports.b | ports.a);
	}, 50);
}
To upload to my XIAO ESP32C3 (connected on COM12):
cd %MODDABLE%\examples\drivers\mcp23017
set UPLOAD_PORT=COM12
mcconfig -d -m -p esp32/xiao_esp32c3
After uploading, I checked it.
▼ It works perfectly. The response is fast.
Conclusion
I confirmed that the MCP23017 works correctly with the Moddable SDK. Later, I also made it compatible with Node-RED MCU, which I’ll cover in a separate article.
Expanding I/O pins with the MCP23017 is convenient, but the code can become a bit complex. Using it through Node-RED MCU should make development much easier.
▼ For more on Node-RED MCU, see the following pages:
書籍紹介:『はじめてのNode-RED』/『はじめてのNode-RED MCU Edition』
Node-REDとは 一言でいうと、Node-REDはプログラミングが簡単にできるツールです。ビジュアルプログラミングの一種で、視覚的にわかりやすくなっています。 ▼百聞は一見…