Trying Out Unreal Engine 5 Part 6 (Robotic Arm and Blueprints)
Introduction
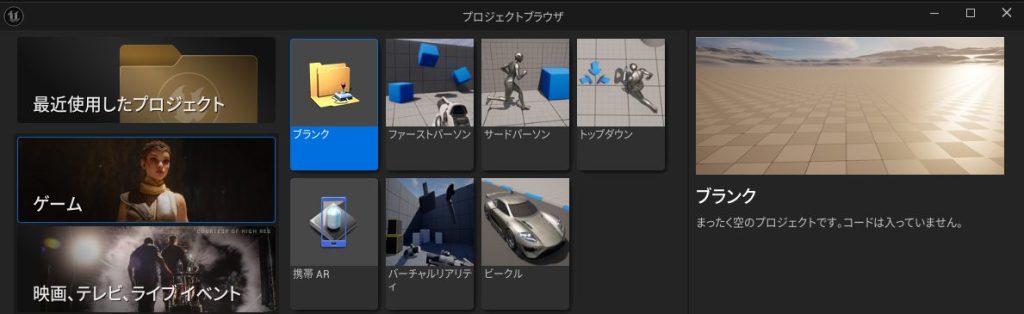
In this post, I tried creating something like a robotic arm in Unreal Engine 5 (UE5). It’s still in the prototype stage, and I’m planning to refine it into a more precise model in the future. I’m still in the trial-and-error phase since there is a massive amount I don’t know about UE5 yet. For now, I’ve made it possible to operate it using a keyboard. In this test, I am using a Windows environment, UE5.4, and a Blank Project.
▼I created it as a new project.
▼Previous articles are here:
Trying Out Unreal Engine 5 Part 3 (NPC Navigation)
Info This article is translated from Japanese to English. Introduction In this post, I tried moving agents in Unreal Engine 5 (UE5). In a game context, these w…
Trying Out Unreal Engine 5 Part 4 (Unreal Learning Kit: Training Virtual Robots – Lesson 1)
Info This article is translated from Japanese to English. Introduction I recently tried out a virtual robot tutorial available in Unreal Engine 5. This is my f…
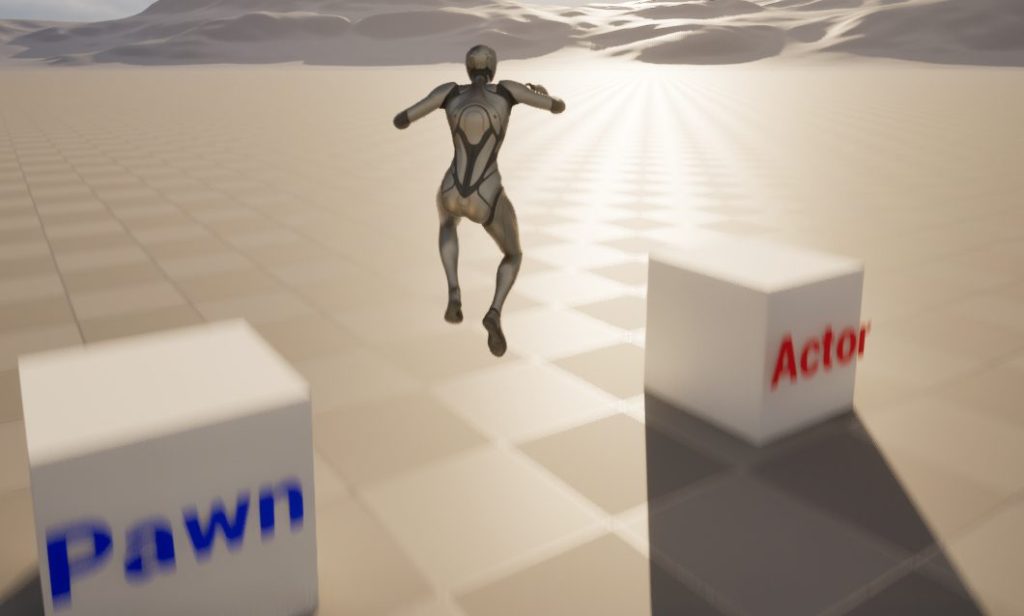
Differences Between Actor and Pawn
About Classes
There are various Blueprint classes in UE5. Since I wasn’t entirely sure of the differences, I did a bit of research.
▼There are quite a few types.
▼Here is the class introduction.
https://note.com/ryodist/n/nb694f36e0703
I focused on testing "Actor" and "Pawn" this time, as I expect to use them frequently.
▼Actor documentation:
▼Pawn documentation:
To summarize briefly:
- Actor: Any object (camera, static mesh, player start position, etc.).
- Pawn: Can be controlled by a player or AI; has a 1-to-1 relationship with a controller.
Let’s look at the differences by moving them in Blueprints.
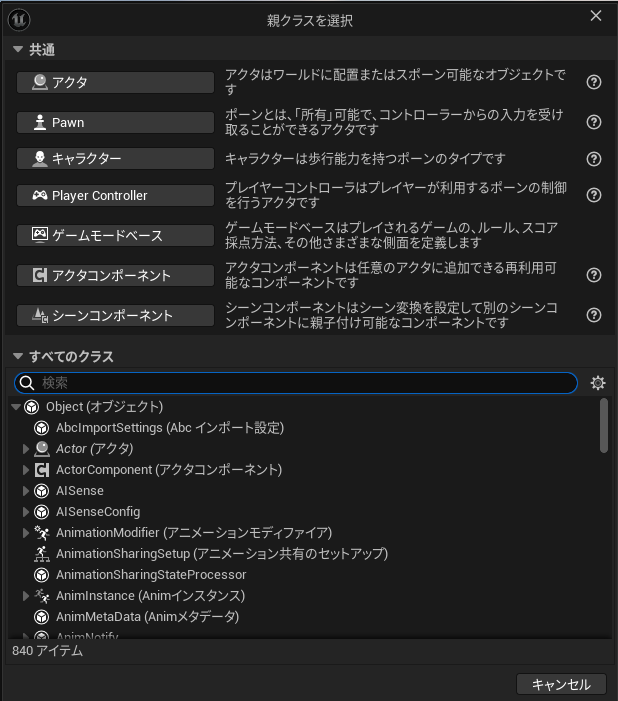
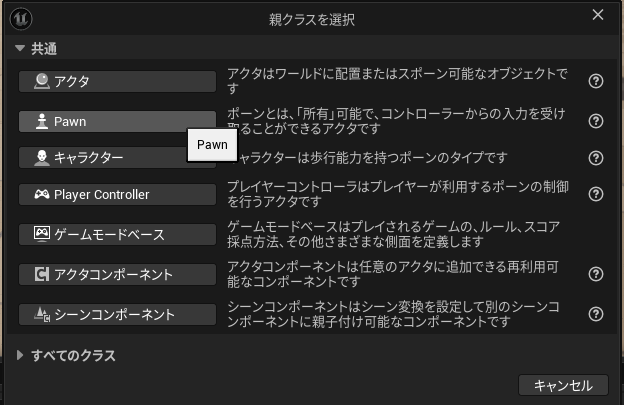
Creating Blueprint Classes
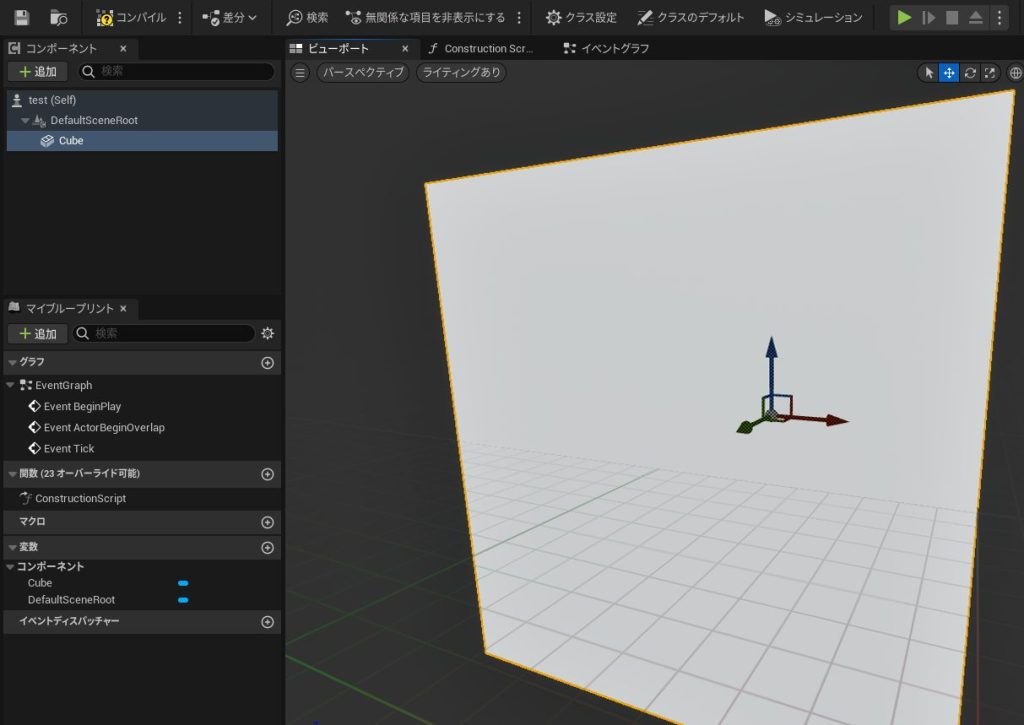
I created a Pawn class named "test" and an Actor class named "test_actor."
▼Right-click in the Content Drawer and select "Blueprint Class."
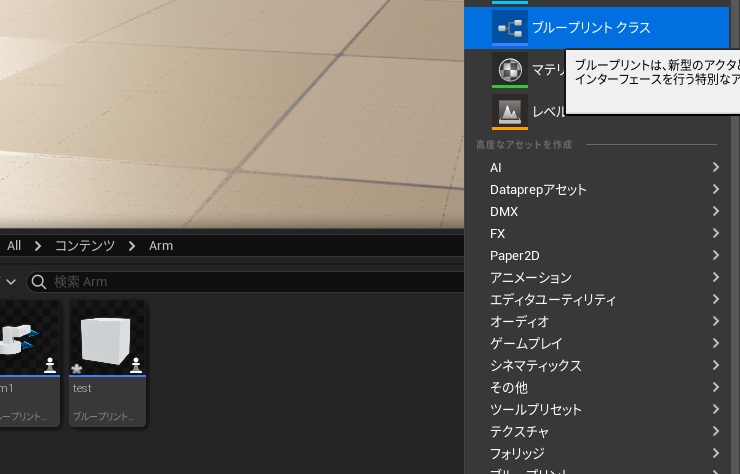
▼Create the Pawn and Actor classes.
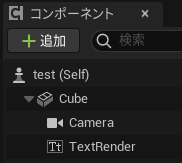
▼I added a simple Cube to each using the "Add Component" button.
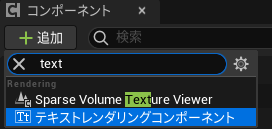
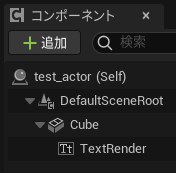
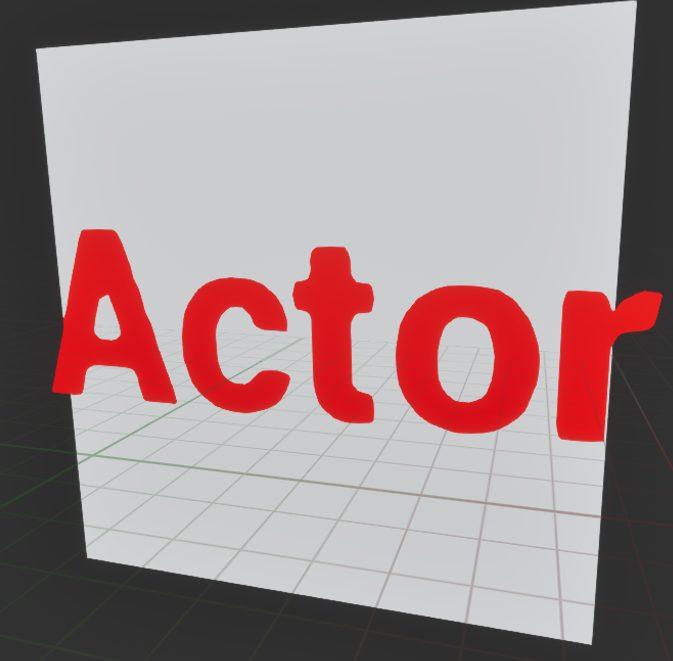
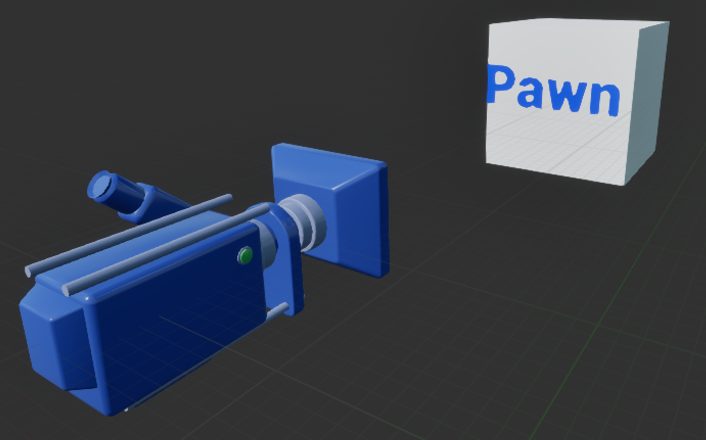
To make it easy to tell if the cube is an Actor or a Pawn, I added text.
▼I added a "Text Render" component and set the text and color.
▼I parented them so the text rotates along with the cube.
▼I also added a camera to the Pawn.
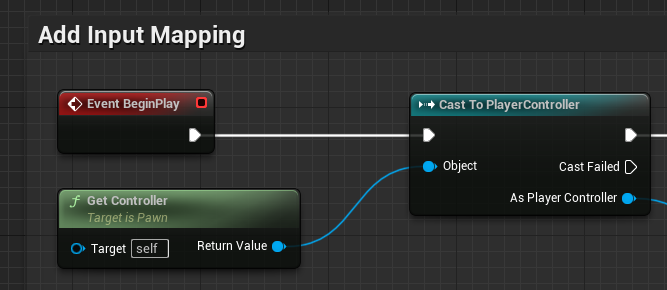
About Possessing
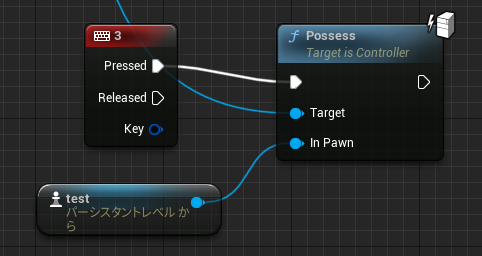
Pawns are controllable, but they only start accepting controller input when they are "possessed."
▼A Pawn can be possessed by executing the "Possess" node.
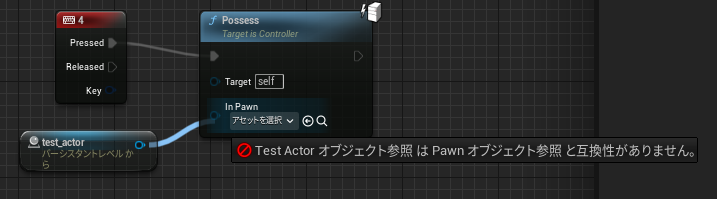
▼If you try to possess an Actor, it won't even show up because it’s incompatible.
I tried a sample related to possessing from the official documentation.
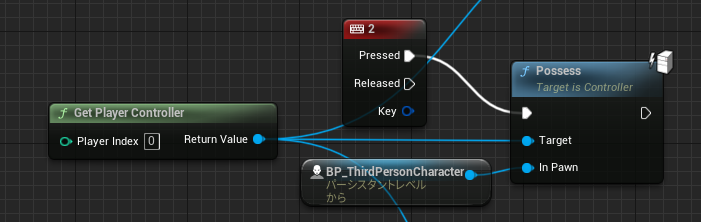
▼Sample regarding possessing the ThirdPersonCharacter:
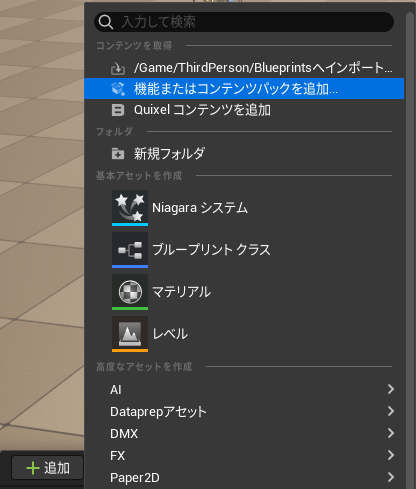
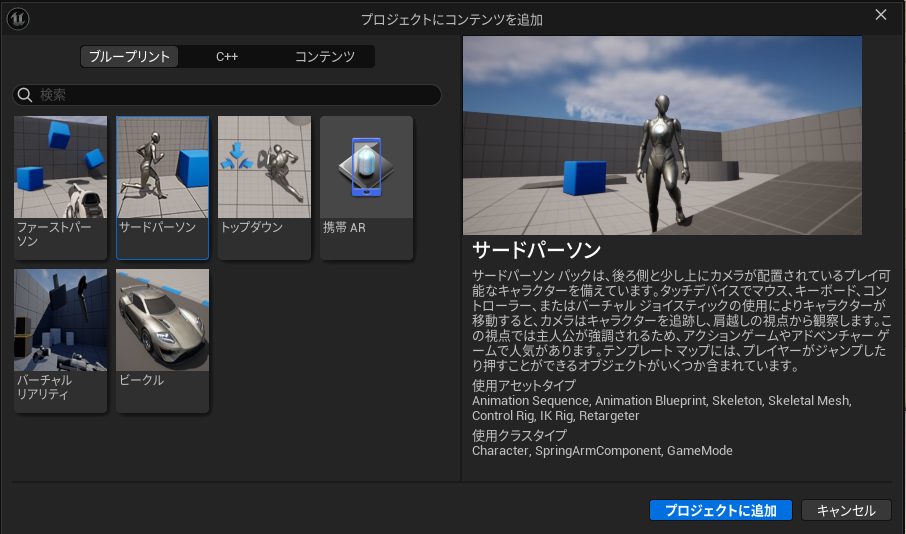
▼If "ThirdPerson" is not in your content folder, you can add it via "Add" -> "Add Feature or Content Pack" in the Content Drawer.
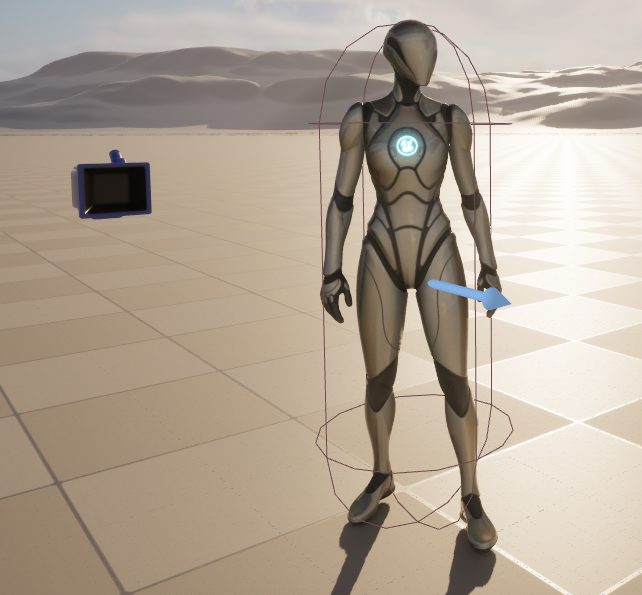
▼I placed it in the world.
I programmed the Level Blueprint so that this ThirdPersonCharacter could be possessed.
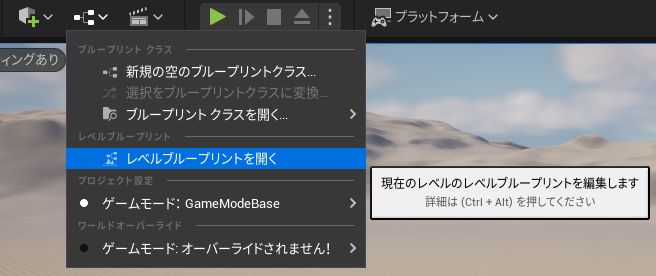
▼You can edit this via "Open Level Blueprint."
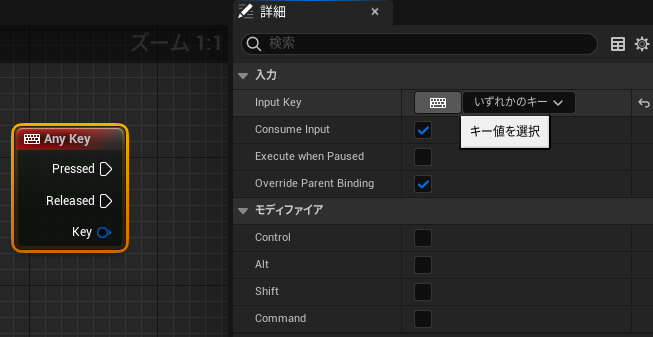
▼I made it so that pressing "2" on the keyboard triggers the possession.
▼For keyboard input, add an "Any Key" node and select the key in the Details tab.
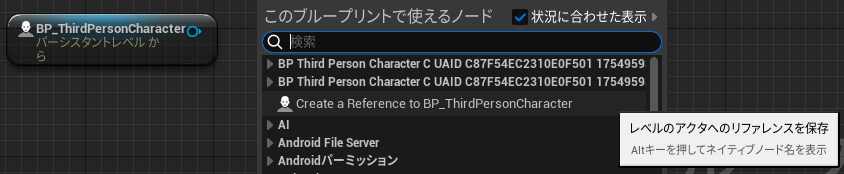
You can place the ThirdPersonCharacter node by dragging and dropping it from the Outliner.
▼It also appeared when right-clicking.
If the official documentation was correct, it should have worked, but it didn't move. This might be due to a version difference.
▼Possession worked and the camera moved, but I couldn't control the character.
I checked the ThirdPersonCharacter Blueprint.
▼It starts from "Event BeginPlay."
As I mentioned in a previous article, "Event BeginPlay" only runs when the game starts. Therefore, it didn't execute when the pawn was possessed mid-game.
To fix this, I made it trigger upon possession.
▼I found an "Event Possessed" node and added it.
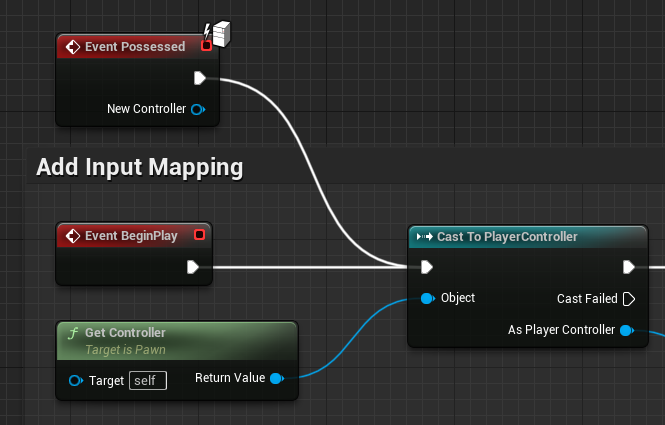
▼Now it’s controllable!
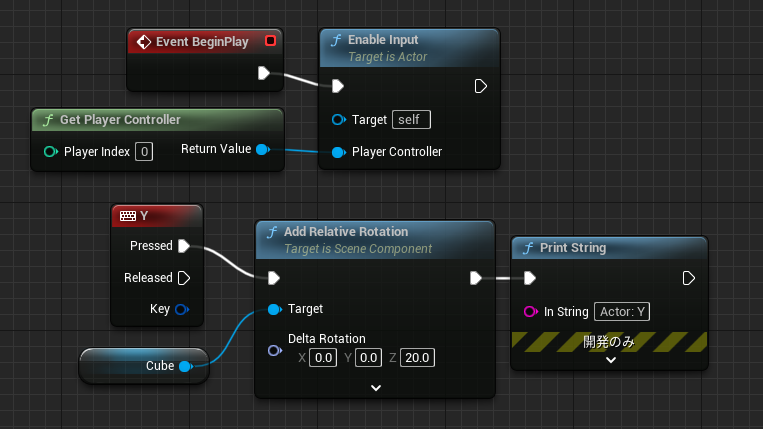
Accepting Player Input
Now, let's rotate the Actor and Pawn using Blueprints.
I set the Actor to rotate when "Y" is pressed and the Pawn to rotate when "T" is pressed. Note: if the keys overlap, only the Actor rotated while the Pawn did not.
One thing to watch out for: an Actor won't rotate unless you use an "Enable Input" node.
▼Here is the enable Input introduction.
https://zenn.dev/posita33/books/ue5_starter_cpp_and_bp_001/viewer/chap_02_bp-input_event
I used the "Add Relative Rotation" node for the rotation.
▼Actor Blueprint: Enable Input is called at the start of the game.
▼Pawn Blueprint: It becomes controllable as soon as it is possessed, even without "Enable Input." However, it won't rotate until possessed.
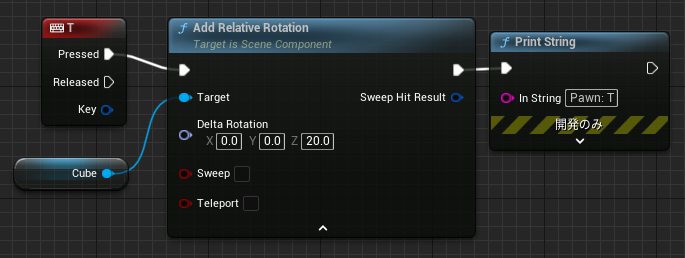
▼Here is how it looks when rotating.
Since the camera and text render components are parented, they rotate together. The center of rotation is the center of the cube.
Building Something Like a Robotic Arm
Component Placement
Based on these tests, I built a 2-axis robotic arm using the Pawn class.
▼It looks more like a gate barrier than a robotic arm.
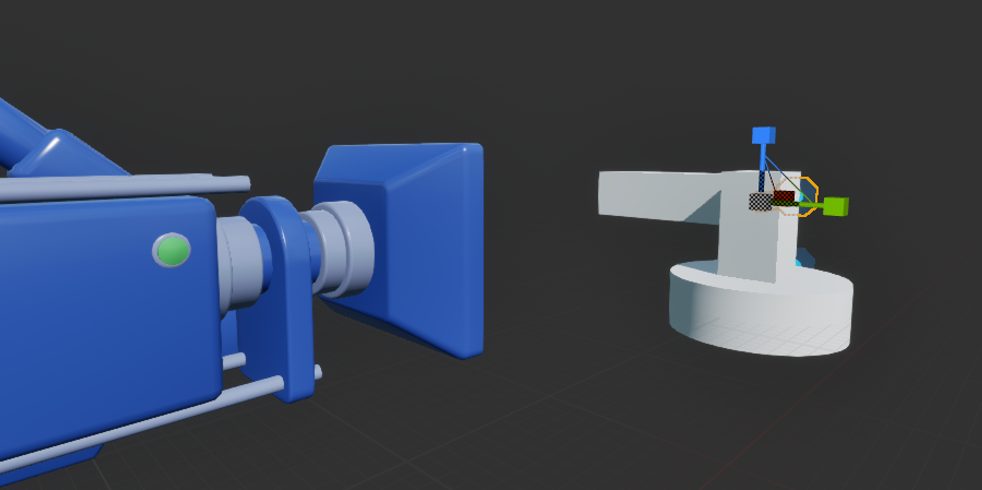
It’s a simple model with a cylinder for the base and cubes for the arms.
By setting up parent-child relationships, when the arm closest to the base rotates, the other arm moves along with it.
▼The hierarchy looks like this.
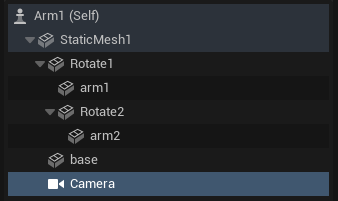
When rotating a cube, the center of the cube serves as the pivot point. A major challenge in controlling this as a robotic arm was how to set the rotation axes.
To solve this, I placed a Static Mesh (without a cube-like body) to act specifically as the rotation axis. These are "Rotate1" and "Rotate2" in the hierarchy.
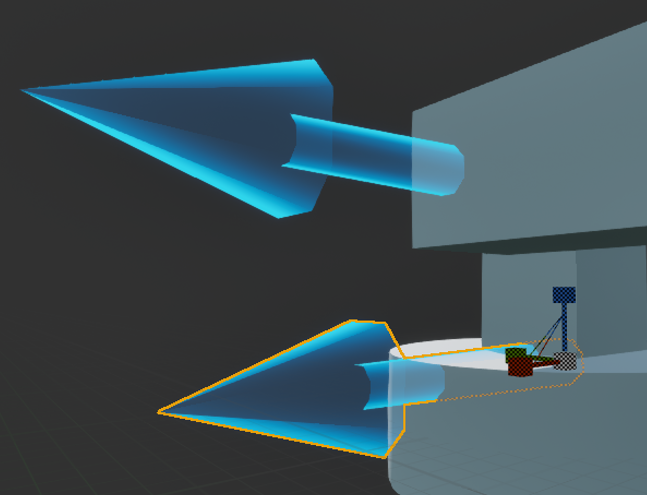
▼The center of "arm2" is the center of the rectangular prism.
▼In contrast, "Rotate2" is placed exactly where the joint axis should be.
By placing "arm2" as a child of "Rotate2," arm2 rotates whenever Rotate2 rotates.
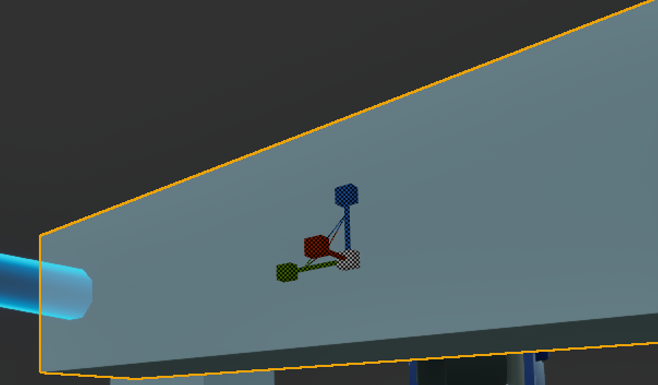
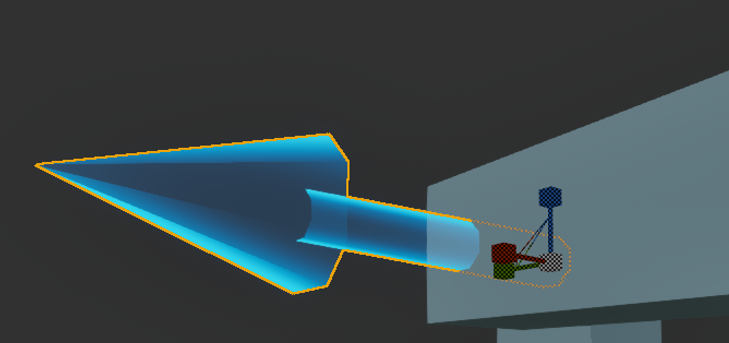
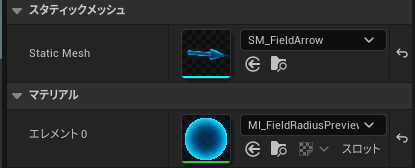
Since Rotate1 and Rotate2 are normally invisible, I assigned "SM_FieldArrow" as a static mesh so I could see them.
▼The translucent light-blue arrows are the axes. These arrows rotate as well.
Editing the Blueprint
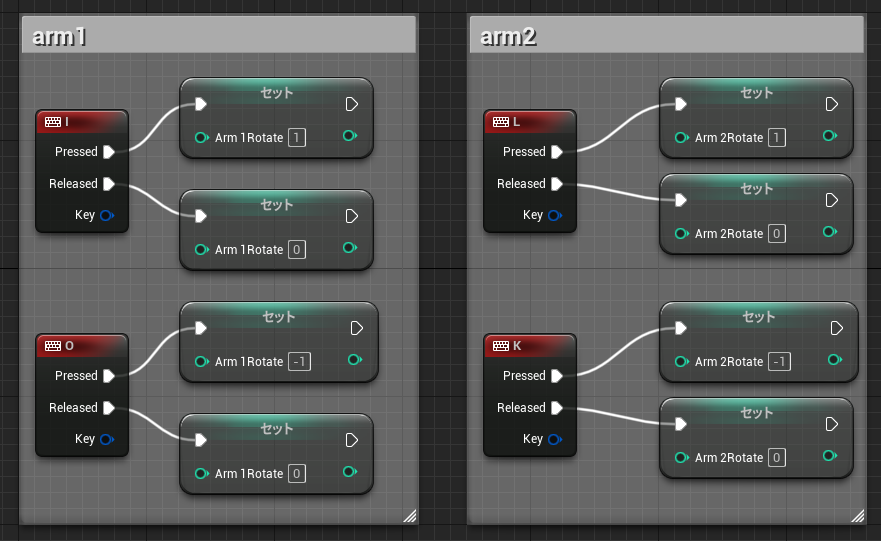
In the Blueprint, I set it to rotate forward, reverse, or stop based on keyboard input.
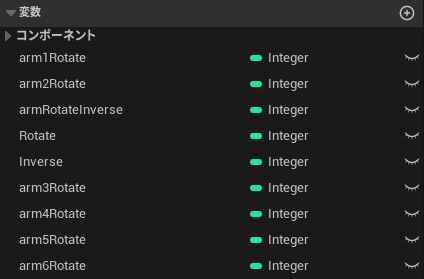
▼I prepared four Integer variables.
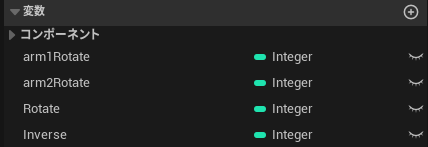
"arm1Rotate" and "arm2Rotate" store the rotation state. "Rotate" and "Inverse" are constants set to 1 and -1, respectively.
- 1: Forward
- 0: Stop
- -1: Reverse
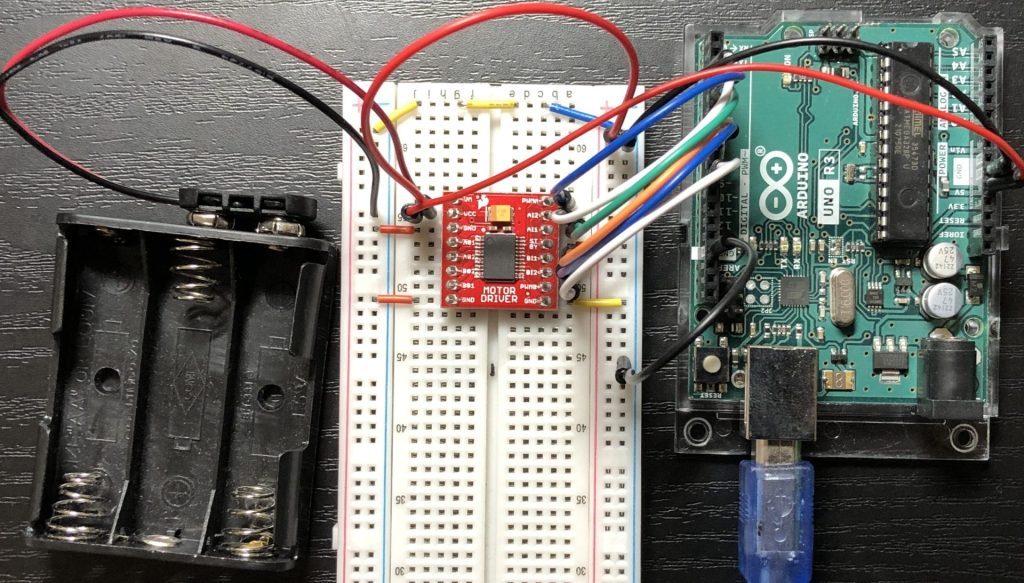
▼This reminds me of controlling motor drivers with a microcontroller. It seems possible to control them using HIGH and LOW on two pins in a similar way.
Control Motors with Motor Driver Part 1 (TB6612FNG)
Introduction In this article, I introduce the TB6612FNG, a dual motor driver. I have used it a lot for small robots in the past, but this is an introduction …
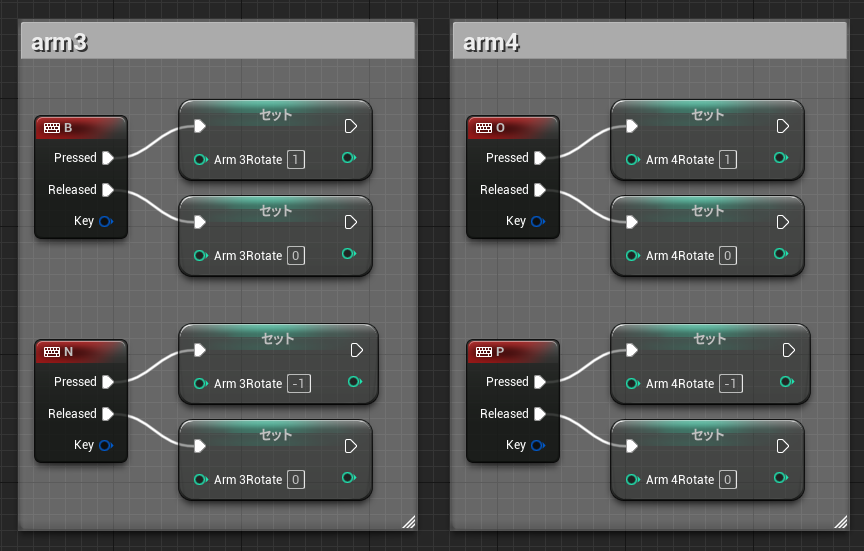
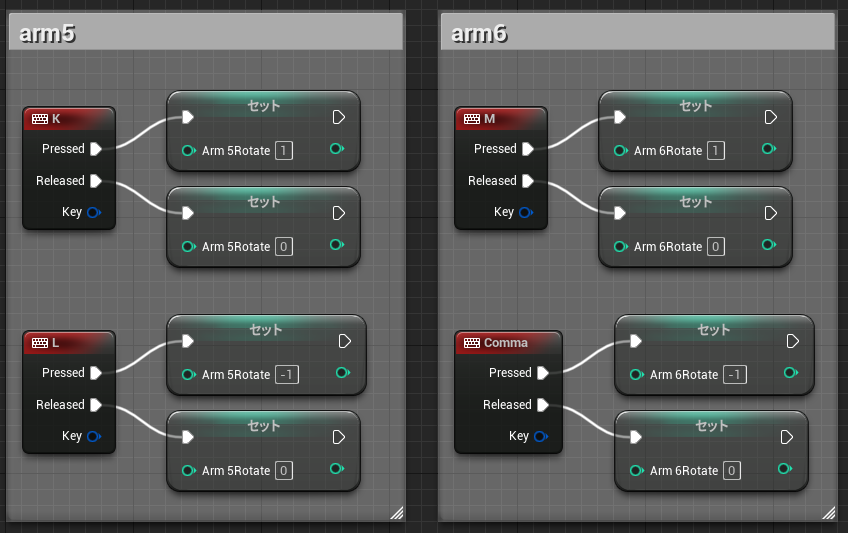
I assign these values based on keyboard input.
▼Pressing the key assigns 1 or -1; releasing it assigns 0.
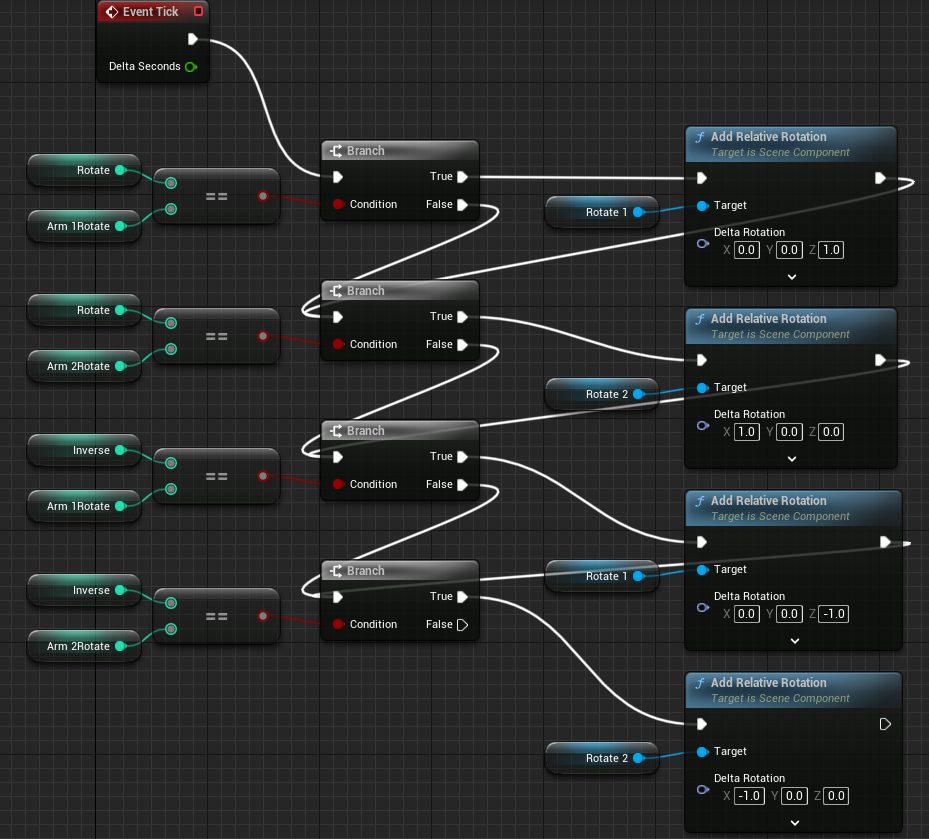
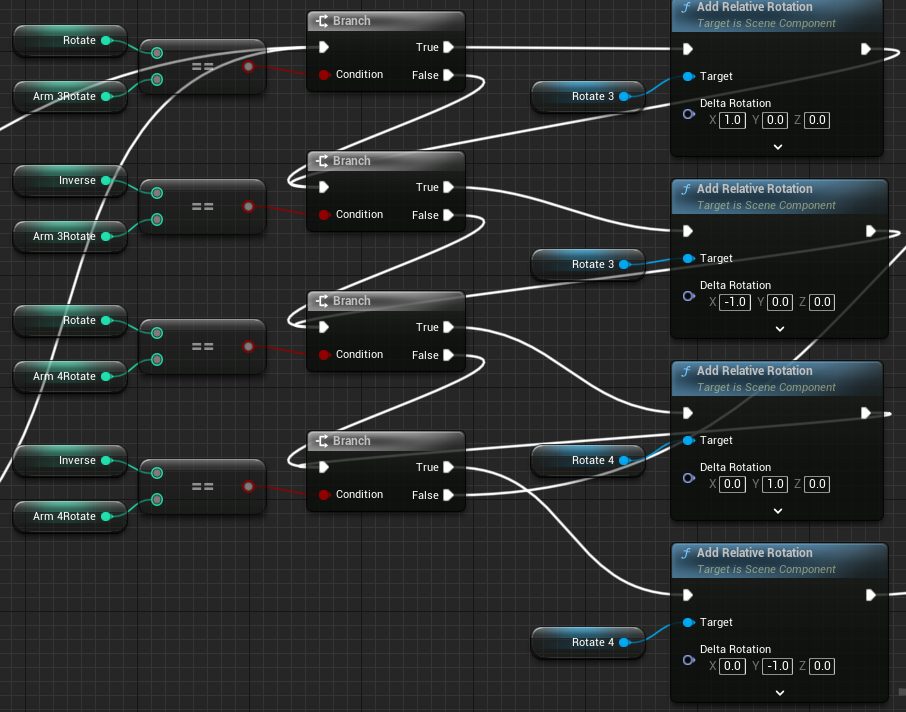
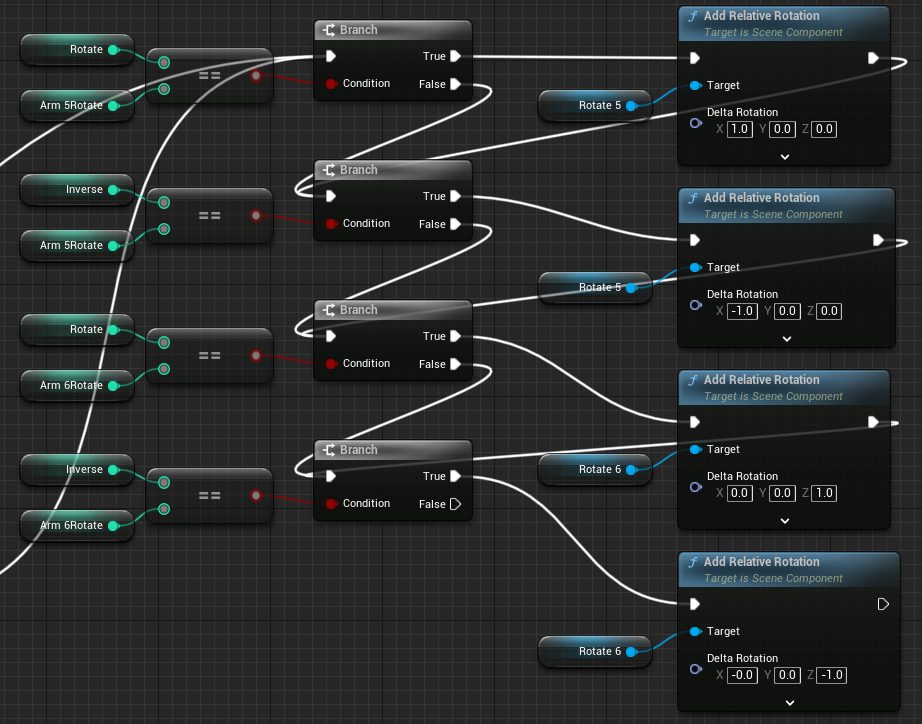
Based on these values, the logic branches to apply relative rotation to the axes.
Using a "Branch" node, if the value matches Rotate/Inverse, the "Add Relative Rotation" node is executed. Regardless of the branch, it then connects to the next logic check.
▼Here is the flow.
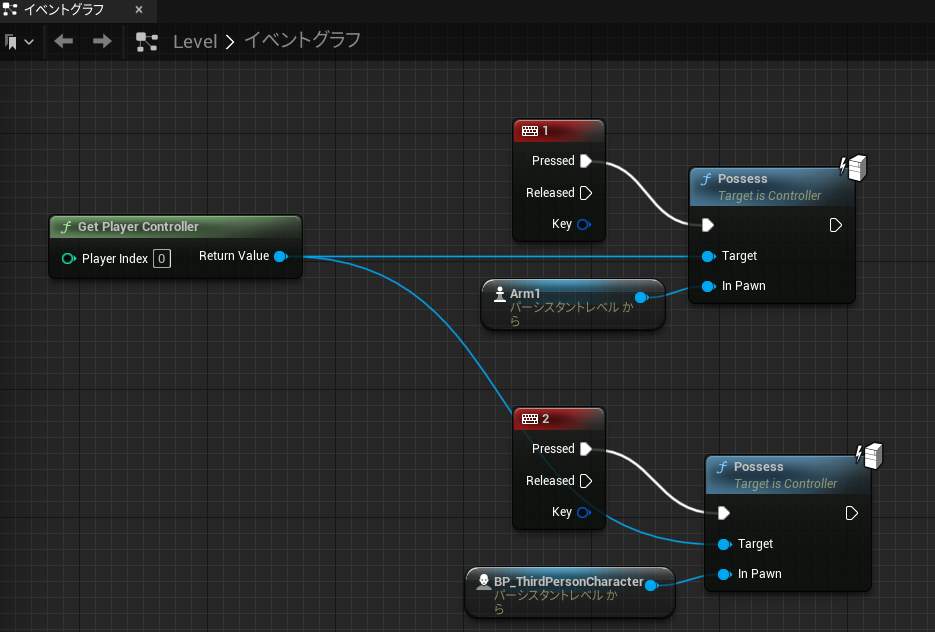
I also added a node to the Level Blueprint to possess this robotic arm.
▼Pressing "1" possesses the Arm1 pawn.
I actually tried running it.
▼It rotates as long as the key is held down. It looks a bit like a turret!
I’m a bit curious about why that mysterious sphere appeared…
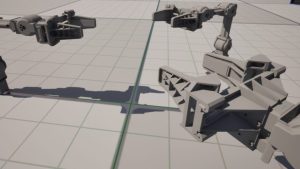
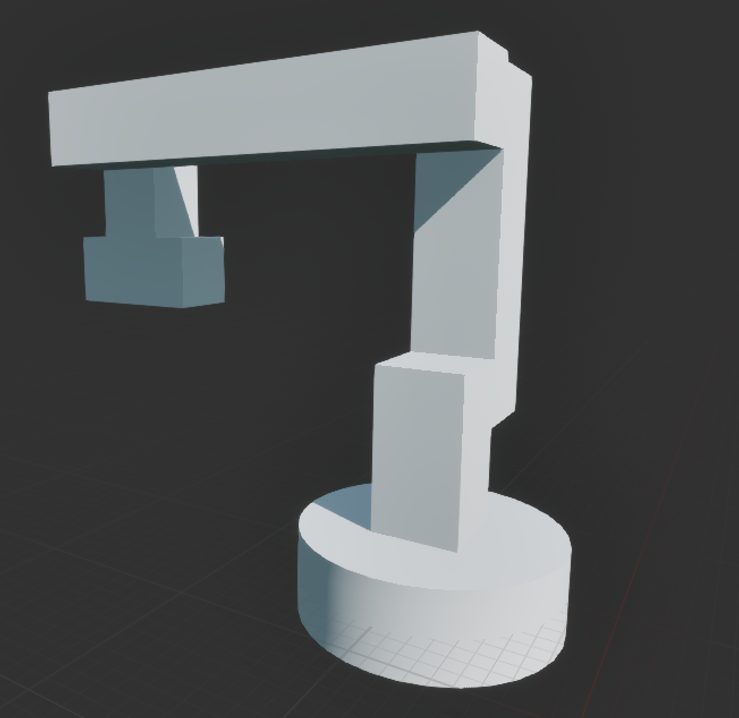
Expanding to 6 Axes
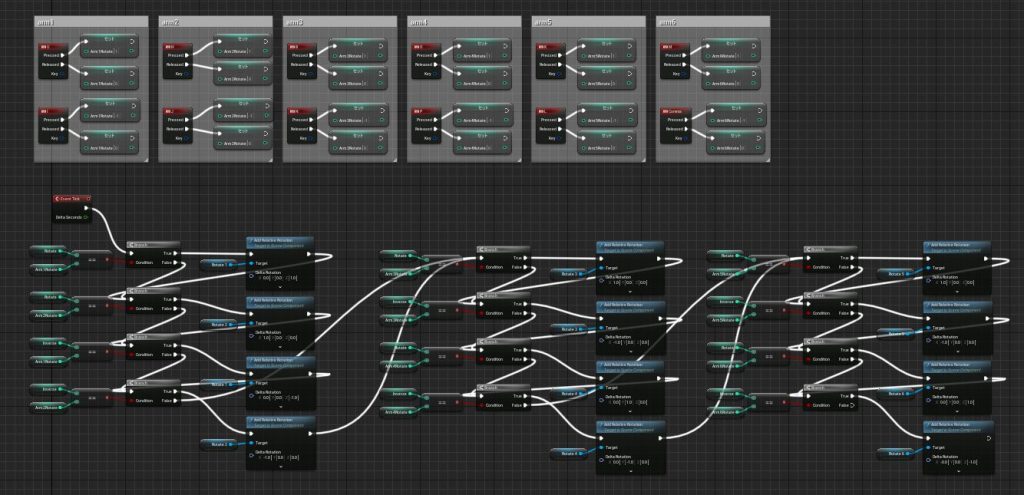
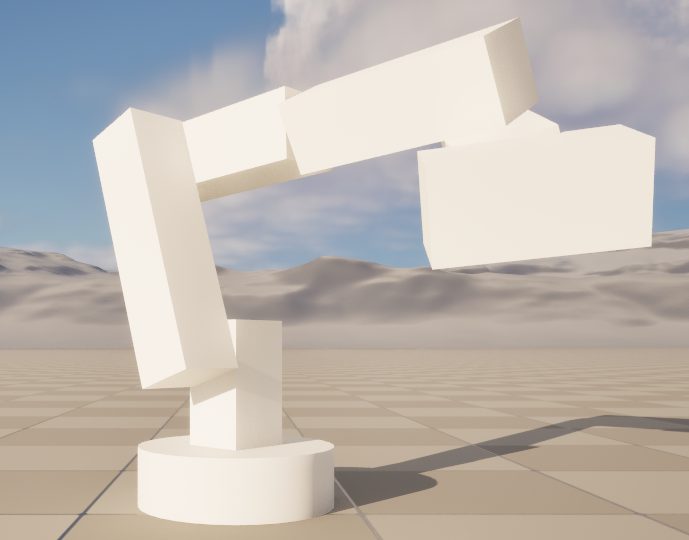
The previous model had 2 axes, so I added 4 more to make it a 6-axis arm.
▼I researched various 6-axis robot configurations.
https://www.keyence.co.jp/ss/products/vision/fa-robot/industrial_robot/mechanism.jsp
▼Even though it's just cubes, it looks much more like a robotic arm now.
The Blueprint is just four more copies of the 2-axis logic, with different rotation axes.
▼I feel like I should be writing this with arrays instead.
▼Here is the full view.
▼And here it is in action. With so many buttons, it's getting hard to operate!
▼I really want a gripper at the end…
Finally
Since the arms are currently clipping through each other, I want to set up collisions next.
I’m still studying robotic arm control, but since the positions are determined starting from the base rather than the hand, I think this is "Forward Kinematics" control.
Because of the parenting, they move together, but it seems I can't yet move just the hand to a specific position and have the joints follow ("Inverse Kinematics"). I might need to recalculate all arm positions or change the hierarchy. I'll keep experimenting.
When I imported CAD data previously, it came in as a Static Mesh. I think I can create a realistic model just by replacing these cubes.
▼I previously tried importing CAD data. I might also try replacing keyboard input with a PS4 controller.
Trying Out Unreal Engine 5 Part 1 (Datasmith, DUALSHOCK 4)
Introduction I have decided to use Unreal Engine 5 to simulate robots. I have been creating robots in both hardware and software, and I intend to use my expe…