Trying Out ngrok (OAuth, GitHub, and Node-RED)
Introduction
In this post, I tried using ngrok. It allows you to expose a server running on your local machine to the global internet.
▼It was introduced in the following articles (Japanese):
https://qiita.com/mininobu/items/b45dbc70faedf30f484e
https://qiita.com/yama-github/items/94514830ad7759bc3687
I have wanted to make my local Node-RED instance publicly accessible for a while, and I was surprised by how easy it was to set up. Since I was concerned about security, I configured it to require a login via a GitHub account.
▼Previous articles:
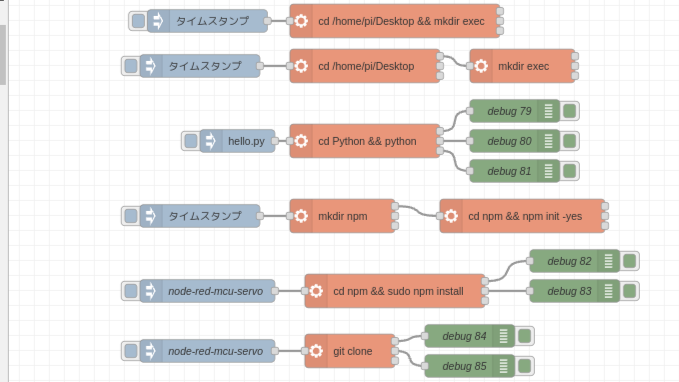
Using Node-RED Part 1 (exec node, Execute Python programs)
Introduction In this article, I used exec node of Node-RED. This is a node that can execute commands. I started using Node-RED MCU first, so I have not use…
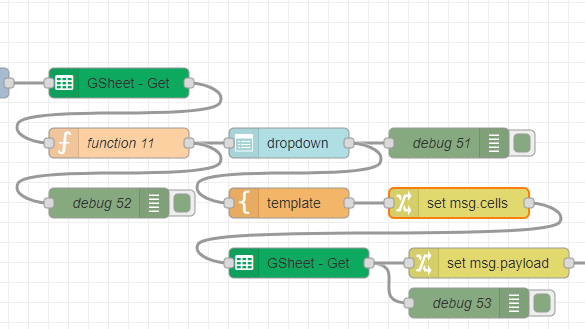
Trying Out Node-RED Part 2 (Google Forms & Google Sheets)
Info This article is translated from Japanese to English. Introduction In this post, I integrated Node-RED with Google Forms and Google Sheets. The workflow in…
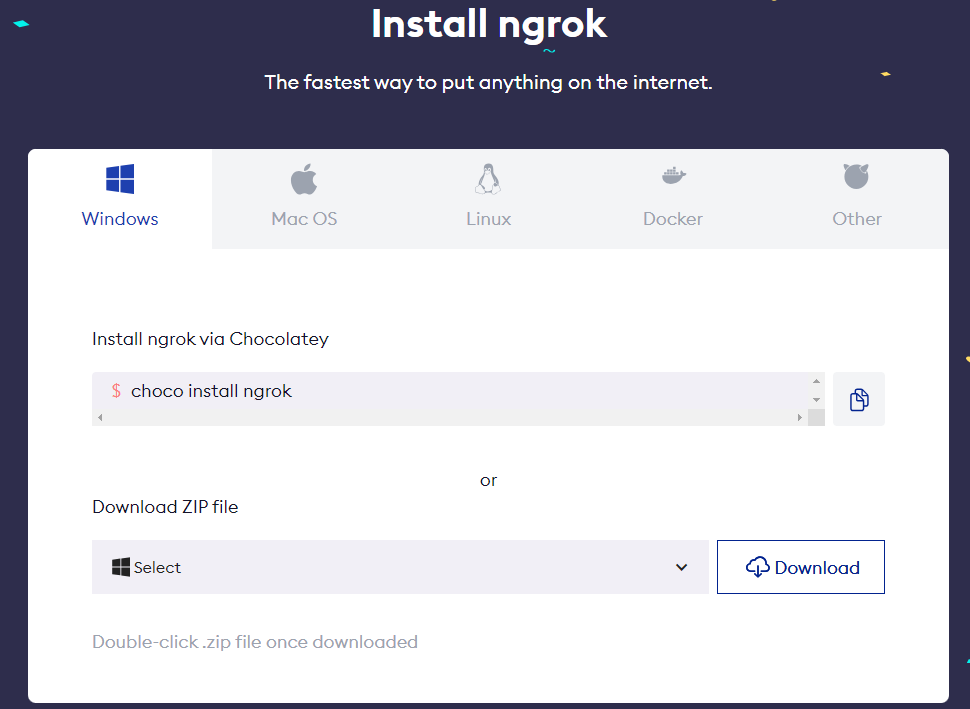
Preparing ngrok
I tested this in a Windows environment.
▼Download link:
▼I downloaded the executable in ZIP format.
Next, create an ngrok account and log in.
▼ngrok homepage:
ngrok | Unified Application Delivery Platform for Developers
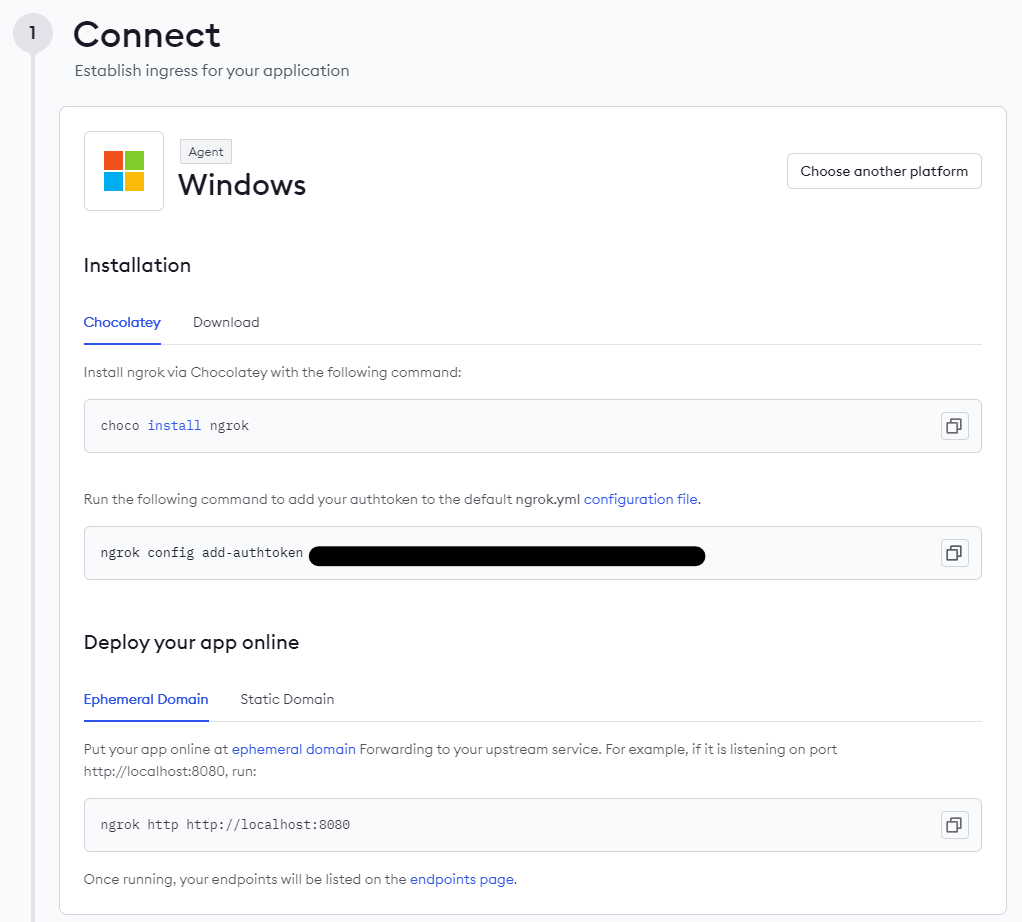
▼Once logged in, the "Getting Started" page appears, including instructions for Node.js.

▼Installation methods and commands are displayed. You need to set an authtoken, so run the command shown on your dashboard.
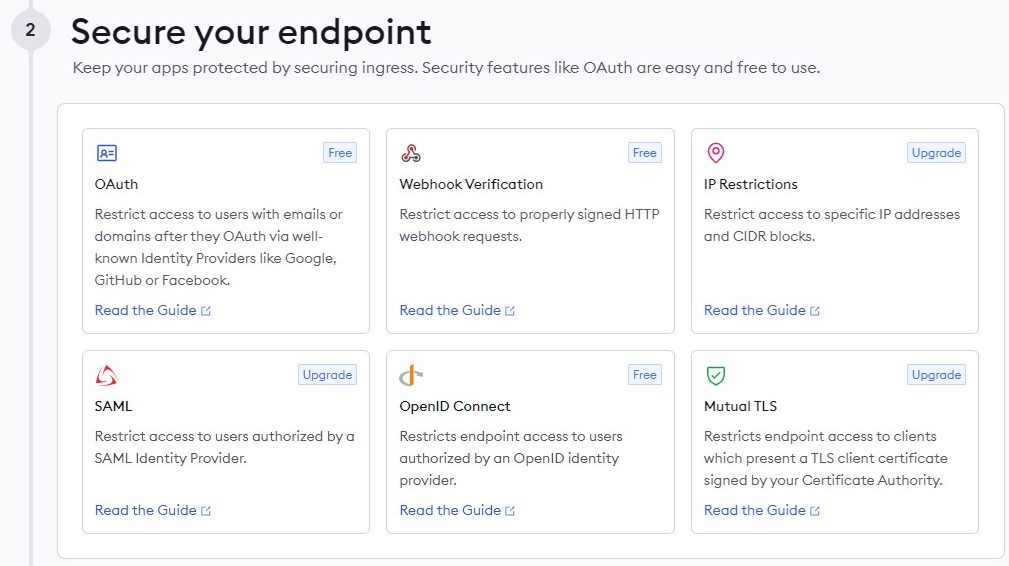
▼There are also various guides. This time, I’ll implement OAuth.
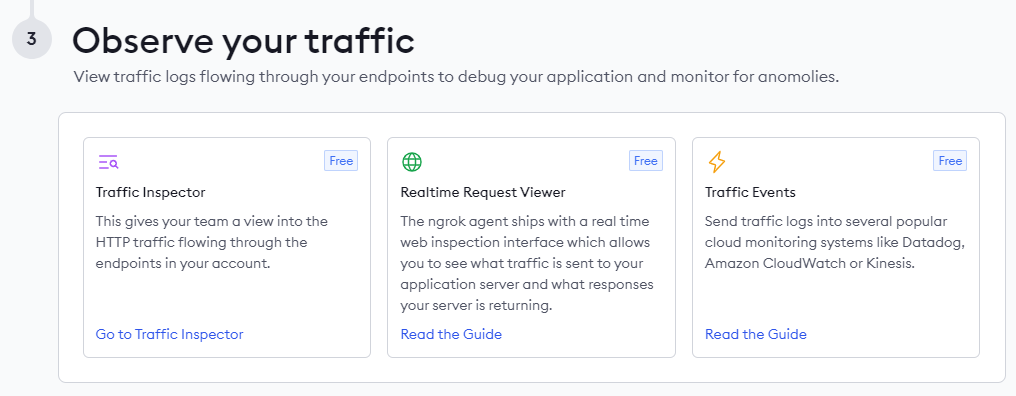
▼This is for traffic monitoring.
Launching ngrok
First, let's try launching it with a simple command.
▼I ran the following:
ngrok http http://localhost:8080
▼The public URL is displayed in the "Forwarding" section.

▼I accessed the URL and selected "Visit Site."

▼An error was displayed.
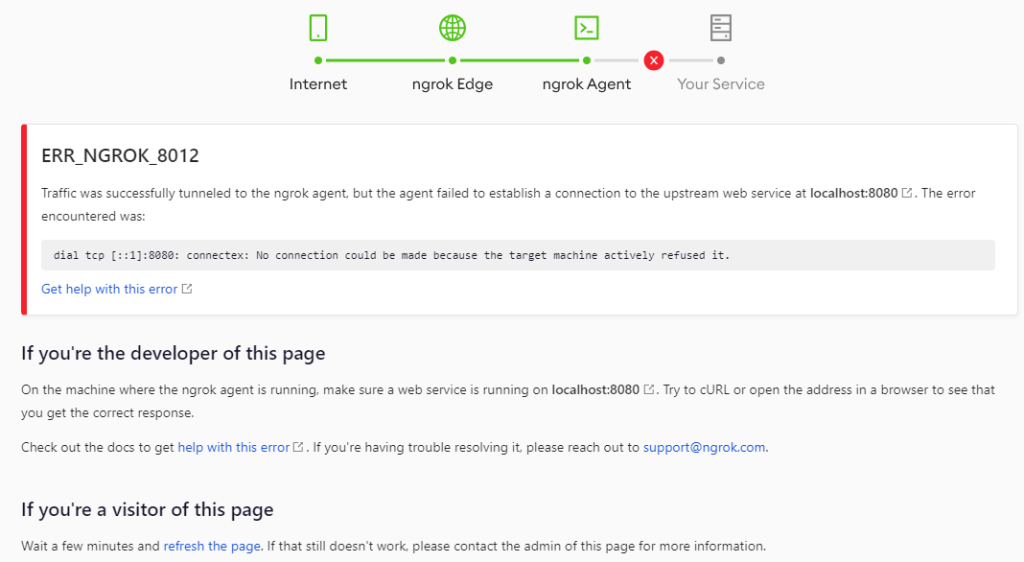
Since nothing was running on localhost:8080, it showed an error. Next, I’ll try pointing it to the port of a server that is actually running locally.
Exposing Node-RED
I will now expose the Node-RED editor running locally using ngrok.
▼The default port for Node-RED is 1880.
Expose port 1880 via ngrok.
▼Run the following command:
ngrok.exe http 1880
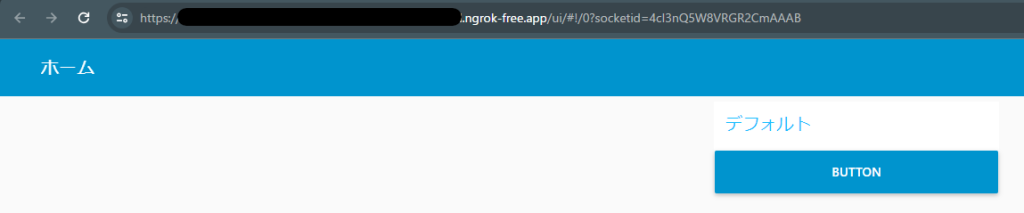
▼When I accessed the public URL provided, the Node-RED editor screen appeared.
▼The Dashboard also displayed correctly.
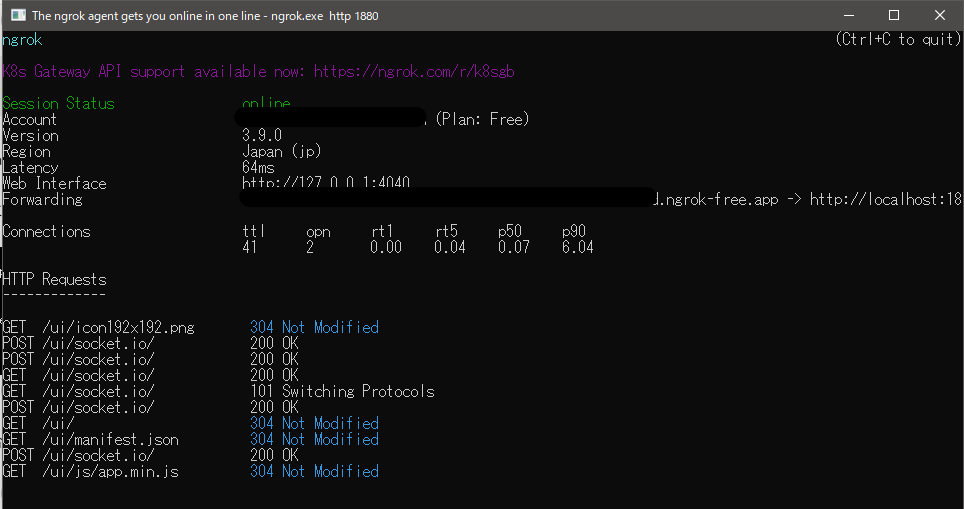
▼HTTP Requests are also visible.
Implementing OAuth
GitHub Configuration
I decided to set up authentication using a GitHub account.
▼OAuth documentation page:
https://ngrok.com/docs/http/oauth/?ref=getting-started&cty=agent-cli
▼Other supported providers include Google, Facebook, Amazon, etc.:
https://ngrok.com/docs/http/oauth/?ref=getting-started&cty=agent-cli#supported-providers
▼GitHub OAuth integration guide:
https://ngrok.com/docs/integrations/github/oauth
First, configure the settings on GitHub.
▼In your GitHub account, go to "Settings."
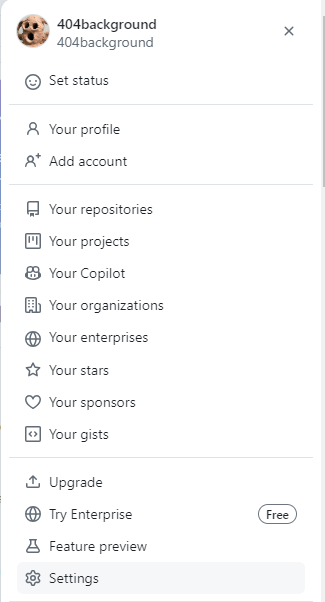
Go to "Developer Settings" at the bottom, then select "OAuth Apps."
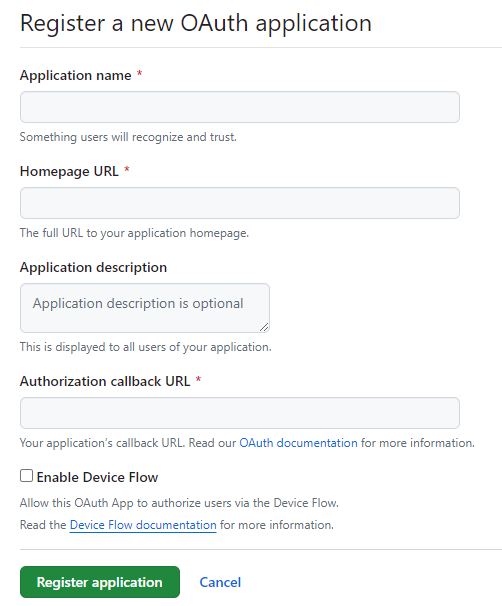
▼Register a new application.

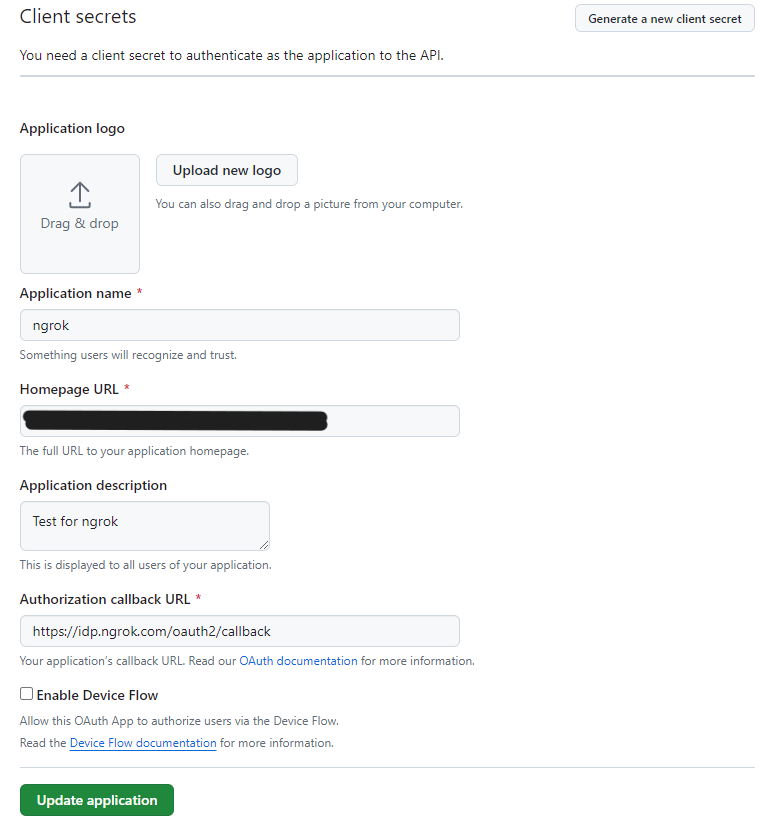
▼The following input fields will appear:
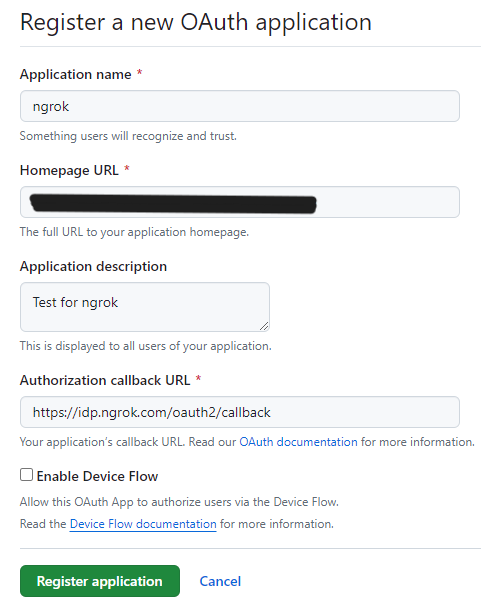
The "Homepage URL" does not have to match the ngrok URL.
▼Set the "Authorization callback URL" to the following:
https://idp.ngrok.com/oauth2/callback
▼I registered with these settings.
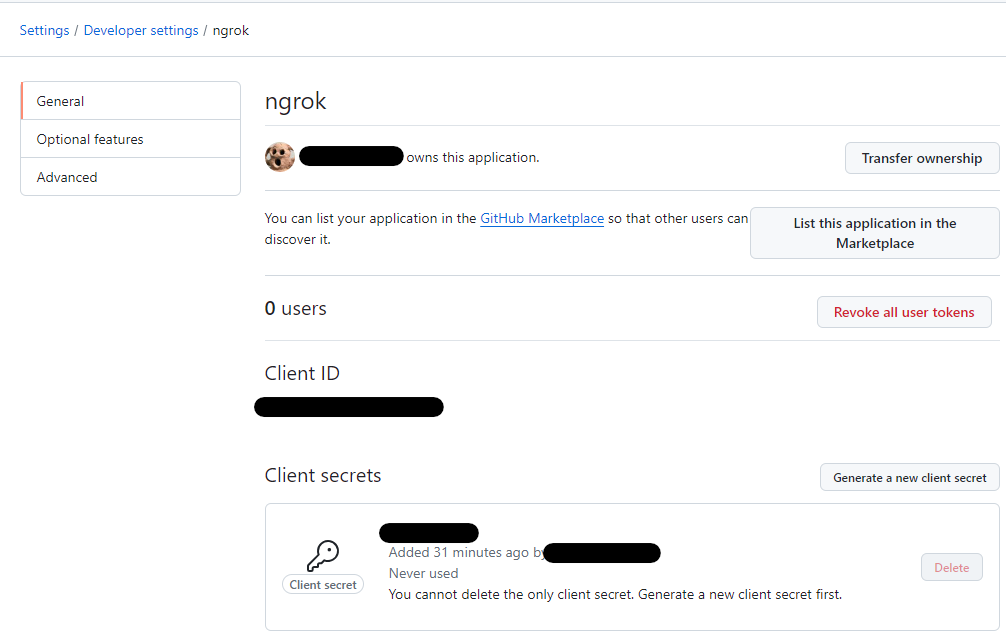
▼The configuration screen appears after registration. Be sure to generate a "Client secret."
▼You can change these settings later, including the logo.
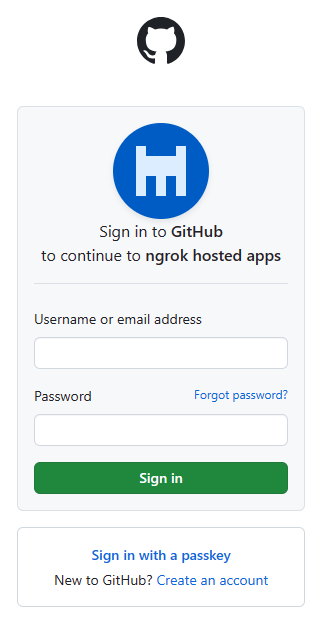
▼After running the command below and accessing the URL, you will be prompted to log in with a GitHub account.
ngrok.exe http 1880 --oauth github
You can also start ngrok by explicitly providing the Client ID and Client secret.
▼Command:
ngrok.exe http 1880 --oauth github --oauth-client-id "<Client ID>" --oauth-client-secret "<Client secrets>"
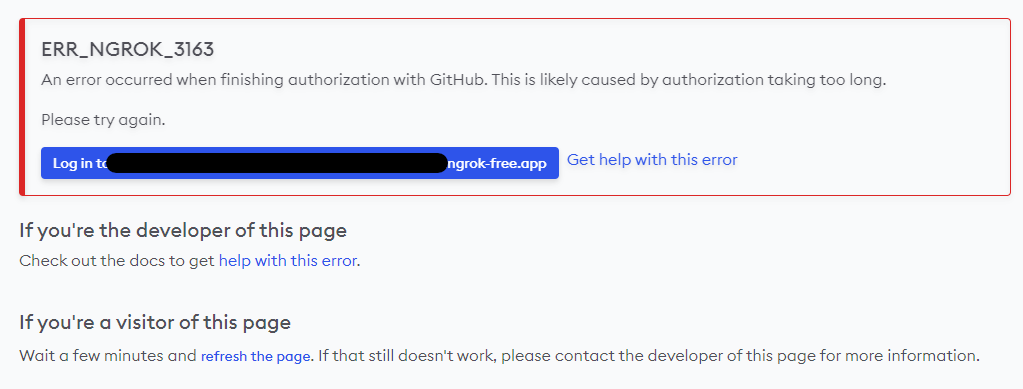
▼Note: If you provide the Client ID but omit the Client secret, the following error occurs. Both are required.

▼If the ID or secret is incorrect, the login will fail.
Logging in on a PC
I launched ngrok with the GitHub OAuth requirement enabled.
▼Accessing the URL brings up the GitHub Username/Password login screen.
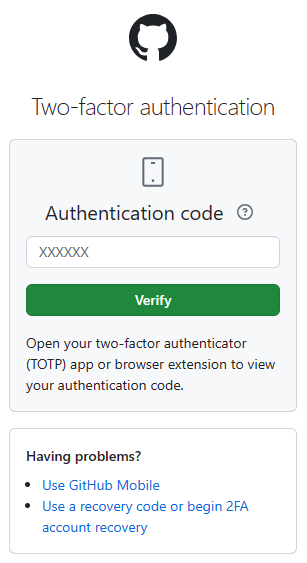
▼Since I have two-factor authentication (2FA) enabled, I was required to enter a code.
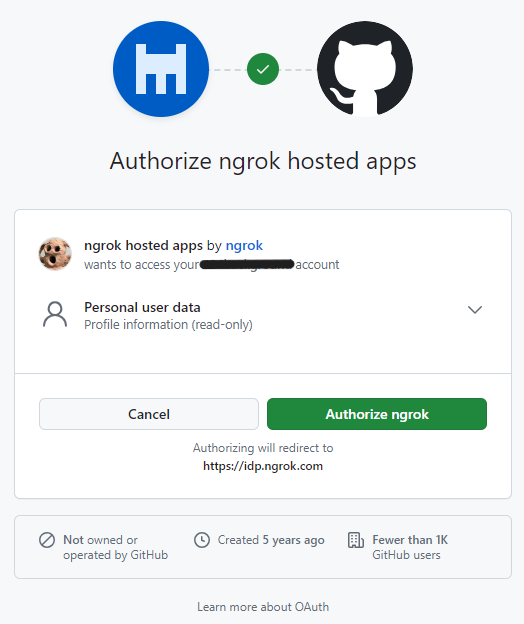
▼An "Authorize ngrok" request appeared.
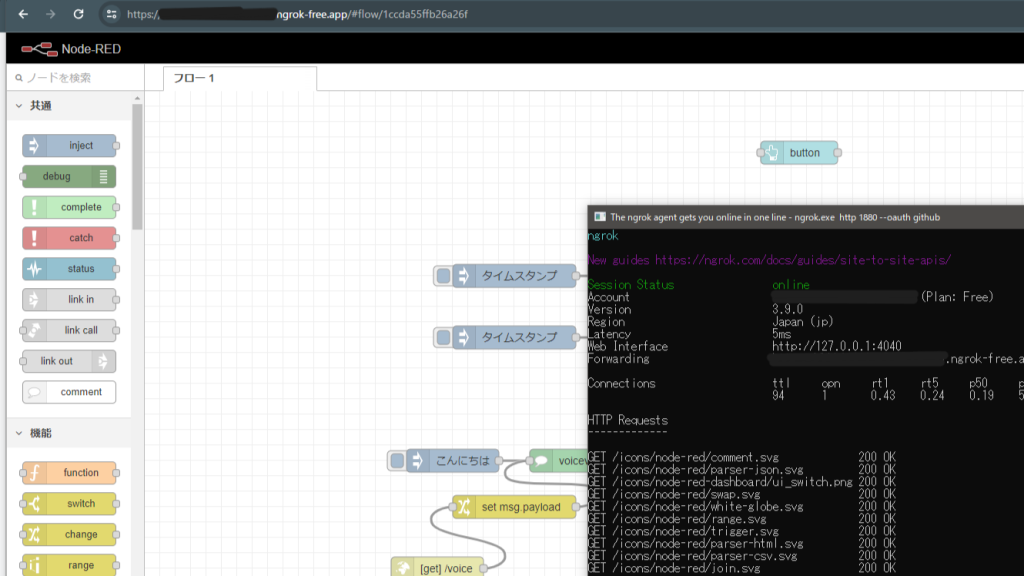
▼After that, the Node-RED screen was successfully displayed.
Logging in on a Smartphone
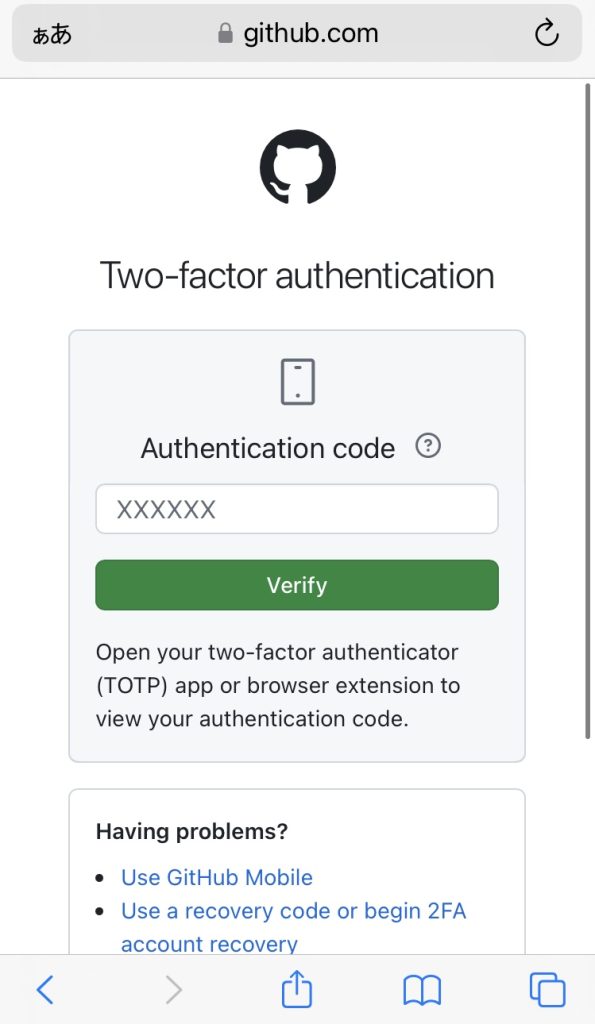
I tried logging in from a smartphone as well.
▼The GitHub login screen appeared.

▼2FA was required here as well.
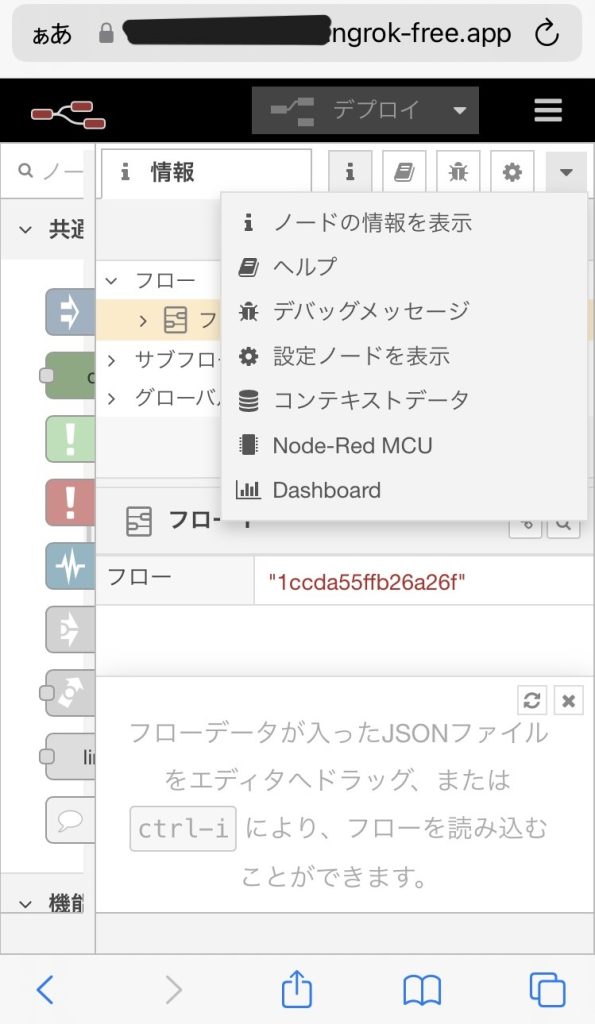
▼The Node-RED screen appeared. It’s quite cramped on a phone screen!
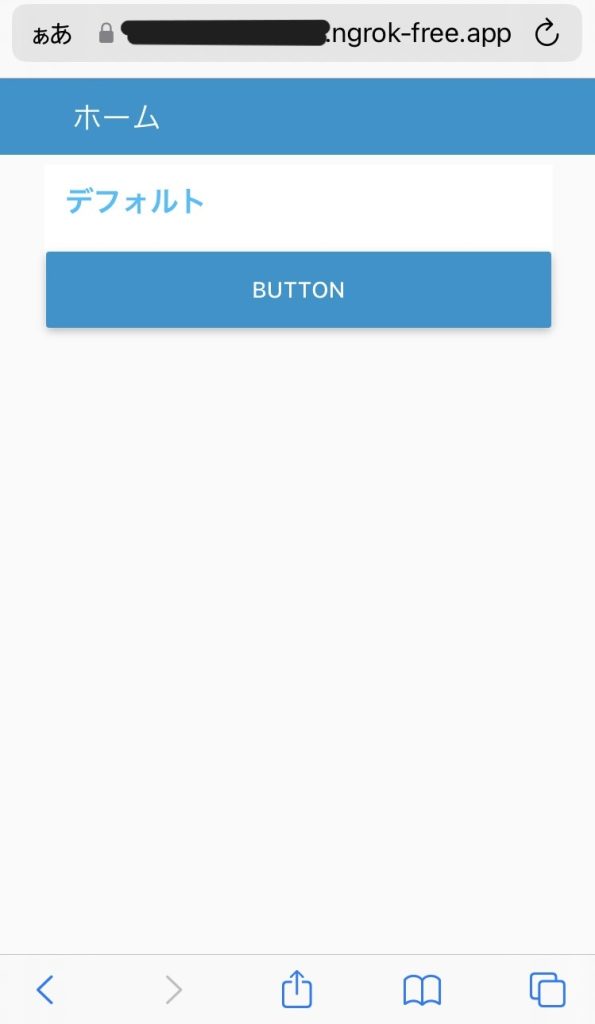
▼The Dashboard screen appeared too. This looks like it could be very useful.
Checking Traffic
To monitor the ngrok service, I checked the traffic logs.
▼Web Inspection Interface documentation:
https://ngrok.com/docs/agent/web-inspection-interface/?ref=getting-started
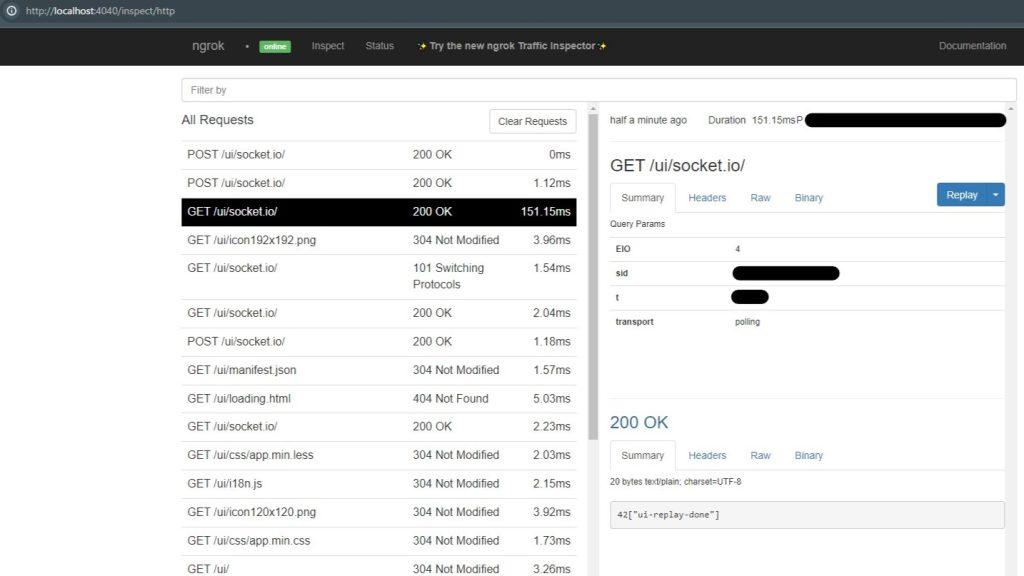
Locally, you can access http://localhost:4040 to view recent logs.
▼Requests and their details are displayed.
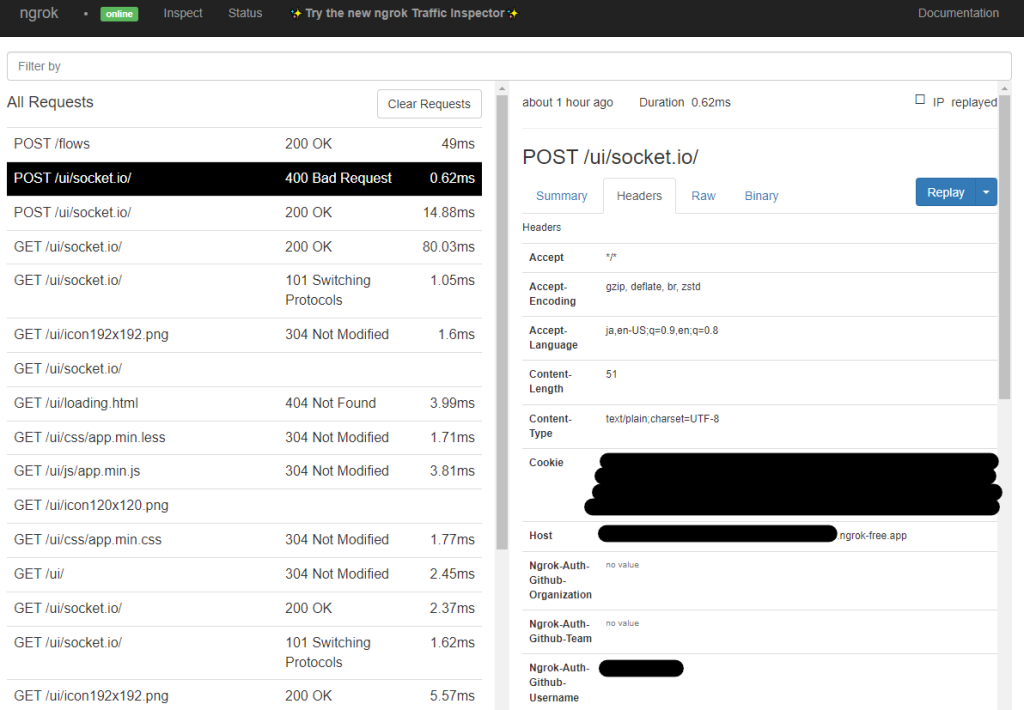
▼Looking at the "Headers," you can see the GitHub username and Cookies.
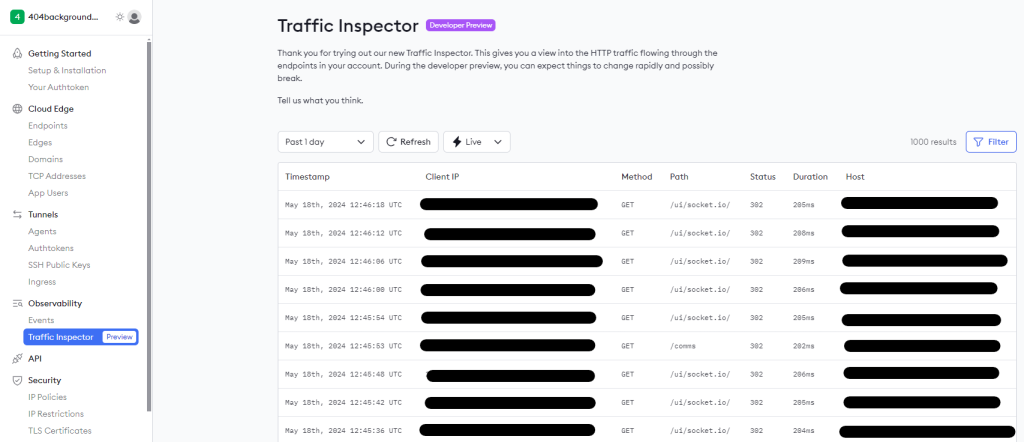
I also checked the "Traffic Inspector" on the ngrok website. After signing in, you can find it under the "Observability" section.
▼Logs can be confirmed here as well.
Selecting a log reveals more details.
▼By default, "Full capture mode" is not enabled, so not all data is shown.
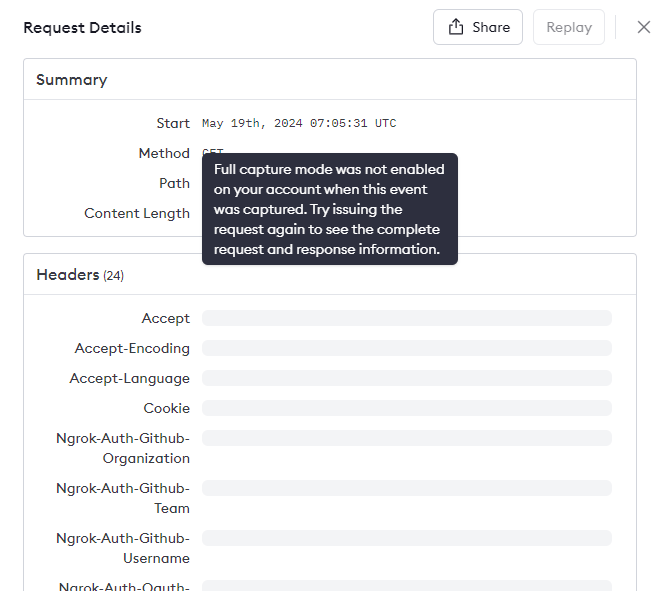
Change the settings on the "Account" page under ngrok Settings to display more details.
▼Set "Observability" to "Enabled."

Now, the account used for login is displayed in the logs.
▼It took some time for this change to be reflected.

Finally
I exposed my local Node-RED instance using ngrok and was amazed at how simple it was. It’s almost too easy, which makes the security aspect a bit intimidating.
With the free plan, you can obtain one static domain. With other domains, the URL changes every time you launch ngrok, but since I’m only using it for testing, that’s perfectly fine. In fact, not reusing the same URL might make it harder to exploit.
While there are endless concerns from a security perspective, I plan to research the topic in more depth.