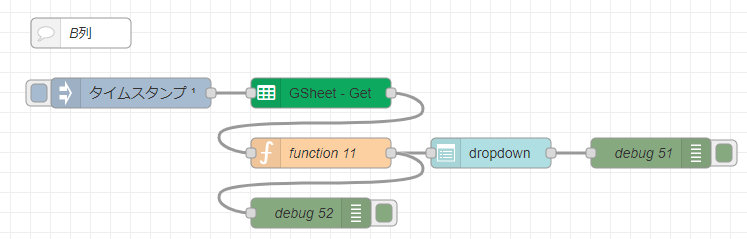
Trying Out Node-RED Part 2 (Google Forms & Google Sheets)
Introduction
In this post, I integrated Node-RED with Google Forms and Google Sheets. The workflow involves linking data entered in a Google Form to a Google Sheet and then retrieving that data using Node-RED. I recently used this setup during the "Osaka 24-Hour AI Hackathon," and it proved to be very practical.
Since the input is handled by Google Forms, it's great that the service automatically manages differences between OSs and devices. It also made sharing and collaborating with team members much easier.
▼Previous articles:
Using Node-RED Part 1 (exec node, Execute Python programs)
Introduction In this article, I used exec node of Node-RED. This is a node that can execute commands. I started using Node-RED MCU first, so I have not use…
Clickと外部データベースを連携させる(Google Spread Sheets、Node-RED)
はじめに 以前の記事でも少し触れましたが、大阪公立大学の「データ利活用やってみよう!ハッカソン2023」に参加していました。ノーコードツールを使ったハッカソンとい…
Preparing Google Forms
First, create a Google Form.
▼Right-click in Google Drive and select "Google Forms." This time, I'll create one from a template.
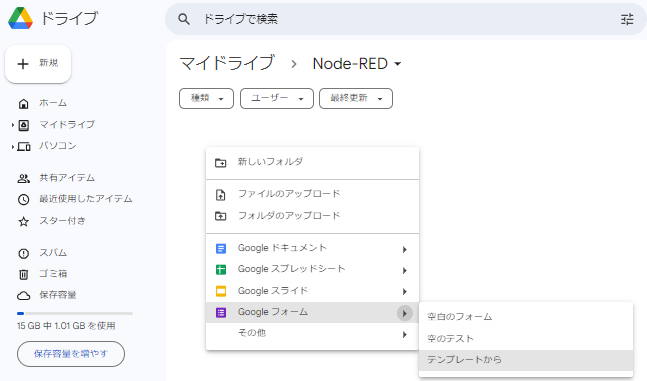
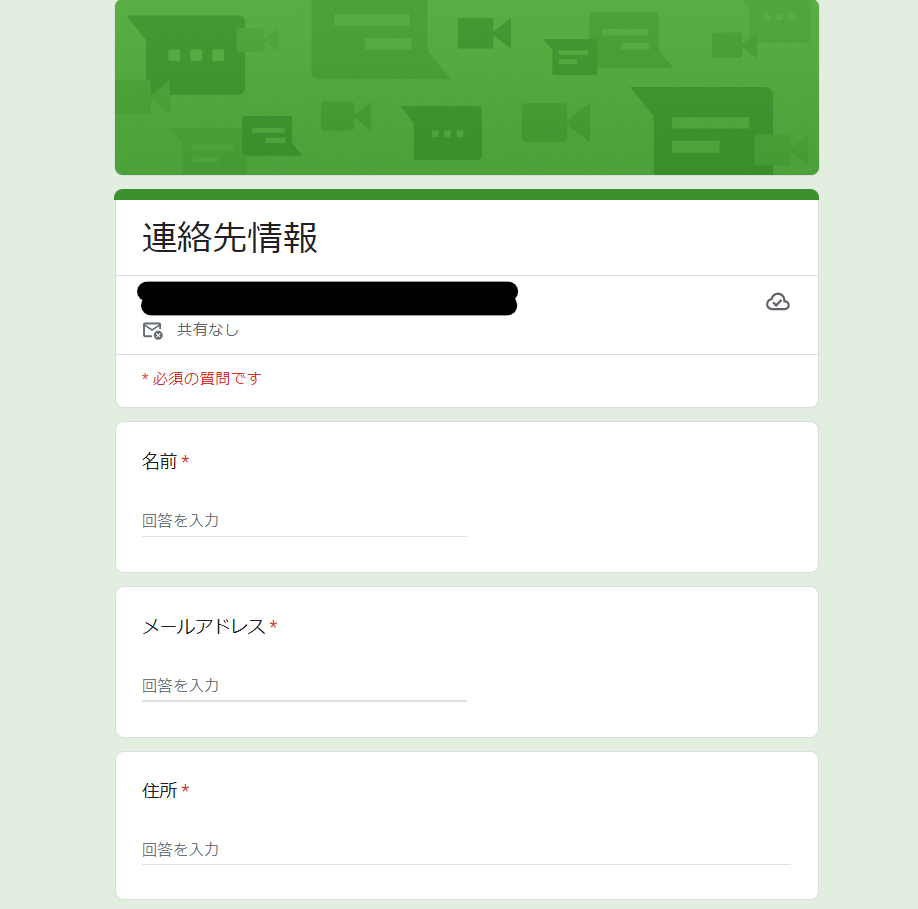
▼I'll use the "Contact Information" template.

▼The form looks like this. You can configure question items here.
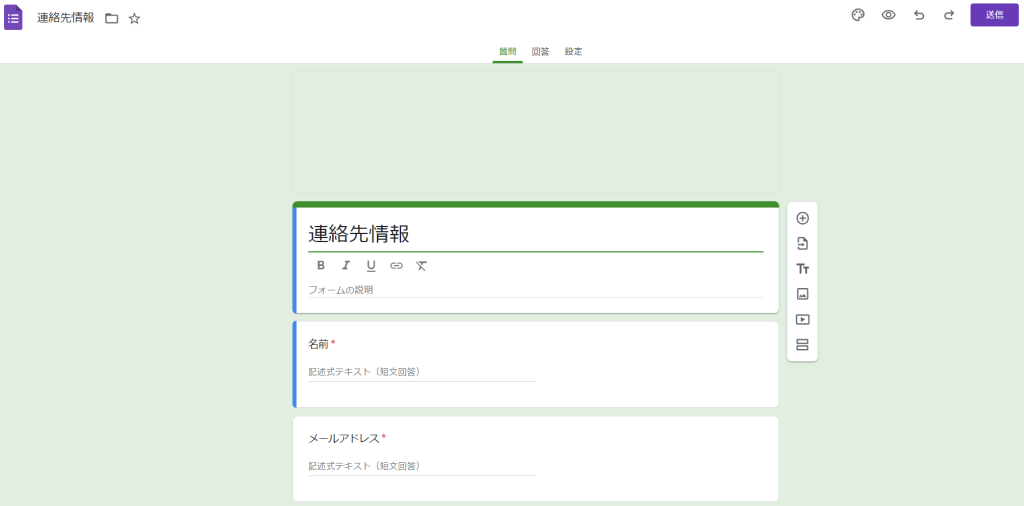
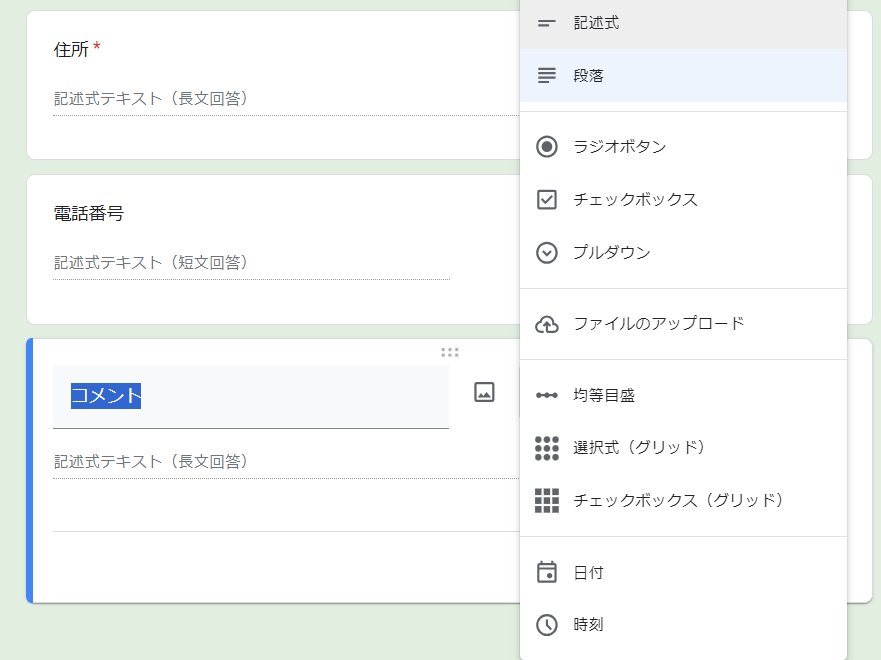
▼Questions can be set as required, and you can choose formats like short answer, multiple-choice, or even file uploads.

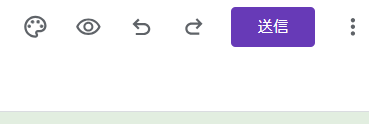
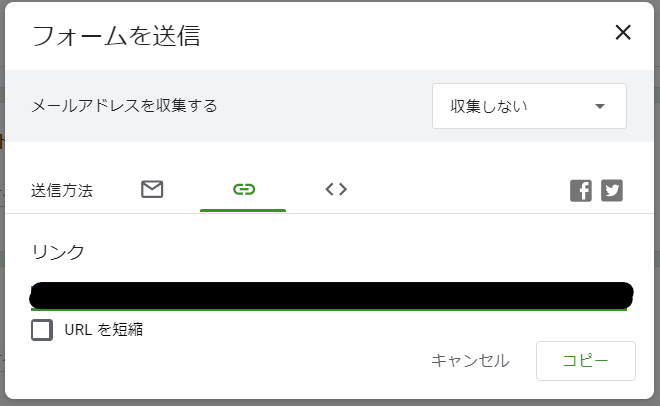
▼Click the "Send" button in the top-right corner to generate a link for the response form.
▼The form can be accessed and filled out from both PCs and smartphones.
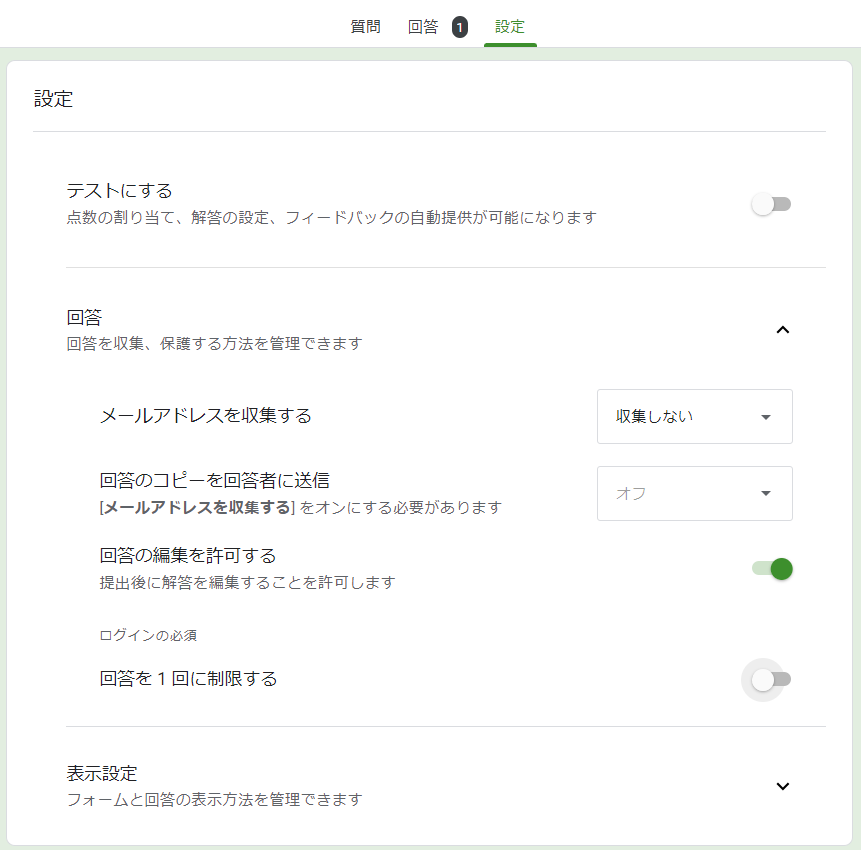
Also, when entering test data, make sure to turn OFF the "Limit to 1 response" option in the settings.
▼If this is ON, you can only respond once per Google account.
Linking to Google Sheets
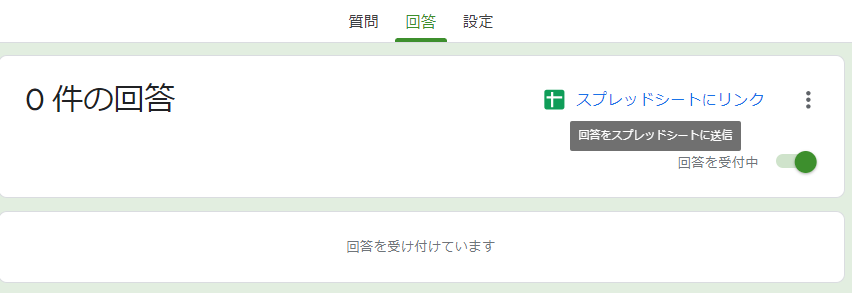
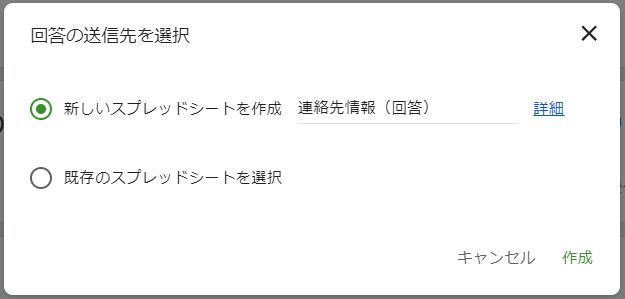
From the "Responses" tab in Google Forms, select "Link to Sheets."
▼Create a new spreadsheet.
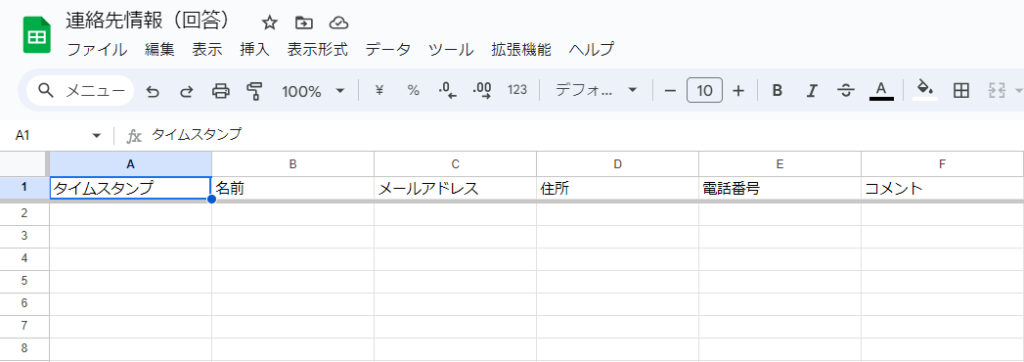
▼A spreadsheet is created. Form responses will be saved here automatically.
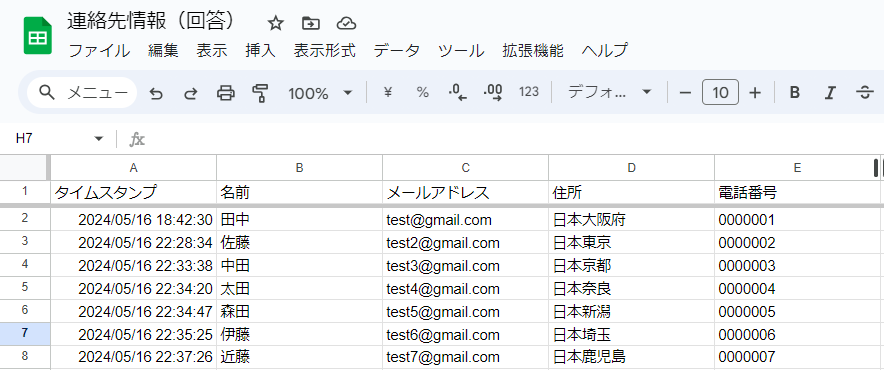
▼I entered dummy data for seven people.
Retrieving Data from Google Sheets
Configuring API Keys and IDs
I always refer to the following articles for detailed steps. While I assume you have a Node-RED environment set up, these steps also work with "enebular," which runs in the cloud.
▼Reference articles (Japanese):
https://qiita.com/tatsuya1970/items/1fd593306334bdfbf509
https://blog.enebular.com/nodes/letsuse-google-spreadsheet-node
You mainly need two things for the node:
- A JSON key file generated via Google Cloud Platform.
- The Spreadsheet ID.
Ensure the spreadsheet is shared so it can be accessed/edited.
Retrieving Values in Node-RED
First, add the necessary node.
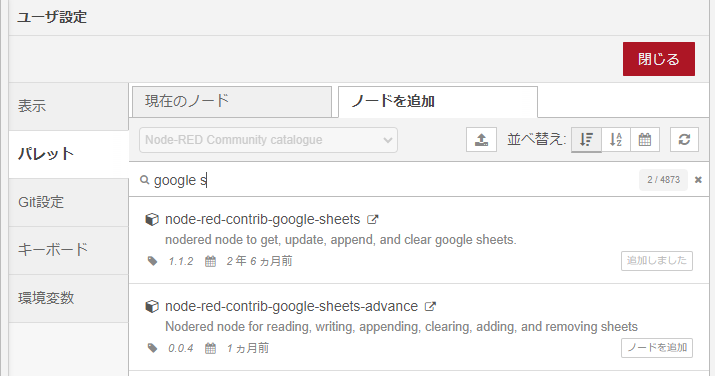
▼You can add it via the "Manage palette" in Node-RED.
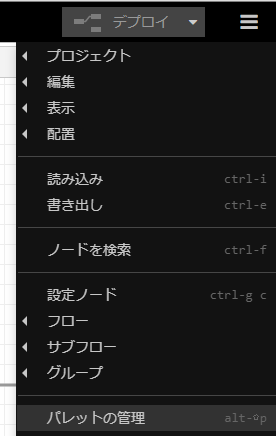
▼I'm using node-red-contrib-google-sheets.
Using this google-sheets node, I'll try to retrieve the header names from the first row.
▼Create a flow like this:

▼Enter the JSON key and the Spreadsheet ID into the node settings.
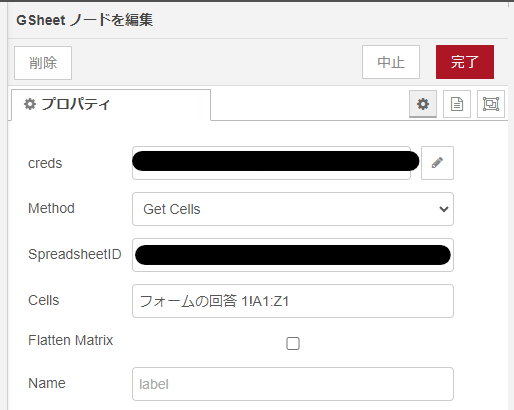
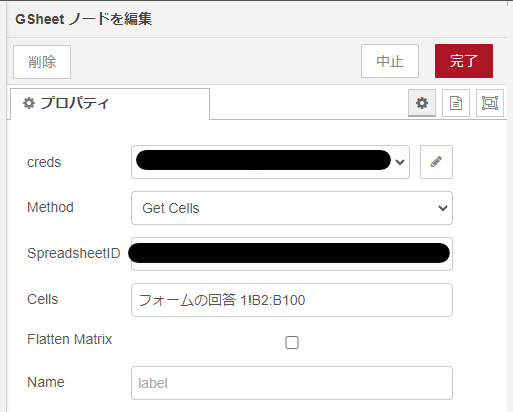
▼The sheet name is "Form Responses 1" (in Japanese: "フォームの回答 1"). Note that it is not "Sheet1."

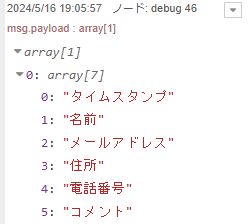
If configured correctly, you can retrieve the data from the first row.
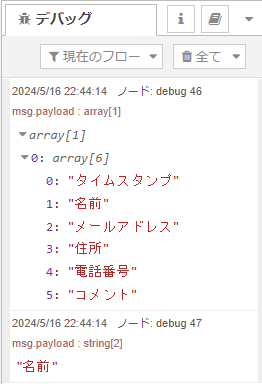
▼The data appears in the debug window as an array.
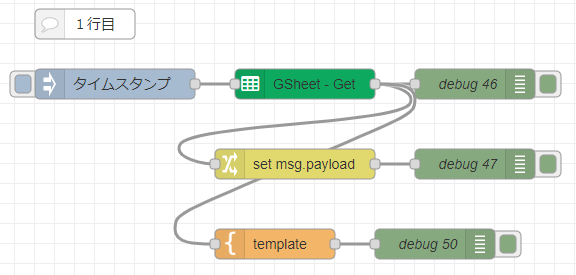
Next, I'll use a change node to extract a specific element from this array.
▼For more details on the change node, this article is very helpful:
https://qiita.com/utaani/items/185343988f8ae86ba1ba
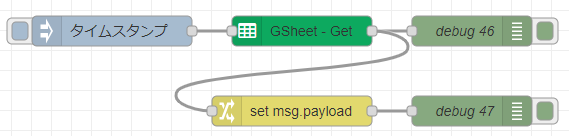
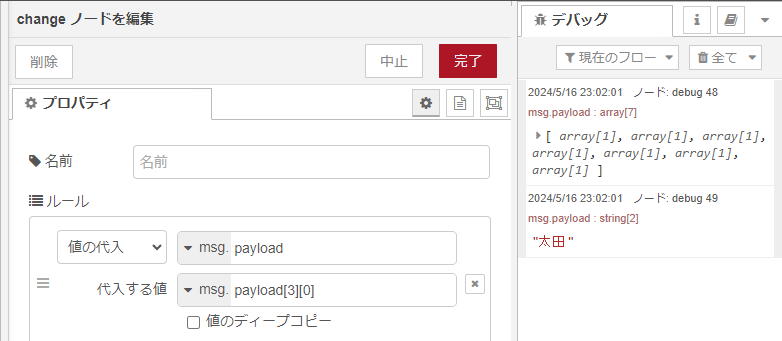
▼I'll pass the 1st element of the 0th array to msg.payload and check the debug window.
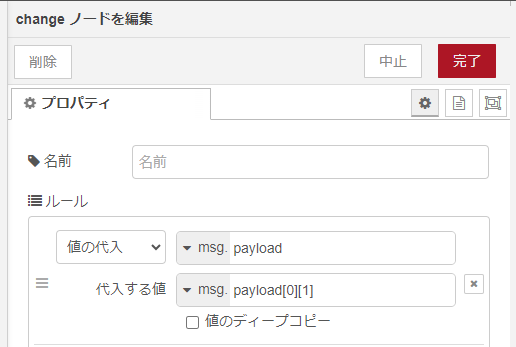
▼I successfully retrieved the text "Name" (名前).
Now, let's retrieve the names in column B.
▼Copy the flow and set it to retrieve elements from B2 to B100.
▼The data is in an array again, but the structure is slightly different this time.
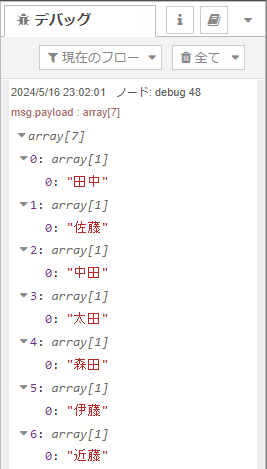
I'll use the change node to retrieve the third name, "Ota" (太田).
▼By assigning the element msg.payload[3][0], I was able to get it.
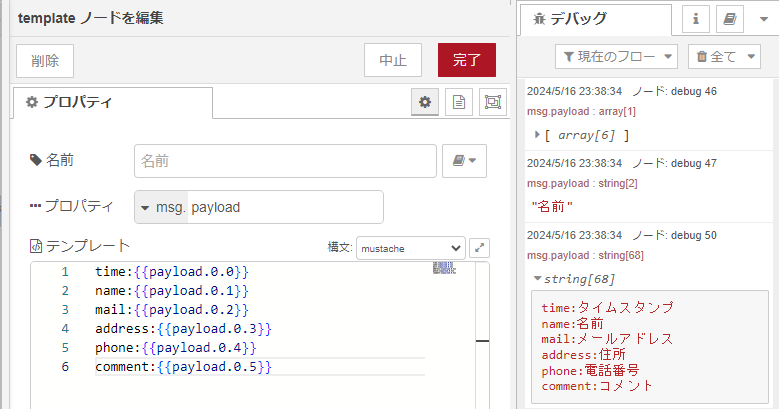
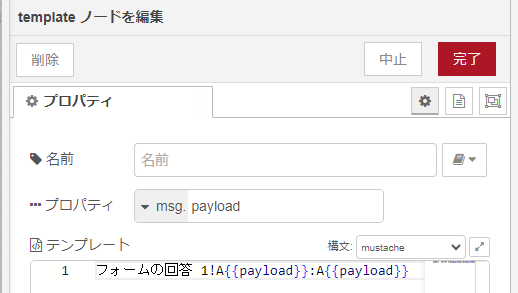
Inserting Values into Strings with the Template Node
Let's combine values retrieved from Google Sheets into a single string.
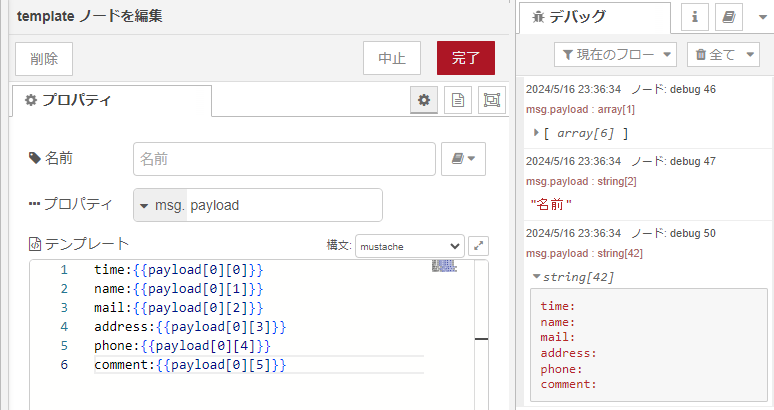
▼I added a template node to the flow.
▼As pre-configured in the node, you can insert variables into a string.
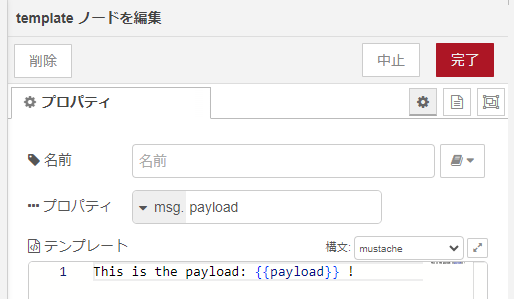
Please note that this uses Mustache syntax, which differs from standard programming array access.
▼About mustache.js:
https://github.com/janl/mustache.js
▼For example, payload[0][0] won't work; you must use payload.0.0.
Displaying Data on the Dashboard
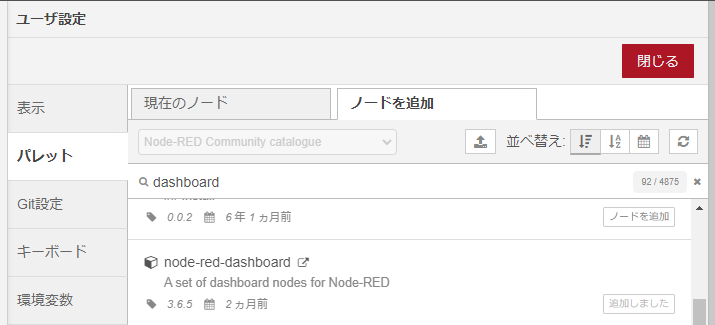
Finally, I'll create a Node-RED dashboard using UI nodes.
▼Add node-red-dashboard via the Manage palette.
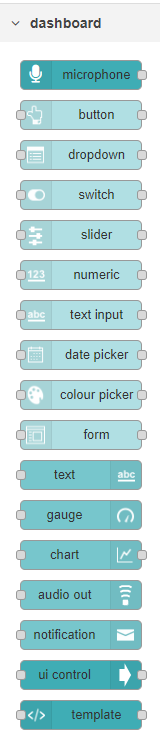
▼I'll use the dropdown and text nodes for this example.
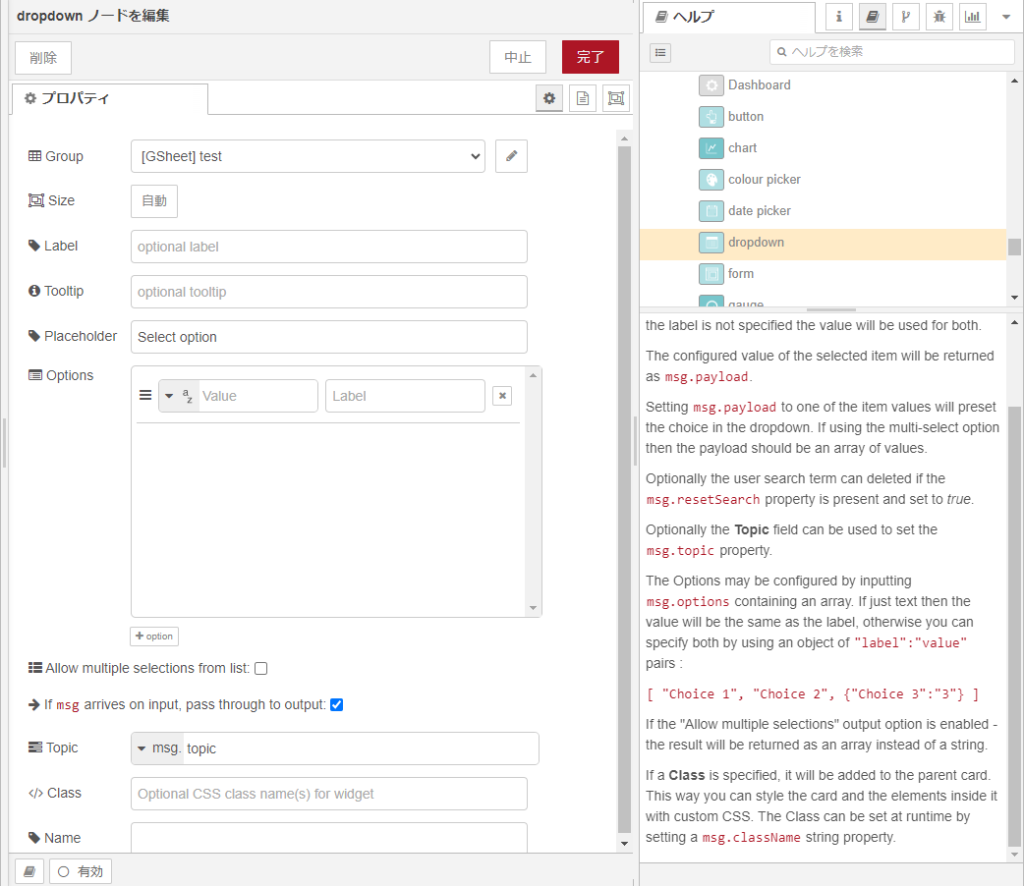
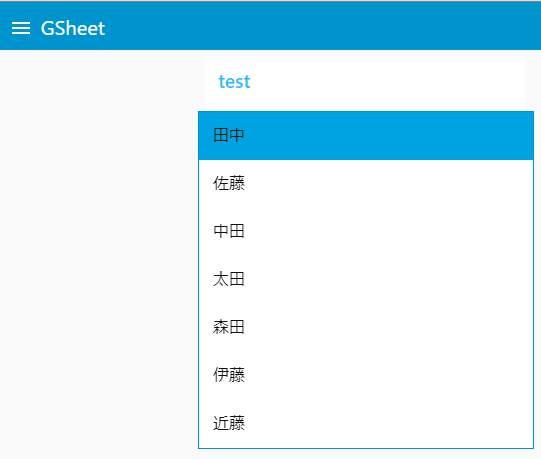
First, I'll display the names from the Google Sheet in a dropdown node.
▼As mentioned in the help section, passing a pair of label and value to msg.options will display them as choices.
▼The flow looks like this:
The values from the google-sheets node are processed by a function node and passed to the dropdown node.
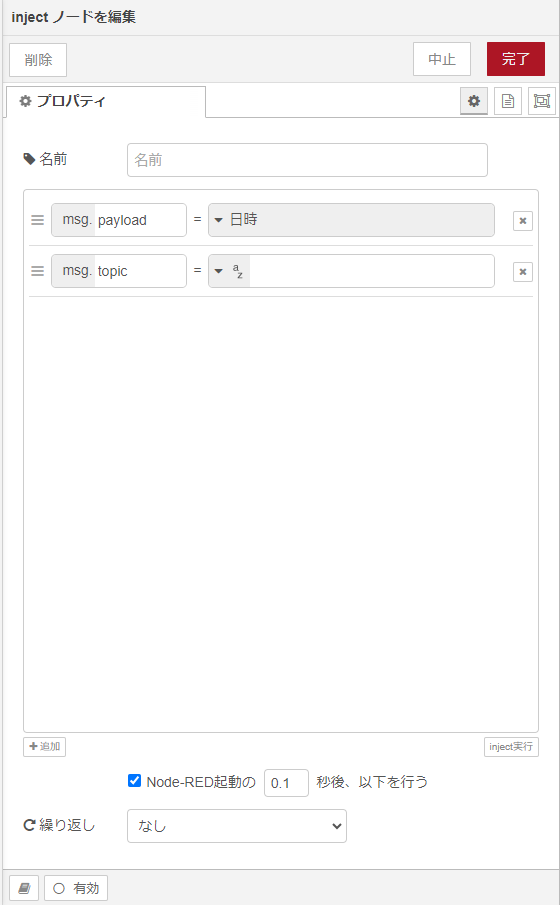
▼The inject node is set to run once at startup.
▼You can write JavaScript inside the function node.
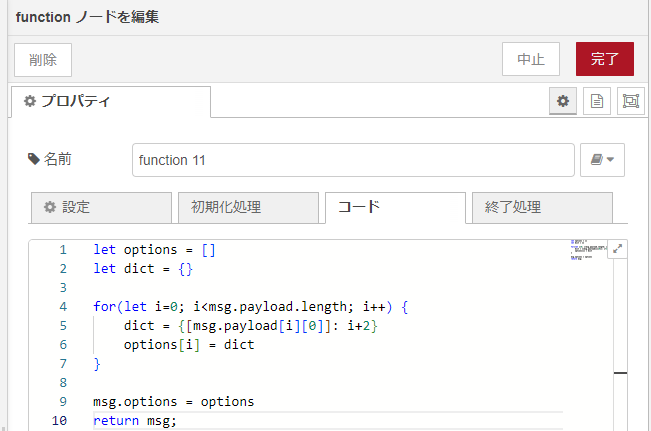
▼The code:
let options = []
let dict = {}

for(let i=0; i<msg.payload.length; i++) {
    dict = {[msg.payload[i][0]]: i+2}
    options[i] = dict
}

msg.options = options
return msg;
▼I referred to this article for how to assign variables to the key and value of an associative array.
https://note.com/aki85/n/ndb0f911a2bca
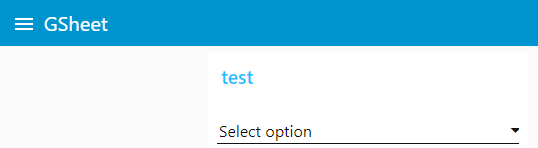
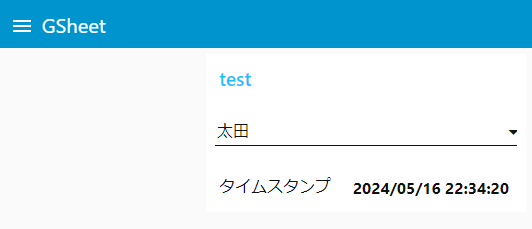
Opening the dashboard reveals the UI.
▼In the Dashboard window, you can access it by clicking the icon on the right that opens external URLs.

▼You can now select names from the dropdown.
When a name is selected, the corresponding row number is passed to msg.payload. I'll use this to retrieve the timestamp from that specific row.
▼The full flow:

▼Pass the cell range using a template node.
▼As described in the google-sheets node help, you pass the cell range to msg.cells. I use a change node to assign this from the template.
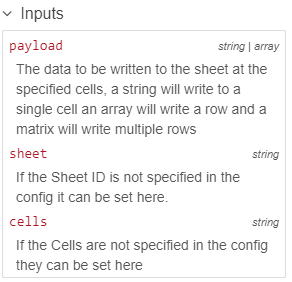
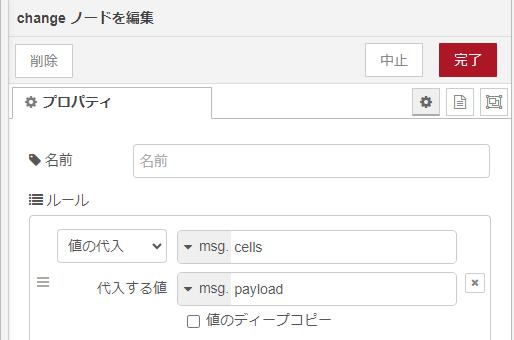
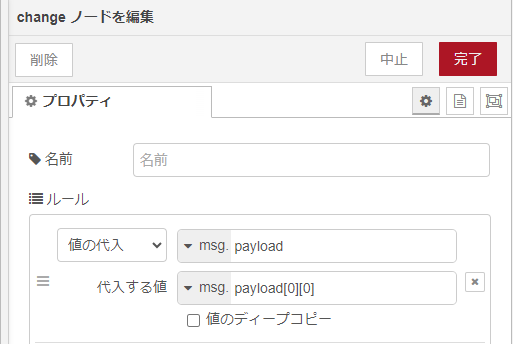
The google-sheets node then retrieves that cell's value and puts it back into an array in msg.payload. I extract it from the array using a change node and pass it to a text node.
▼The text node configuration:
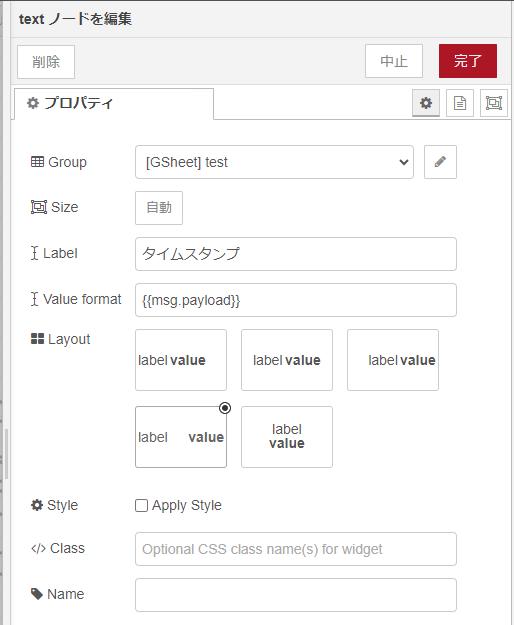
▼When a name is selected, the timestamp is displayed.
Finally
I successfully integrated Google Forms, Google Sheets, and Node-RED. Looking at the flow alone might seem complicated at first.
However, if you build the flow yourself and adjust it while checking values in the debug window, you'll quickly get the hang of it. This experience will definitely be useful when working with other Node-RED nodes!