
MQTT Communication with ESP32 (XIAO ESP32S3, Node-RED, HID Keyboard)
Introduction
In this post, I tried using MQTT communication with the XIAO ESP32S3. I have used MQTT with Node-RED MCU before, but this time I am writing and uploading the program using the Arduino IDE. The reason I didn't use Node-RED MCU is that I also wanted to use the ESP32's HID keyboard functionality. Since I’ve confirmed it works on the hardware side, I’d eventually like to create a custom node for it.
▼The microcontroller used is shown below. It works great with small breadboards.
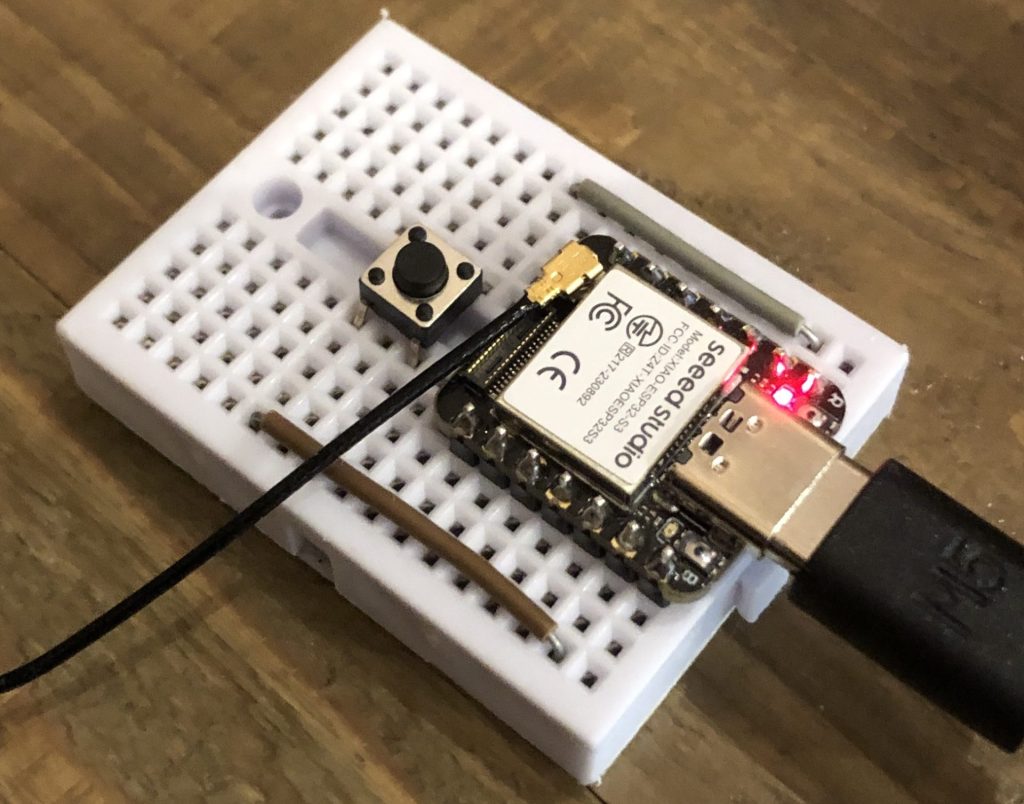
▼The sales page for XIAO ESP32S3 Sense is here.
https://akizukidenshi.com/catalog/g/g118079
Seeed Studio XIAO ESP32S3 Sense — スイッチサイエンス
Seeed Studio XIAO ESP32S3にカメラモジュールを搭載したモデルで、カメラ、デジタルマイク、mSDカードスロットを備えています


▼Previous articles:
MQTT communication with Node-RED (Node-RED MCU, M5Stack)
Introduction In this article, I used MQTT communication with Node-RED; MQTT communication is used to communicate with IoT devices and is said to be low-power…
Trying Out MQTT Communication
▼Detailed information on connecting to WiFi can be found on Seeed Studio's page:
https://wiki.seeedstudio.com/xiao_esp32s3_wifi_usage/
For the MQTT broker, I used Shiftr.io.
▼Shiftr.io's public MQTT broker page: (Sample programs are available at the bottom)
Note: Since this is a public broker, your transmitted data can be seen by third parties. Please be careful with the data you handle.
Using the Sample Program
I tried out the Shiftr.io sample program, which uses the MQTT library.
▼MQTT library GitHub repository:
https://github.com/256dpi/arduino-mqtt/tree/master
▼Here is the program. Please set your own WiFi SSID and password.
//https://www.shiftr.io/try?lang=arduino
#include <WiFi.h>
#include <MQTT.h>

const char ssid[] = "ssid";
const char pass[] = "pass";

WiFiClient net;
MQTTClient client;

unsigned long lastMillis = 0;

void connect() {
  Serial.print("checking wifi...");
  while (WiFi.status() != WL_CONNECTED) {
    Serial.print(".");
    delay(1000);
  }

  Serial.print("\nconnecting...");
  while (!client.connect("arduino", "public", "public")) {
    Serial.print(".");
    delay(1000);
  }

  Serial.println("\nconnected!");

  client.subscribe("hello");
}

void messageReceived(String &topic, String &payload) {
  Serial.println(topic + ": " + payload);
}

void setup() {
  Serial.begin(115200);

  // start wifi and mqtt
  WiFi.begin(ssid, pass);
  client.begin("public.cloud.shiftr.io", net);
  client.onMessage(messageReceived);

  connect();
}

void loop() {
  client.loop();
  delay(10);

  // check if connected
  if (!client.connected()) {
    connect();
  }

  // publish a message roughly every second.
  if (millis() - lastMillis > 1000) {
    lastMillis = millis();
    client.publish("/hello", "world");
  }
}
Let's look at the code briefly while referring to the repository:
- An MQTTClient object named client is created.
- In client.begin, the port is not specified, so it defaults to 1883.
- client.onMessage: Specifies the callback function to be called when a message is received.
- Received messages can be handled as payload within the callback function.
- Communication is established by matching the topic names for publish and subscribe.
- client.publish: Passes the topic name and the message to be sent as arguments.
- client.subscribe: Receives messages from the specified topic.
MQTT Communication with Node-RED
I tested MQTT communication between Node-RED and the ESP32.
▼I use Node-RED installed on my PC, but if you don't have it installed, I recommend "enebular," which can be run in the cloud.
Preparing the Flow
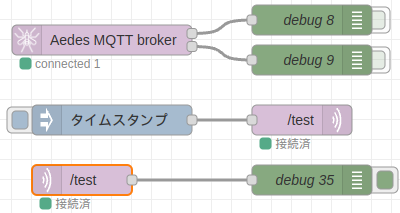
I used the mqtt in and mqtt out nodes for the communication. Matching the sample program, I set the topic name to /hello.
▼Here is the flow. You can send messages by clicking the button on the inject node.
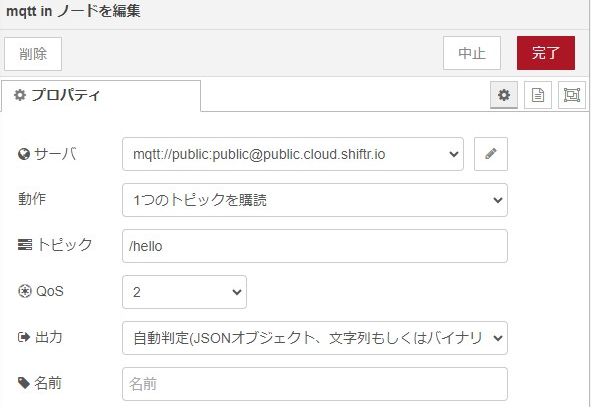
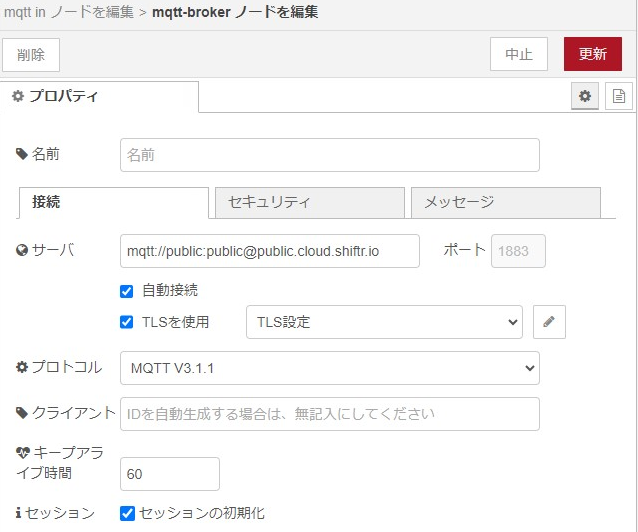
▼Settings for the mqtt in node (the mqtt out node is similar). Specify the server address and the topic name.
Execution
▼The received messages appeared in the Serial Monitor. It successfully received messages sent when the Node-RED inject node button was pressed.

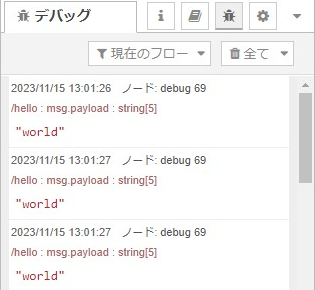
▼Messages are also displayed in the Node-RED debug window.
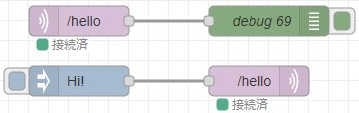
Application Example: Creating an MQTT Keyboard
I combined MQTT communication with the HID keyboard function. Similar to a BLE keyboard, you could call this an "MQTT Keyboard."
When uploading the program, be sure to hold down the BOOT button while powering it on to enter upload mode. Otherwise, the keyboard function might take over your PC's inputs, making it difficult to operate.
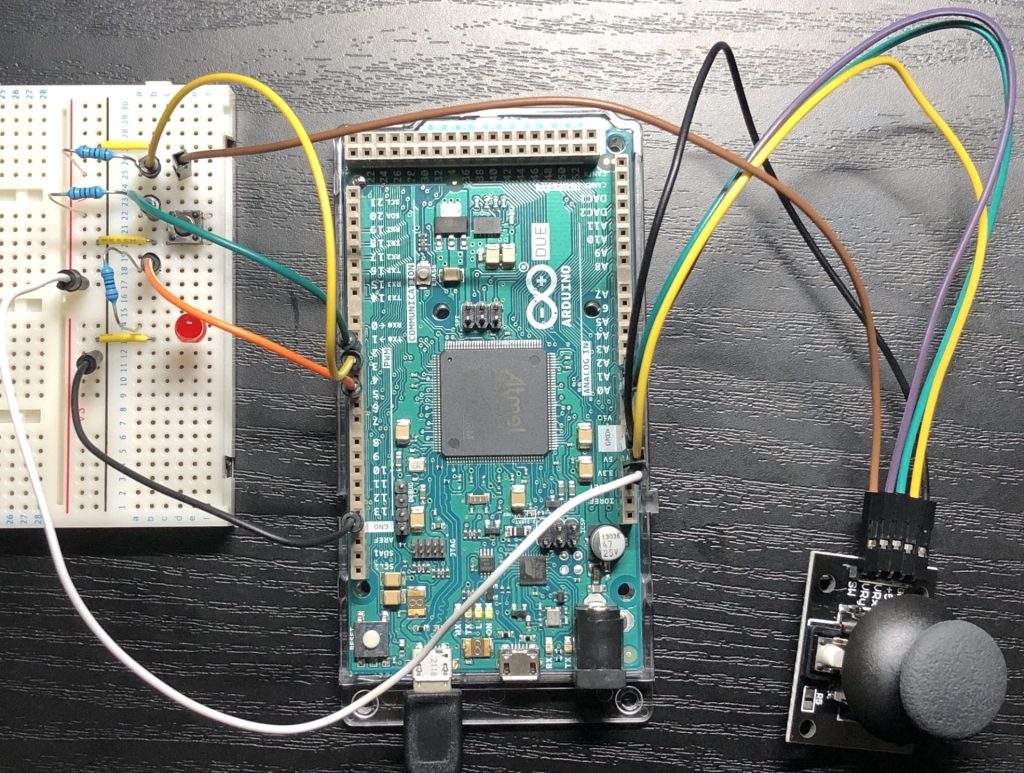
▼Previously, I used the HID function of the Arduino Due. In that case, the USB port for uploading was separate, so there was no risk of input hijacking.
Arduino Dueを使ってJoystickMouseControl
はじめに タイトルの「JoystickMouseControl」というのは、Arduino IDEに内蔵されているスケッチ例の名前です。今回はジョイスティックで、マウスのようにパソコンを操…
In this example, characters received via MQTT are output as keyboard strokes within the callback function. During testing, unrelated strings were sometimes entered, so I configured it to input strings into the PC only until a backslash is received.
#include <WiFi.h>
#include <MQTT.h>
#include "USB.h"
#include "USBHIDKeyboard.h"
const char ssid[] = "ssid";
const char pass[] = "pass";
WiFiClient net;
MQTTClient client;
USBHIDKeyboard Keyboard;
const int buttonPin = 2;
int previousButtonState = HIGH;
int counter = 0;
char command[] = { 'h', 'e', 'l', 'l', 'o' };
void connect() {
Serial.print("checking wifi...");
while (WiFi.status() != WL_CONNECTED) {
Serial.print(".");
delay(1000);
}
Serial.print("\nconnecting...");
while (!client.connect("arduino", "public", "public")) {
Serial.print(".");
delay(1000);
}
Serial.println("\nconnected!");
client.subscribe("hello");
}
void messageReceived(String& topic, String& payload) {
Serial.println(topic + ": " + payload);
char command[100];
payload.toCharArray(command, 100);
for (int i = 0; i < sizeof(command); i++) {
if (command[i] == '\\') {
break;
}
Keyboard.write(command[i]);
Serial.print(command[i]);
}
Serial.println();
}
void setup() {
Serial.begin(115200);
pinMode(buttonPin, INPUT_PULLUP);
Keyboard.begin();
USB.begin();
WiFi.begin(ssid, pass);
client.begin("public.cloud.shiftr.io", net);
client.onMessage(messageReceived);
connect();
}
void loop() {
int buttonState = digitalRead(buttonPin);
if (buttonState == LOW) {
for (int i = 0; i < sizeof(command); i++) {
Keyboard.write(command[i]);
delay(10);
}
delay(500);
}
client.loop();
if (!client.connected()) {
connect();
}
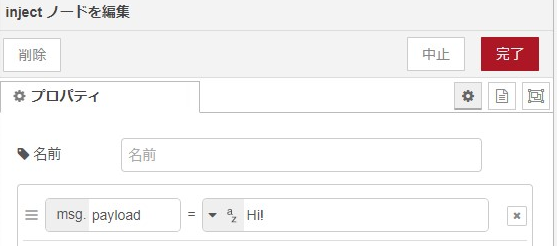
}▼Here is a video of it in action. Node-RED sends the string "Hi!" every two seconds. Pressing the physical button inputs "hello."
Finally
I was able to establish MQTT communication between the ESP32 and Node-RED. Understanding topics, subscribing, and publishing might make the code seem difficult at first, but having used Node-RED made it easier to grasp.
At the "Let's try data utilization! Hackathon 2023" held recently at Osaka Metropolitan University, I was also able to link Node-RED with Google Sheets. It seems that once you connect a device to Node-RED, it can be used for a wide variety of applications.
▼Here is the presentation video from the Hackathon:

