Trying Out Genesis Part 1 (Environment Setup and Running Sample Programs)
Introduction
In this post, I tried out a physics simulation software called Genesis.
It was released only about three months ago, and the demo videos looked very interesting. The graphics are as realistic as Unreal Engine, and it simulates multi-axis robot arms moving just like in ROS.
▼There are various interesting demo videos available.
https://genesis-embodied-ai.github.io
It can be used in combination with AI-related technologies and developed using Python.
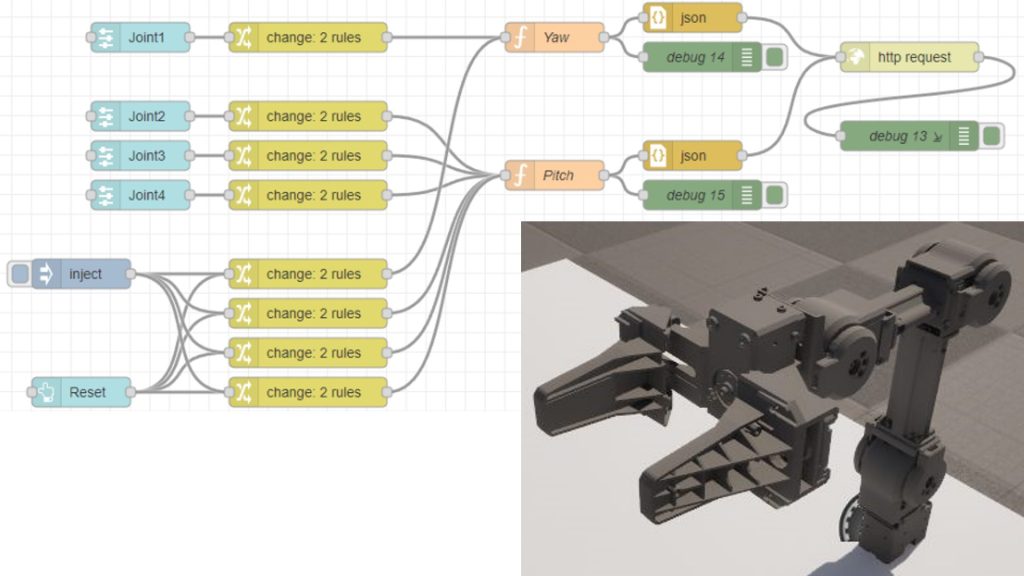
▼Previously, I tried creating something like a digital twin for robots by connecting Unreal Engine and ROS using Node-RED. I am curious to see how much can be achieved with Genesis.
▼Previous articles are here:
Trying Out Unreal Engine 5 Part 9 (Remote Control API and Node-RED)
Info This article is translated from Japanese to English. Introduction Previously, I used the HTTP Blueprint to test communication from Unreal Engine 5 (UE5) t…
Using WSL2 Part 4 (Ubuntu 16.04, ROS Kinetic, Open Manipulator)
Info This article is translated from Japanese to English. Introduction So far, I’ve installed Ubuntu 18.04, 20.04, and 22.04 on WSL2 and built ROS/ROS2 environ…
Setting Up the Environment
▼I am using a gaming laptop purchased for around 100,000 yen, running Windows 11.
Shopping: New Laptop and SSD Expansion (ASUS TUF Gaming A15)
Info This article is translated from Japanese to English. Introduction In this post, I’ll be talking about replacing my PC after my previous one broke down. I …


I built the environment referring to the README. The execution environment is Windows 11, and the Python version is 3.10.
▼The GitHub page is here:
https://github.com/Genesis-Embodied-AI/Genesis
First, create a Python virtual environment and activate it.
py -3.10 -m venv pyenv-genesis
cd pyenv-genesis
.\Scripts\activate
It seems PyTorch is required.
▼I performed the installation when I set up YOLO to run on a GPU. I executed the same command.
Object Detection with YOLO Part 4 (GPU Setup, CUDA 12.6)
Info This article is translated from Japanese to English. Introduction In this post, I tried object detection with YOLO using a GPU.According to the Ultralytic…
I installed it using the following command. Since this command is for CUDA 12.6, please execute it according to your environment.
pip3 install torch torchvision torchaudio --index-url https://download.pytorch.org/whl/cu126Next, I installed the Genesis package. While it can be installed via pip, I cloned the GitHub repository and installed it this time.
git clone https://github.com/Genesis-Embodied-AI/Genesis.git
cd Genesis
pip install -e .
Or:
pip install genesis-worldTrying Out Sample Programs
Although it was just recently released, there are already several articles experimenting with Genesis. I only tried three examples in this post, so please check other people's articles for more details.
▼The following page summarizes the execution results of sample programs with videos in an easy-to-understand way. It makes it clear what can be done.
https://note.com/npaka/n/nb76d7cf5aae7
Basic Code
▼I referred to the following page:
https://genesis-world.readthedocs.io/ja/latest/user_guide/getting_started/hello_genesis.html
The original program used a loop for processing, but since it finished immediately, I changed it to a while loop.
# https://genesis-world.readthedocs.io/ja/latest/user_guide/getting_started/hello_genesis.html
import genesis as gs
gs.init(backend=gs.cpu)
scene = gs.Scene(show_viewer=True)
plane = scene.add_entity(gs.morphs.Plane())
franka = scene.add_entity(
gs.morphs.MJCF(file='xml/franka_emika_panda/panda.xml'),
)
scene.build()
while True:
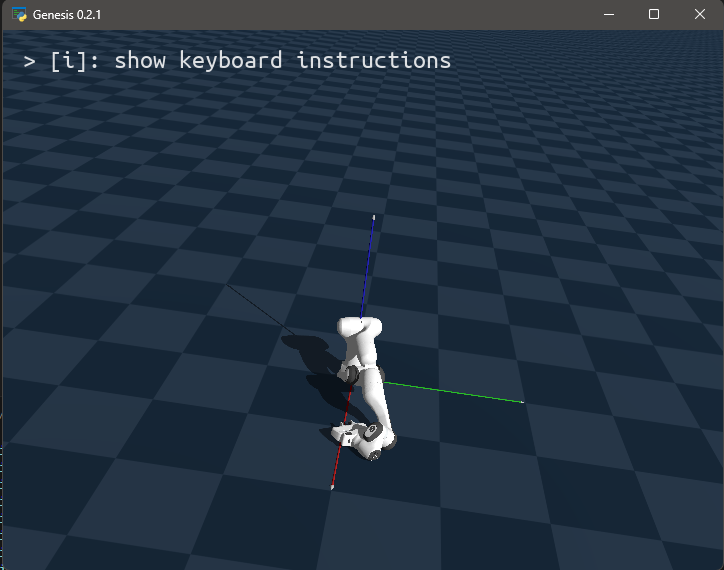
scene.step()▼Execution started.

▼A robot arm appeared. It is being affected by gravity.
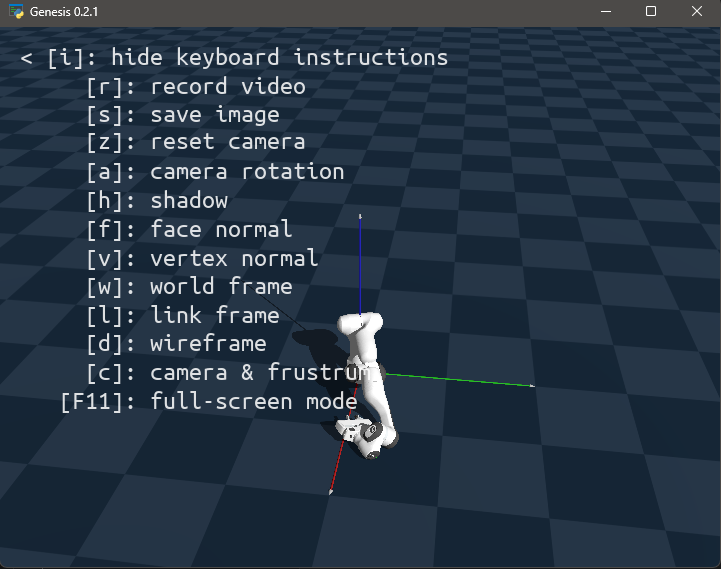
▼Pressing the I key displayed the key bindings. I could also change the camera perspective using the mouse.
Visualization
▼I referred to the following page:
https://genesis-world.readthedocs.io/ja/latest/user_guide/getting_started/visualization.html
After running the sample program on the page, the result was saved as video.mp4.
▼Recording is taking place while the camera rotates.
I tried running it after changing the program parameters as follows:
# https://genesis-world.readthedocs.io/ja/latest/user_guide/getting_started/visualization.html
import genesis as gs
gs.init(backend=gs.cpu)
scene = gs.Scene(
show_viewer = True,
viewer_options = gs.options.ViewerOptions(
res = (1280, 960),
camera_pos = (3.5, 0.0, 2.5),
camera_lookat = (0.0, 0.0, 0.5),
camera_fov = 40,
max_FPS = 60,
),
vis_options = gs.options.VisOptions(
show_world_frame = False, # ワールド座標系のフレームを表示
world_frame_size = 1.0, # ワールドフレームの長さを1.0メートルに設定
show_link_frame = True, # リンクフレームは非表示
show_cameras = True, # カメラのメッシュと視錐体は非表示
plane_reflection = True, # 平面反射を有効化
ambient_light = (0.5, 0.5, 0.5), # 環境光を設定
),
renderer=gs.renderers.Rasterizer(), # ラスタライザを使用
)
plane = scene.add_entity(
gs.morphs.Plane(),
)
franka = scene.add_entity(
gs.morphs.MJCF(file='xml/franka_emika_panda/panda.xml'),
)
cam = scene.add_camera(
res = (640, 480),
pos = (3.5, 0.0, 2.5),
lookat = (0, 0, 0.5),
fov = 30,
GUI = True,
)
scene.build()
# RGB、深度、セグメンテーションマスク、法線をレンダリング
rgb, depth, segmentation, normal = cam.render(rgb=True, depth=True, segmentation=True, normal=True)
cam.start_recording()
import numpy as np
for i in range(1000):
scene.step()
cam.set_pose(
pos = (3.0 * np.sin(i / 60), 3.0 * np.cos(i / 60), 2.5),
lookat = (0, 0, 0.5),
)
cam.render()
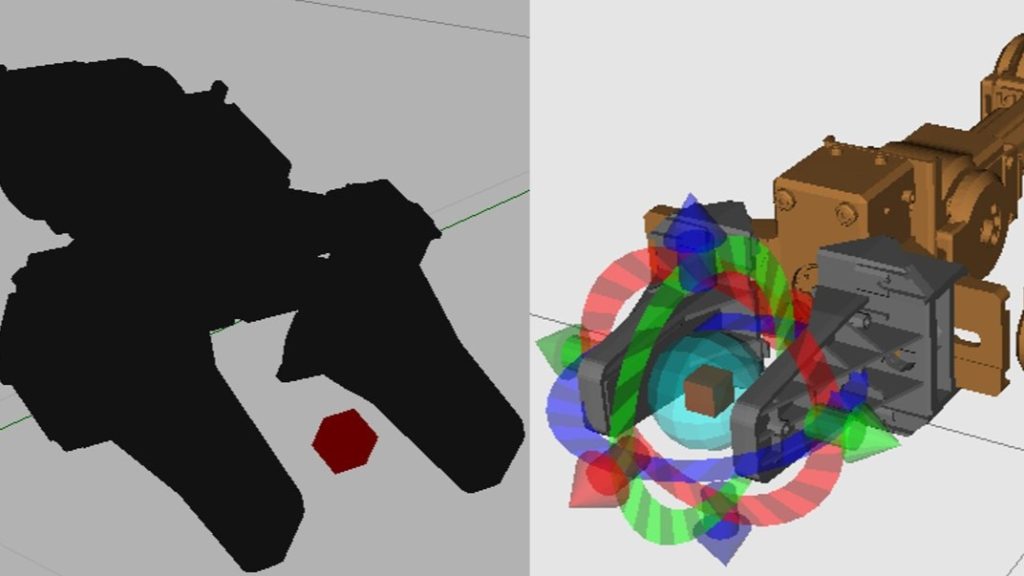
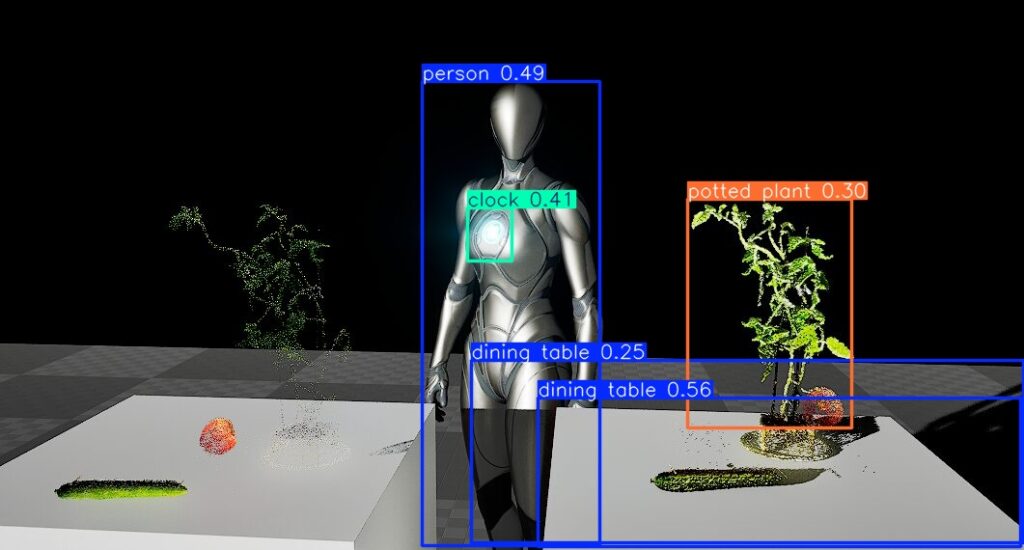
cam.stop_recording(save_to_filename='video.mp4', fps=60)▼Results were displayed in various patterns. This is due to enabling the rendering of RGB, depth, segmentation masks, and normals.
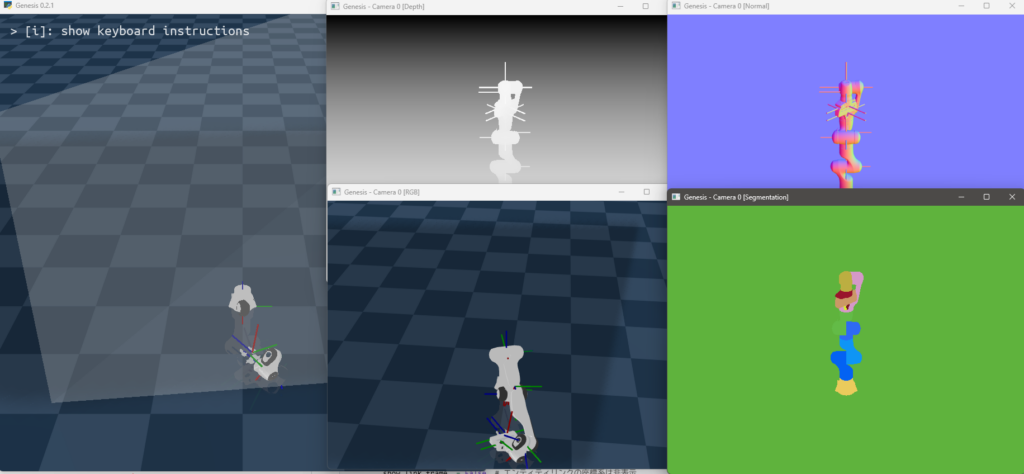
▼When I previously captured depth images with an Intel RealSense D435, the object outlines were blurry. While it depends on the depth camera, the simulation produces very clean images.
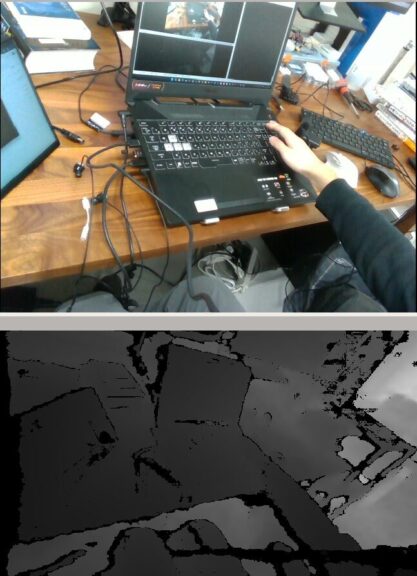
Object Detection with YOLO Part 3 (Integration with ROS, WSL2 Ubuntu 18.04)
Info This article is translated from Japanese to English. Introduction In this post, I tried integrating YOLO with ROS on Ubuntu 18.04 via WSL2.This setup is c…

▼I tried changing parameters such as ambient light, the number of rotations, and wireframe display.
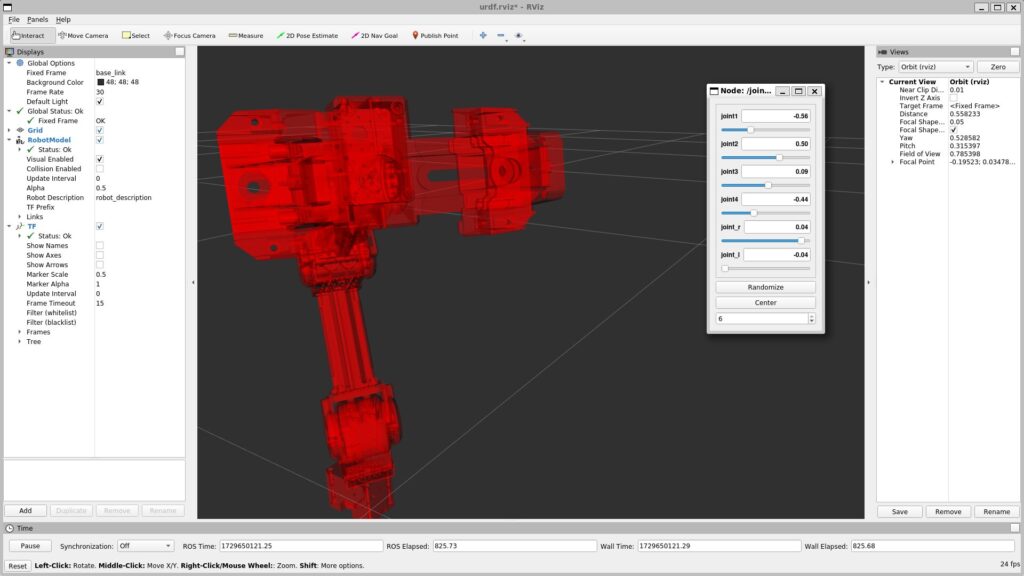
▼It looks similar to when loading URDF files in ROS. Since Genesis loads xml files, it seems they can be handled in a similar way.
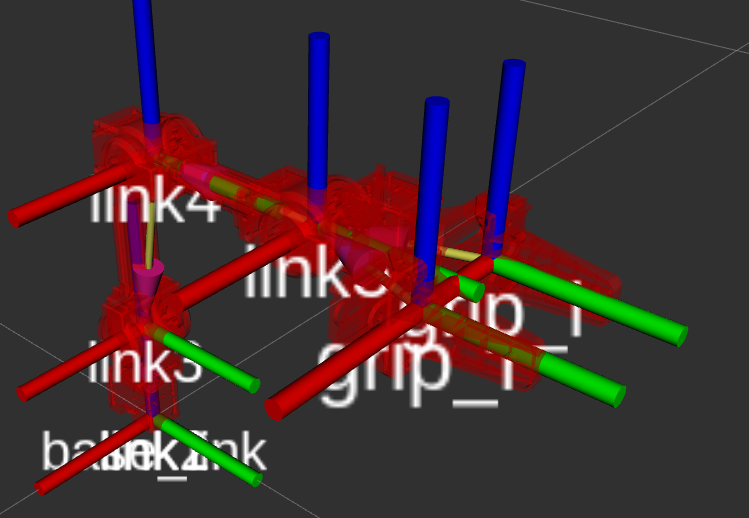
ROS1を使ってみる その4(URDFファイルの作成、Open Manipulator)
はじめに 今回はOpen ManipulatorのURDFファイルを作成してみました。 これまではROSですでに用意されていたOpen Manipulatorのモデルを利用していましたが、URDFファ…
Following this sample, there was a section on photorealistic ray-tracing rendering, but it was written for execution in an Ubuntu environment. It is unclear if it can run on Windows, so I might try it in a WSL environment later. The visuals looked like Unreal Engine.
Training a Drone Hovering Policy Using Reinforcement Learning
▼I referred to the following page:
https://genesis-world.readthedocs.io/ja/latest/user_guide/getting_started/hover_env.html
▼The idea reportedly originated from this paper on the Nature website:
https://www.nature.com/articles/s41586-023-06419-4
▼The following repository is used:
https://github.com/leggedrobotics/rsl_rl
I installed the necessary packages with the following commands:
git clone https://github.com/leggedrobotics/rsl_rl
cd rsl_rl
git checkout v1.0.2
pip install -e .
pip install tensorboard
I then ran the Genesis sample program. Note that -v is the visualization option.
cd ..
cd .\Genesis\examples\drone
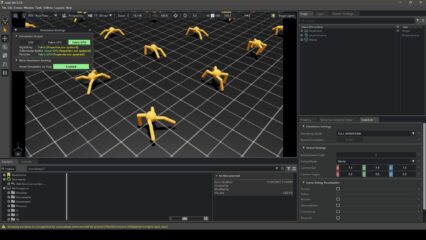
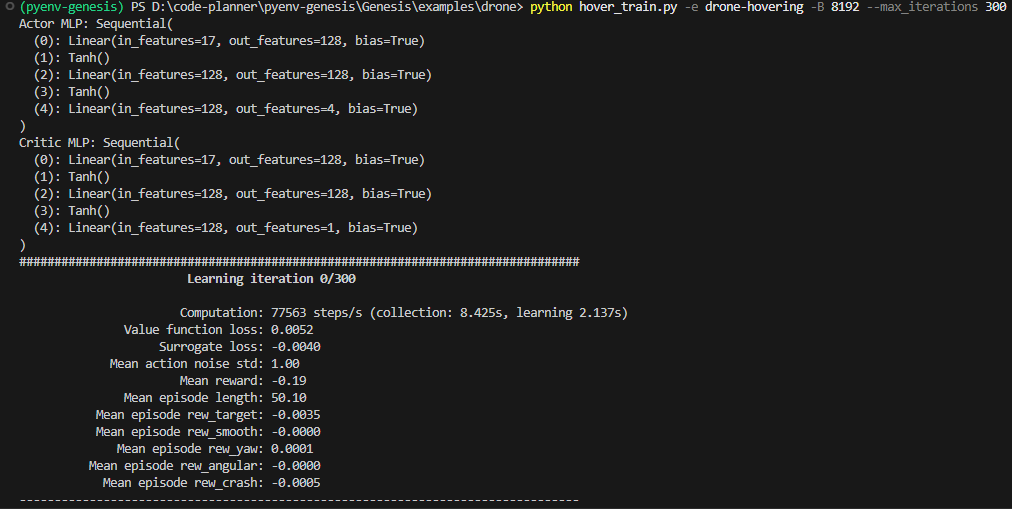
python hover_train.py -e drone-hovering -B 8192 --max_iterations 300 -v▼After a while, the progress started being output.
▼The drone moved as follows:
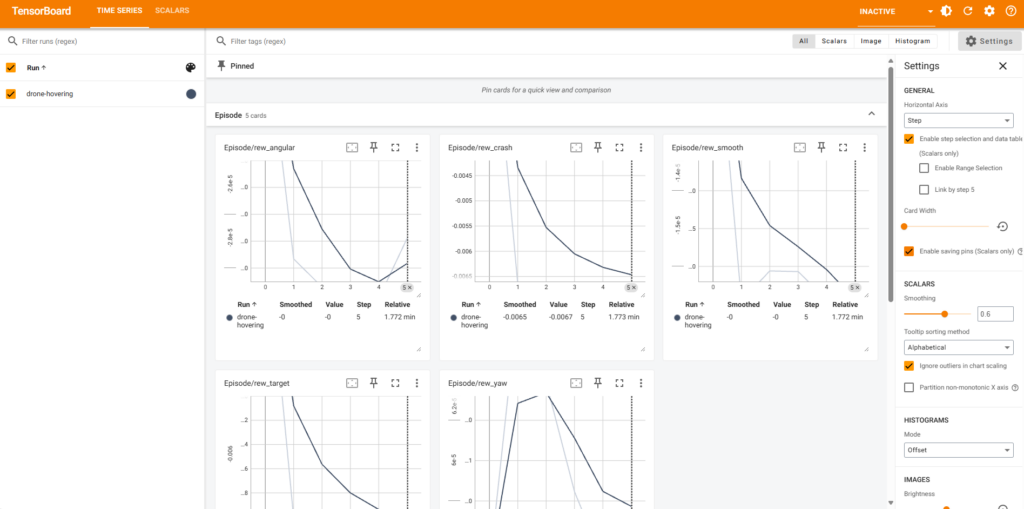
During execution, I started TensorBoard with the following command:
tensorboard --logdir logs▼Accessing http://localhost:6006 in a browser showed the data being displayed.
It likely depends on the PC specs, but it took a long time to start and execute. Performing simulations while calculating seems to be a heavy load. Even in Unreal Engine, processing tends to slow down as the number of objects increases.
▼It ultimately took 7477.63s, so about 2 hours.
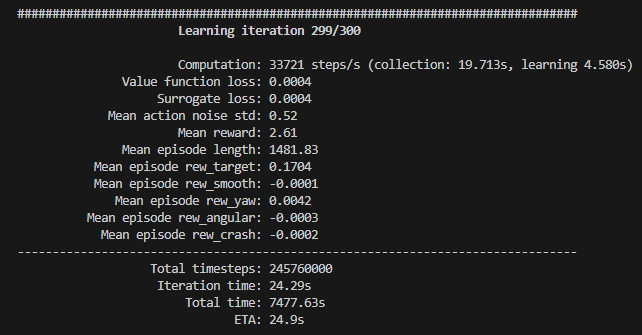
▼I don't fully understand how to read the data yet, but the values in the Train section showed an increasing trend.

I also performed an evaluation after training using the following command:
python hover_eval.py -e drone-hovering --ckpt 300 --record▼Here is the video saved as the simulation result:
The drone's flight is very realistic. I would love to use drone objects that move like this in Unreal Engine if they were available.
If this movement was achieved through learning, it is truly the ideal way to use a simulation.
About Automatic 3D Scene Generation
Demos showing automatic 3D scene generation from text were introduced on the Genesis introduction page and social media.
▼It is also introduced here:
I really wanted to try it, but it seems it hasn't been implemented in the GitHub code yet. Running gs.generate(), which was in the demo video, resulted in an "does not exist" error.
Searching on GitHub, I found that others were also curious, and the response was that it hasn't been implemented yet.
▼Update information is expected to be announced in this issue:
https://github.com/Genesis-Embodied-AI/Genesis/issues/6
I have high hopes for the future.
Finally
While some parts are still unimplemented, if development progresses and features shown in the demo videos become available, it will be very useful for robot simulation development.
I feel there might be other tools for generating 3D spaces from text, so I’d like to try them if I find any. Creating spaces in Unreal Engine is always a lot of work.
If multi-axis robot arm kinematics calculations can be done easily with Python code, I would definitely want to use them.