Creating Node for Node-RED MCU Part 2 (Servo node)
Introduction
I previously posted an article on Qiita about creating a Servo node for a Node-RED MCU. At that time, I only did the processing of msg.payload that it would be used with the PWM out node.
▼Here is the article.
https://qiita.com/background/items/9b820251aa9dda5a3167
This time I read the source code further and tried to make it available only in the Servo node, referring to the PWM out node.
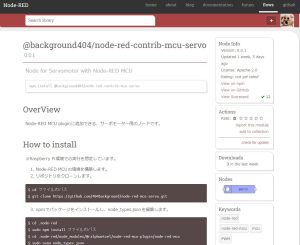
▼The program is also available on GitHub.
https://github.com/404background/node-red-mcu-servo/tree/develop
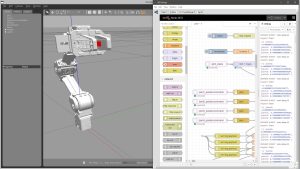
▼Node-RED installed on a Raspberry Pi 400 and running.

▼Previous article is here.
Creating Node for Node-RED MCU Part 1 (LINE Notify)
Introduction In a previous article, I introduced information related to Node-RED that I used during the hackathon. Since then, I have been experimenting with…
Read the source code
File Structure
▼Nodes specific to Node-RED MCU are here
https://github.com/phoddie/node-red-mcu/tree/main/nodes/mcu
For example, the pwm node folder contains the following four files.
- manifest.json : Necessary to include the node to build. node_types.json describes the path.
- mcu_pwm.html : Configuring the view on Node-RED
- mcu_pwm.js : Creating nodes to be displayed on Node-RED
- pwm.js : Describes the process of a node
This time, read the pwm.js file in particular.
▼Here from the repository
https://github.com/phoddie/node-red-mcu/blob/main/nodes/mcu/pwm/pwm.js
Contents of pwm.js
Node is imported from “nodered”.
import {Node} from "nodered";▼The Node class is exported in node-red-mcu/nodered.js. The RED class is also found here.
In pwm.js, the Node class is inherited, and processing is described in the PWMOutNode class.
class PWMOutNode extends Node { ...The config is used. The value of the defaults that accepts input from input in the html file can be received in the js file by the name of the config. variable.
▼Here is more information about the property
https://nodered.jp/docs/creating-nodes/properties
Note that the values you set in credentials will not be included when you export the flow, nor will they be included when you build with Node-RED MCU.
"onStart" sets the pins and frequency." status" is what is displayed in the debugger.
onStart(config) { ...
	try {
			const options = {
				pin: config.pin,
			};
			if (config.hz)
				options.hz = config.hz;
			this.#io = io = new device.io.PWM(options);
			cache.set(config.pin, io);
		}
		catch {
			this.status({fill: "red", shape: "dot", text: "node-red:common.status.error"});
		}
In onMessage, processing is executed based on the value of msg.payload.
onMessage(msg, done) {
		if (this.#io) {
			this.#io.write(msg.payload * ((1 << this.#io.resolution) - 1));
			this.status({fill:"green", shape:"dot", text: msg.payload.toString()});
		}
		done();
	}
The resolution property is used in the calculation, but this seems to be set on the moddable side. It was also found in the sample.
▼More information can be found here, and PWM classes can also be found here.
https://github.com/Moddable-OpenSource/moddable/blob/public/documentation/io/io.md#pwm
Other: Writing JavaScript
The “??=” is called the null coalescing assignment, and is used to assign null or undefined values.
▼It is described here.
There is a # sign on io, I think this is the way to write it for ES2022. It seems to be a private property.
▼It is described here.
https://jsprimer.net/basic/class/#private-class-fields
Create Node
Let's create the Servo node.
First, for the html file, I incorporate the mcuHelper that was also used in the PWM out node. This is a summary of common processes.
▼mcu_servo.html is here. outputs is set to 0 since it is not connected to the PWM out node.
<script type="text/javascript">
	RED.nodes.registerType('mcu_servo',{
		category: mcuHelper.category,
		color: mcuHelper.color,
		defaults: {
			name: { value:"SG90" },
			pin: { validate: RED.validators.number() },
			hz: { value:"50" },
			pulseMin: {value:"0.5"},
			pulseMax: {value:"2.4"},
			angleMin: {value:"0"},
			angleMax: {value:"180"},
			moddable_manifest: {value: {include: "./manifest.json"}},
		},
		inputs:1,
		outputs:0,
		icon: "serial.svg",
		paletteLabel: 'Servo',
		label: function() {
			return this.name || "Servo " + this.pin;
		},
		oneditprepare: function() {
			const div = $("#node-mcu-rows");
			mcuHelper.appendProperties.PWM(div, "io", {});
			mcuHelper.restoreProperties.PWM(this, "io");
		},
		oneditsave: function() {
			mcuHelper.saveProperties.PWM(this, "io");
		},
	});
</script>

<script type="text/html" data-template-name="mcu_servo">
	<div class="form-row">
		<label for="node-input-name"><i class="fa fa-tag"></i> Name</label>
		<input type="text" id="node-input-name" placeholder="Servo">
	</div>
	<div id="node-mcu-rows">
	</div>
	<div class="form-row">
        <label for="node-input-pulse"><i class="fa fa-arrows-h"></i> pulse width(us)</label>
        <span for="node-input-pulseMin">min</span>
        <input type="number" id="node-input-pulseMin" style="width:60px" step="0.1">
        <span for="node-input-pulseMax" style="margin-left:22px;">max</span>
        <input type="number" id="node-input-pulseMax" style="width:60px" step="0.1">
    </div>
	<div class="form-row">
        <label for="node-input-angle"><i class="fa fa-arrows-h"></i> angle</label>
        <span for="node-input-angleMin">min</span>
        <input type="number" id="node-input-angleMin" style="width:60px" step="0.1">
        <span for="node-input-angleMax" style="margin-left:22px;">max</span>
        <input type="number" id="node-input-angleMax" style="width:60px" step="0.1">
    </div>
</script>

<script type="text/markdown" data-help-name="mcu_servo">

</script>
▼The input field for a node looks like this.
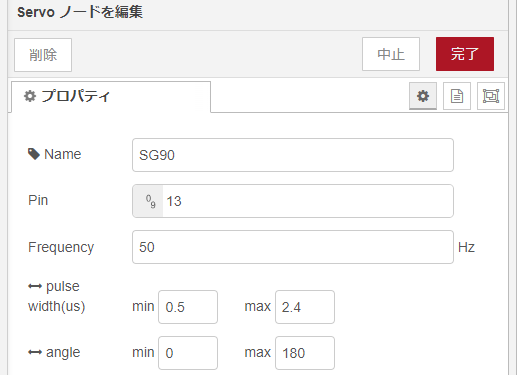
Based on the set values, the calculation is done in servo.js. I had an error with the numerical calculation, but passing it to the Number function solved the problem. It may be reliable to convert it to a numerical value.
▼Learn more about Number functions
https://developer.mozilla.org/ja/docs/Web/JavaScript/Reference/Global_Objects/Number
▼The program is here.
import {Node} from "nodered";
let cache;

class ServoNode extends Node {
	#io; #cycle; #pulseWidth; #angleWidth; #pulseMin;

	onStart(config) {
		super.onStart(config);

		if (!globalThis.device?.io?.PWM)
			return void this.status({fill: "red", shape: "dot", text: "node-red:common.status.error"});

		cache ??= new Map;
		let io = cache.get(config.pin);
        this.#cycle = 1 / Number(config.hz) * 10 ** 3;
        this.#pulseWidth = Number(config.pulseMax) - Number(config.pulseMin);
        this.#angleWidth = Number(config.angleMax) - Number(config.angleMin);
		this.#pulseMin = Number(config.pulseMin);

		if (io) {
			this.#io = io;
		}
		else {
			try {
				const options = {
					pin: config.pin,
				};
				if (config.hz)
					options.hz = config.hz;
				this.#io = io = new device.io.PWM(options);
				cache.set(config.pin, io);
			}
			catch {
				this.status({fill: "red", shape: "dot", text: "node-red:common.status.error"});
			}
		}
	}
	onMessage(msg, done) {
        let ratio = (Number(msg.payload) / this.#angleWidth * this.#pulseWidth + this.#pulseMin) / this.#cycle;
		if (this.#io) {
			this.#io.write(ratio * ((1 << this.#io.resolution) - 1));
			this.status({fill:"green", shape:"dot", text: ratio.toString()});
		}
		done();
	}

	static type = "mcu_servo";
	static {
		RED.nodes.registerType(this.type, this);
	}
}
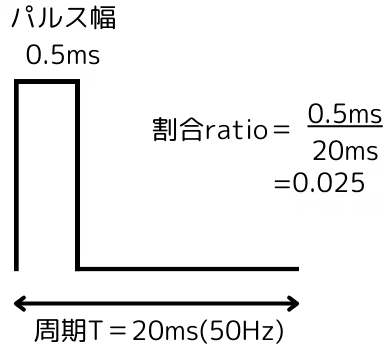
The PWM out node adjusts the output with a value of 0~1. From the period and pulse width, the value is calculated to control the servo motor.
▼For SG90, it is 0.5ms~2.4ms. 0.5ms is 0.025.
The other files are almost the same as the PWM out node.
▼manifest.json is here.
{
	"modules": {
		"servo": "./servo"
	},
	"preload": [
		"servo"
	]
}
▼mcu_servo.js is here.
module.exports = function(RED) {
    function ServoNode(config) {
        RED.nodes.createNode(this, config);
		console.log(config)
    }
    RED.nodes.registerType("mcu_servo", ServoNode);
}
Install Node
You can install the package by specifying a folder with the following command. Run it in the directory where you built the Node-RED MCU environment; it will be added to the node_modules folder.
npm install <Folder Path>
Add the path of manifest.json to node_types.json in node_modules/@ralphwetzel/node-red-mcu-plugin/node-red-mcu. This time specify it as a relative path.
▼It will be added to the same node_modules folder, so it goes back that far.
"servo": "../../../mcu_servo/manifest.json"
▼If the path is not set properly or the name in manifest.json is not proper, you will get the following error.
Disabling unsupported node type "mcu_servo"!
Start Node-RED and check to see if the node has been added.
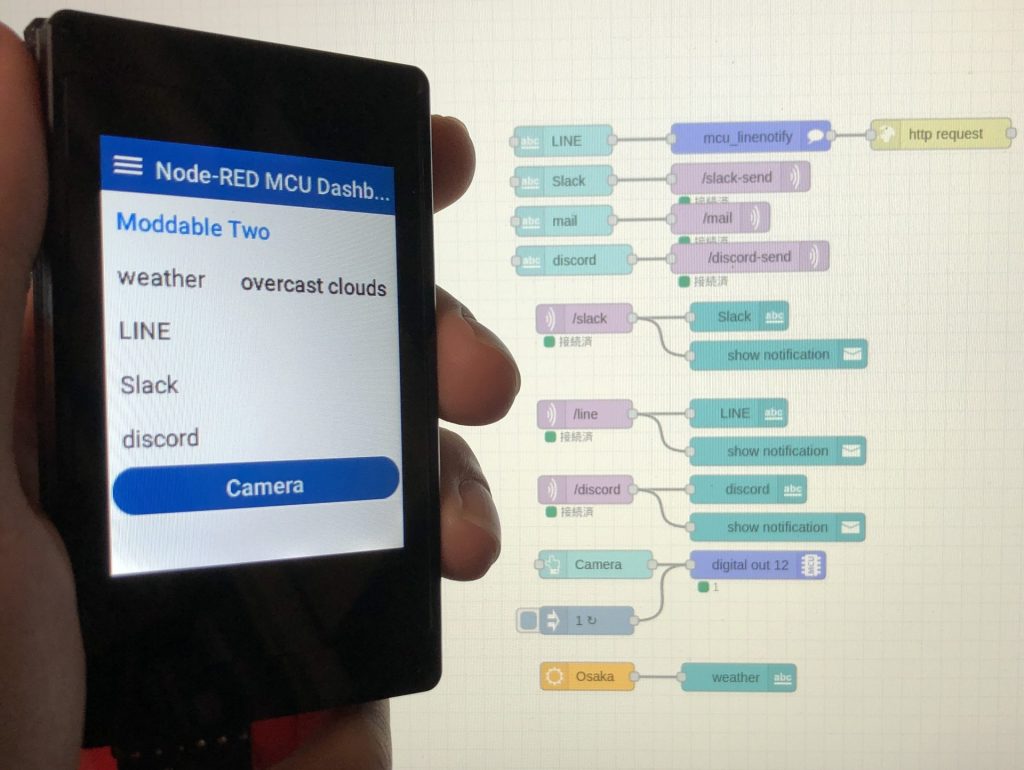
▼After installation, I connected it to the slider of the ui node.
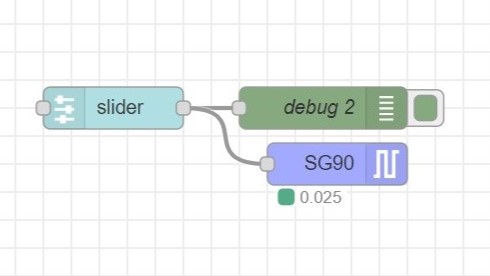
Note that if the pins used for the display and the pins for the servo motor are covered, the screen may not update.
▼Here is how it works
Finally
It took me a while to read it because there are still many things I don't know, such as whether it is written in the node-red-mcu or moddable repository.
I'm thinking that if I can use the Moddable side of the program, I'd like to have a WiFi related node. I would like to be able to make it an access point and set the SSID.