Trying Out XIAO ESP32C3 Part 7 (RTC and Fetching Network Time)
Introduction
In this post, I experimented with using an RTC (Real-Time Clock) and a network connection to keep track of time on a microcontroller. I'm planning to use this for IoT applications, specifically for an automated watering system.
▼I’ve been growing tomatoes at home and wanted to automate the process, but the fruits ripened before I made much progress!

▼Previous articles:
Trying Out XIAO ESP32C3 Part 5 (Bluefruit Connect, BLE Communication with iPhone)
Info This article is translated from Japanese to English. Introduction In this post, I experimented with BLE (Bluetooth Low Energy) communication between the X…
Trying Out XIAO ESP32C3 Part 6 (Communication with DUALSHOCK 4 using Node-RED)
Info This article is translated from Japanese to English. Introduction In this post, I tried operating a small robot equipped with a XIAO ESP32C3 using a DUALS…

Building the Circuit
For the RTC, I used a module based on the RX8900.
▼I purchased it from Akizuki Denshi Tsusho:
https://akizukidenshi.com/catalog/g/g113009
The microcontroller is the XIAO ESP32C3.
▼The product page for the XIAO ESP32C3 is here:
https://akizukidenshi.com/catalog/g/g117454
Seeed Studio XIAO ESP32C3 — スイッチサイエンス
Bluetooth Low EnergyとWi-Fiを搭載した小型マイコンボードです。IoTや携帯するアプリケーションに最適です。工事設計認証を取得しています。


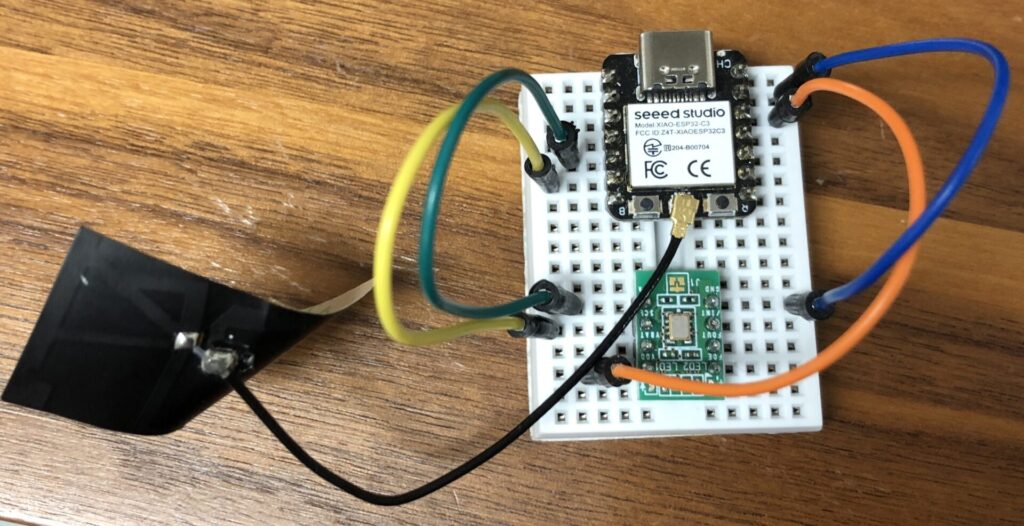
Since it uses I2C communication, I connected the SDA and SCL pins accordingly. I connected the RTC's VCC to the 3.3V pin of the microcontroller and shared the GND.
▼I wired it up on a small breadboard.

Precautions When Uploading Programs
While uploading the program via the Arduino IDE for the first time in a while, I encountered an upload error. I’d like to review the solution here.
▼Seeed Studio’s official account posted about the "bootloader mode":
As is common with ESP32-series microcontrollers, you can enter flashing mode by holding the BOOT button while pressing the RESET button. I experienced some errors after flashing, possibly due to my recent setup of Node-RED MCU or changes to the ESP32 board version in the Arduino IDE.
▼An OSError occurred.

The flashing itself was successful, and the program seemed to run. However, the Serial Monitor wouldn't display anything immediately; I found that sending a random character often forced the output to appear.
Testing the Sample Program
I tried the sample program provided on the Akizuki Denshi Tsusho website.
▼Found on this page:
https://akizukidenshi.com/catalog/g/g113009
▼The program was designed to wait for a manual time setting via the Serial Monitor initially.
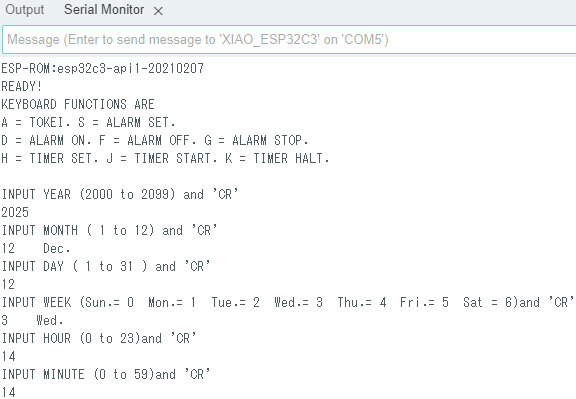
▼Once set, the time was displayed every second.
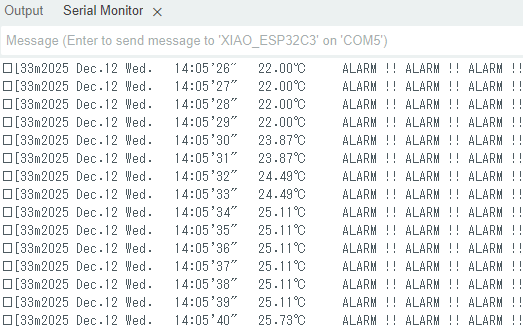
▼It also measures temperature. When I placed my finger on the module, the temperature reading rose.
The sample program was quite long, so I removed the unnecessary parts and separated constants and functions into a header file to keep the main .ino file compact.
Fetching Time from the Internet
Since the XIAO ESP32C3 has Wi-Fi capabilities, I tested fetching the time from the network using NTP (Network Time Protocol). I had ChatGPT generate the following code:
#include <WiFi.h>
#include "time.h"

const char* ssid     = "Your_SSID";
const char* password = "Your_Password";

const char* ntpServer = "pool.ntp.org";
const long  gmtOffset_sec = 9 * 3600;    // Japan Time (GMT+9)
const int   daylightOffset_sec = 0;

void setup() {
    Serial.begin(115200);
    WiFi.begin(ssid, password);
    while (WiFi.status() != WL_CONNECTED) { delay(500); Serial.print("."); }
    configTime(gmtOffset_sec, daylightOffset_sec, ntpServer);
}

void loop() {
    struct tm timeinfo;
    if (!getLocalTime(&timeinfo)) return;
    Serial.printf("Current Time: %04d-%02d-%02d %02d:%02d:%02d\n",
                  timeinfo.tm_year + 1900, timeinfo.tm_mon + 1, timeinfo.tm_mday,
                  timeinfo.tm_hour, timeinfo.tm_min, timeinfo.tm_sec);
    delay(10000);
}
▼I connected the microcontroller to my smartphone's hotspot and successfully retrieved the time. This logic can be used to set the initial date and time.

Integrating Network Time with RTC
While reading the RTC sample program, I found the I2C address handling a bit complex. In the end, I realized the READ_AND_TX() function was handling the per-second processing.
I decided to use the RTC solely for incrementing time by the second while managing the date and time values using a separate library. I had ChatGPT write a program to manage the clock by incrementing seconds:
#include <TimeLib.h>

void setup() {
    Serial.begin(115200);

    // Set initial time
    setTime(14, 30, 0, 12, 2, 2025);
}

void loop() {
    static unsigned long lastUpdate = 0;

    if (millis() - lastUpdate >= 1000) {
        lastUpdate = millis();
        Serial.print(year());
        Serial.print("/");
        Serial.print(month());
        Serial.print("/");
        Serial.print(day());
        Serial.print(" ");
        Serial.print(hour());
        Serial.print(":");
        Serial.print(minute());
        Serial.print(":");
        Serial.println(second());

        // Increment time and print...
        adjustTime(1);
    }
}
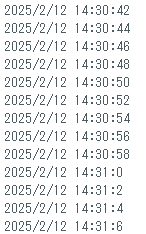
▼The time incremented correctly. Although adjustTime(1) should add one second, I found I needed to adjust the logic slightly to keep it accurate.
I combined the previous programs so that the system synchronizes with the network time only on the first run, and then increments by one second using the RTC.
I created and executed the following program. It retrieves the network time five times during the initial setup.
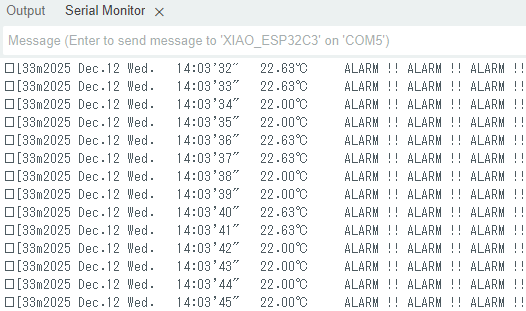
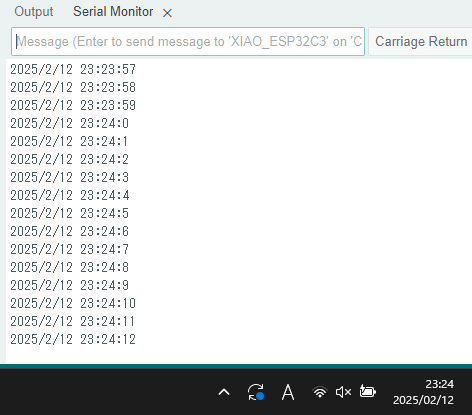
▼The time is being retrieved correctly.
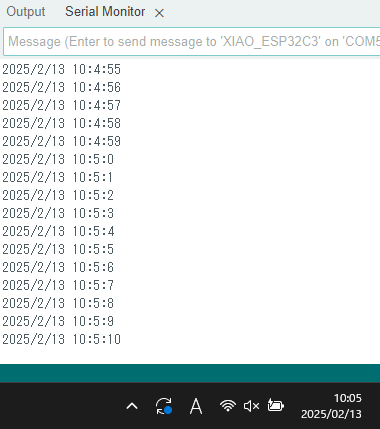
▼I left it running overnight and checked it in the morning; the time hadn't drifted yet.
I plan to leave it for a few days to verify how much it drifts. The tricky part is deciding what to use as the "true" time—perhaps a time signal service is the most reliable?
Finally
I’ve made it easy to set the time using both RTC and network synchronization.
There might be some mistakes in how I used the libraries, so I intend to run it for a long period to verify its stability.
While ChatGPT is great for generating small programs for basic confirmation, it sometimes suggests methods that don't exist in certain libraries. It seems human adjustment is still necessary to some extent.