Trying Out XIAO ESP32C3 Part 2 (analogWrite Function and Servo Motors)
Introduction
In this post, I experimented with the analogWrite function and servo motor control using the XIAO ESP32C3.
Regarding the servo motor, existing libraries did not work. Therefore, I controlled it by sending pulses while referring to the datasheet.
▼This was also discussed here, but the proposed library resulted in an error for me.
https://forum.arduino.cc/t/xiao-esp32-c3-pwm-servo-control/1087850
▼The product page for the XIAO ESP32C3 is here:
https://akizukidenshi.com/catalog/g/g117454
Seeed Studio XIAO ESP32C3 — スイッチサイエンス
Bluetooth Low EnergyとWi-Fiを搭載した小型マイコンボードです。IoTや携帯するアプリケーションに最適です。工事設計認証を取得しています。


▼Previous article:
Using XIAO ESP32C3 Part 1 (Battery, Bluetooth)
Introduction The previous article was about my exhibit at Maker Faire Kyoto 2023. This time I will talk about the microcontroller I used for our exhibit, the…
Precautions Regarding Pins
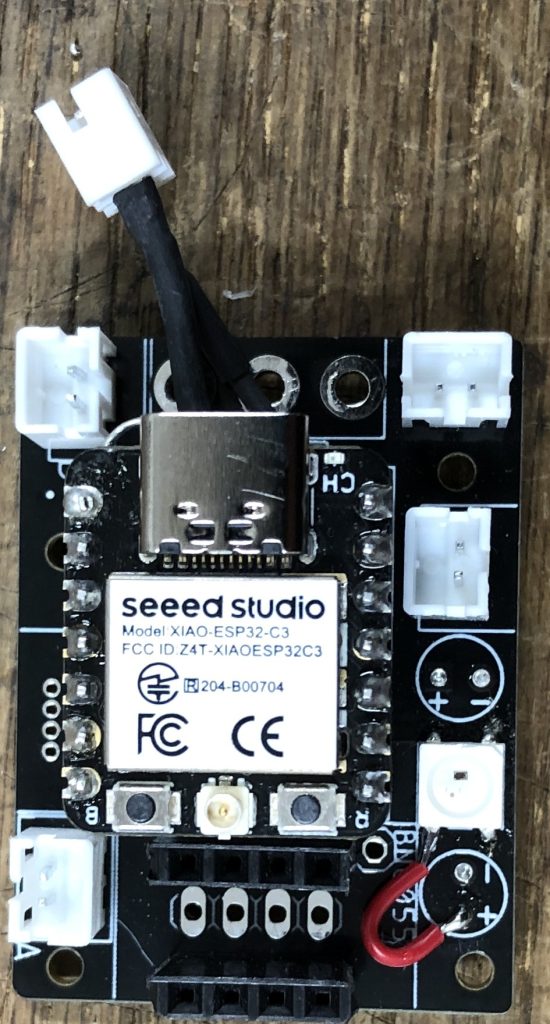
While researching, I discovered that some pins on the XIAO ESP32C3 are connected to internal circuits. Pins D6, D8, and D9 require caution.
▼More details can be found here:
Seeed Studio XIAO ESP32C3のI/O割り付けに注意 - Seeed K.K. エンジニアブログ
Seeed K.K.の松岡です。 最近、Seeed Studio XIAO ESP32C3を使った某プロジェクトの回路を設計しました。基板を作って動かしてみると、なにもしていないのにLEDが点灯する…

▼Information on the various modes can be found here:
https://wiki.seeedstudio.com/XIAO_ESP32C3_Getting_Started/#strapping-pins
Performing PWM Control
In the Arduino ecosystem, the analogWrite function is typically used for PWM output. Since it wasn't available for standard ESP boards, I used to use the ledcWrite function. However, it seems that analogWrite can actually be used with the XIAO ESP32C3.
▼It was mentioned here:
https://qiita.com/ginger/items/476012a24c6b30121606
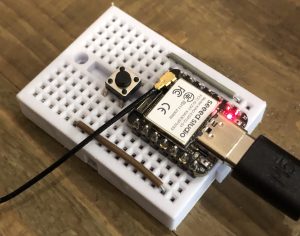
I tried the "Fade" program, which adjusts LED brightness.
▼I used the standard Arduino "Fade" code as is. It works perfectly.
Controlling a Servo Motor
This time, I am controlling the SG90. First, let's look at the datasheet.
▼Datasheet:
https://akizukidenshi.com/download/ds/towerpro/SG90_a.pdf
It appears control is handled by the duration of HIGH and LOW intervals:
- 0.5ms for the -90° position
- 1.45ms for the 0° position
- 2.4ms for the 90° position
- The cycle period is 20ms
It seems manageable with functions like digitalWrite() and delay(). Let's write a program and test it.
Precautions Regarding delay
▼I referred to the following article for pulse control:
【Arduino入門編⑧】サーボモーターを動かしてみる。PWM制御についていの解説です! | ぶらり@web走り書き
【Arduino入門編⑧】サーボモーターを動かしてみる。PWM制御についていの解説です!

Normally, delay() is used to pause the program with units in milliseconds (ms).
Checking the official reference for delay(), the argument is an unsigned long type. Since it takes integer values from 0 to 4,294,967,295, decimal values cannot be used. However, the datasheet requires control between 0.5ms and 2.4ms.
Therefore, to control time intervals in microseconds (μs) instead of ms, I use delayMicroseconds() instead of delay().
▼Page regarding delay():
https://www.arduino.cc/reference/en/language/functions/time/delay/
▼Page regarding unsigned long:
https://www.arduino.cc/reference/en/language/variables/data-types/unsignedlong/
▼Page regarding delayMicroseconds():
https://www.arduino.cc/reference/en/language/functions/time/delaymicroseconds/
Verifying with Arduino Nano
The SG90 datasheet states the "Power and Signal" should be 4.8V to 5V, but the pin voltage for ESP32-based boards is 3.3V. Just to be safe, I decided to verify the operation with a 5V Arduino Nano first.
▼Verified with Arduino Nano and the servo motor.


▼With the Arduino Nano, you can use standard libraries. Here is how the "Sweep" example from the Servo library looks:
▼Here is the pulse control program without using a library. I used a for loop to achieve control similar to "Sweep."
▼Actual operation:
Verifying with XIAO ESP32C3
Unlike the verification with the Arduino Nano, I noticed the rotation was slow until the Serial Monitor was opened. For this version, I have omitted the serial communication part.
Also, while I used pin 9 in the video, as mentioned earlier, it has internal connections. I changed the program to use pin 10, and it worked correctly.
▼Program for the XIAO ESP32C3:
▼Actual operation:
▼By the way, the SG92R, which has slightly more torque than the SG90, could be controlled in the same way.
Finally
I was able to control a servo motor without using a library. Since I only used standard Arduino functions, this method should work on other boards as well.
I am a bit concerned that the rotation is slower on the XIAO ESP32C3 compared to the Arduino Nano. Perhaps the signal voltage is indeed better at 4.8V to 5V.
Personally, I was surprised that the analogWrite function worked. I’m more used to it than ledcWrite, and it’s simple and easy to use.