Trying Out Jetson Xavier Part 1 (JetPack 5.1.5 Setup)
Introduction
I’ve been participating in the TechSeeker Hackathon 2025 recently, and as a participant benefit, I was able to purchase a Jetson Xavier for just 10,000 yen. In this post, I’ll walk through how I set it up.
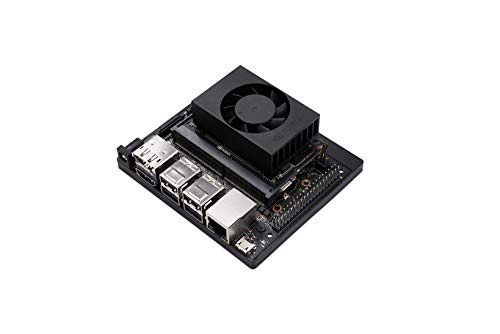
The model I bought is a small PC from AVerMedia equipped with the NVIDIA Jetson Xavier NX module. Because of this, some parts differ from the official NVIDIA Developer Kit.
▼If they still have stock, it should be available at Kyoritsu Ele-Shop.
https://eleshop.jp/shop/g/gO4Q31C/?srsltid=AfmBOoqnIPltjAi5dFnPhVe9owcBEl9zUNk884SEyOTO6mScrpFw9EeI
▼I saw used units being sold in stores for around 30,000 yen.
▼It also seems to be available on this site.
https://www.ads-tec.co.jp/imaging/nx211b-nx211b-16g
▼The module itself usually costs around 100,000 yen. While 30,000 yen is already a bargain, 10,000 yen is an absolute steal.

I’m planning to use this as a home server.
▼By the way, the Jetson Nano I bought previously broke because the power supply shorted out for some reason. Maybe a case is mandatory…
Jetson Nanoを使ってみる(周辺機器、リモートデスクトップ接続)
はじめに 以前Jetson Nanoを手に入れたので、今回はこれからロボットの開発をするための準備です。追加で購入しないといけないものが色々とありました。 CLI(コマン…
▼Previous articles are here:
Object Detection with YOLO Part 3 (Integration with ROS, WSL2 Ubuntu 18.04)
Info This article is translated from Japanese to English. Introduction In this post, I tried integrating YOLO with ROS on Ubuntu 18.04 via WSL2.This setup is c…

Shopping: Upgrading Laptop Memory (ASUS TUF Gaming A15, gpt-oss-20b)
Info This article is translated from Japanese to English. Introduction In this post, I’ll be sharing my experience upgrading the RAM in my daily-use laptop fro…
Purchase & Unboxing
I unboxed it immediately and removed the screws.
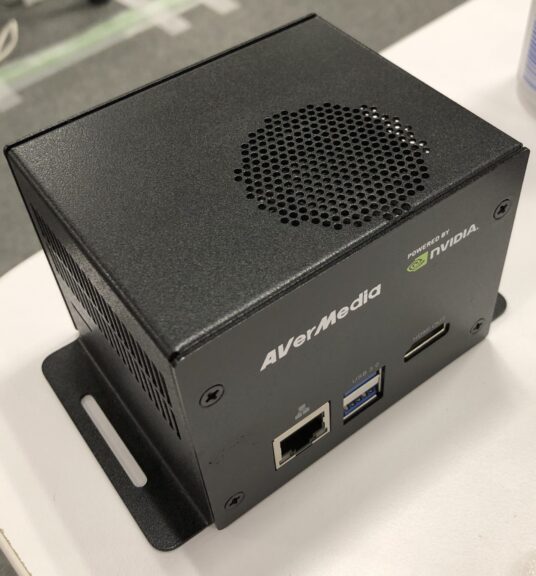
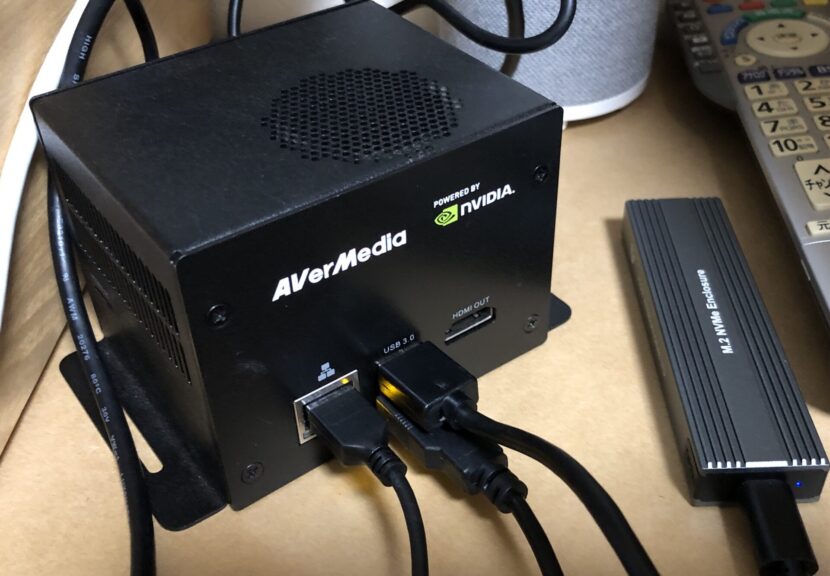
▼Here is the exterior. It has HDMI, USB, LAN ports, and a micro SD card slot.
▼Opening the side reveals this. There is also a connector for a camera.
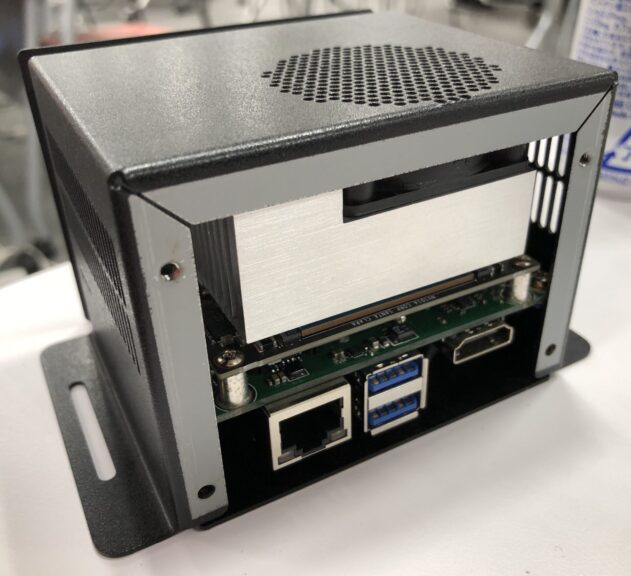
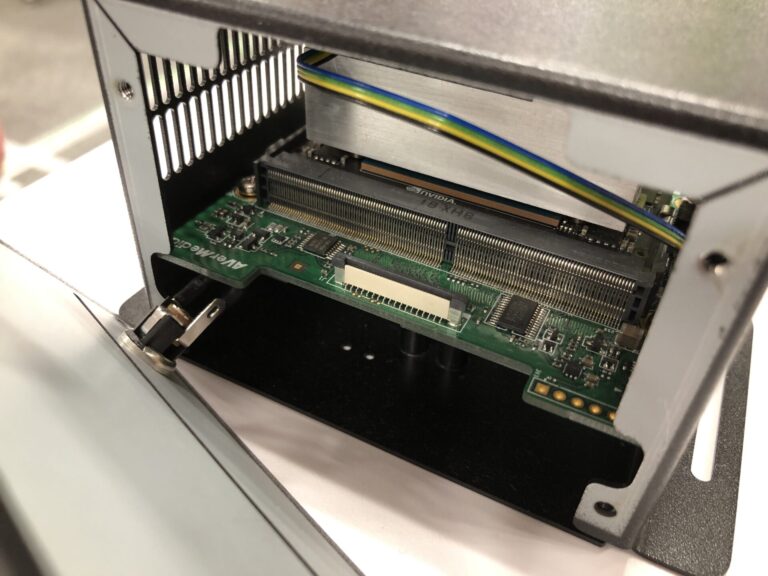
▼Opening it further looks like this. Instead of the typical black NVIDIA heatsink, it comes with a fan. The board says AVerMedia.
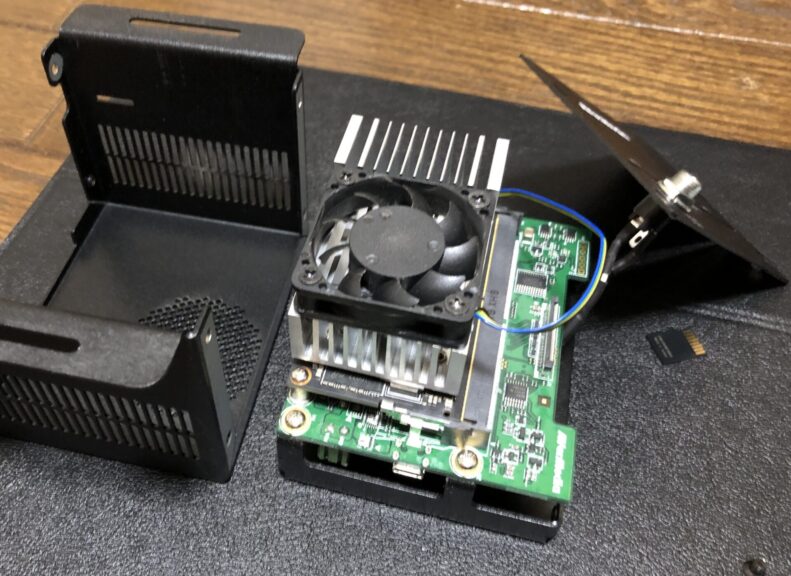
The system fits compactly if you write the image to the internal 16GB eMMC or a micro SD card.
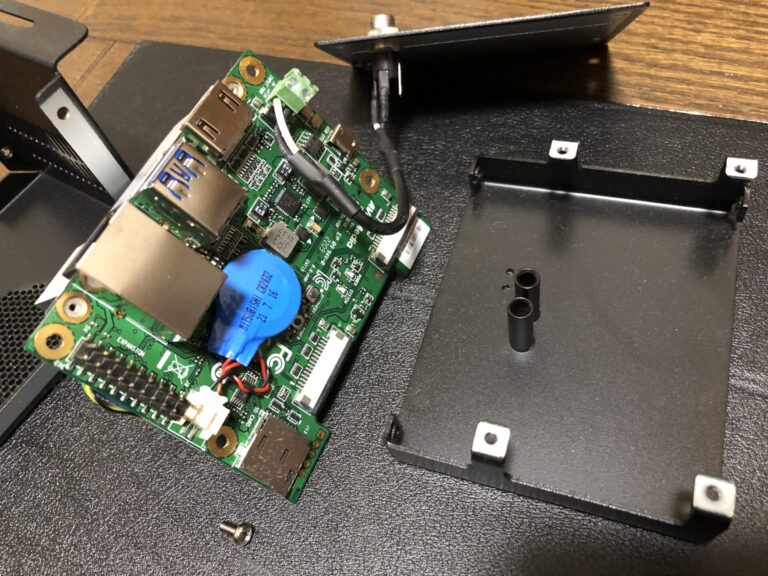
Since I was worried about running out of space on an SD card, I bought an M.2 SSD beforehand, but I realized after taking it apart that there is no M.2 slot. It seems only the official NVIDIA Developer Kit has the slot…
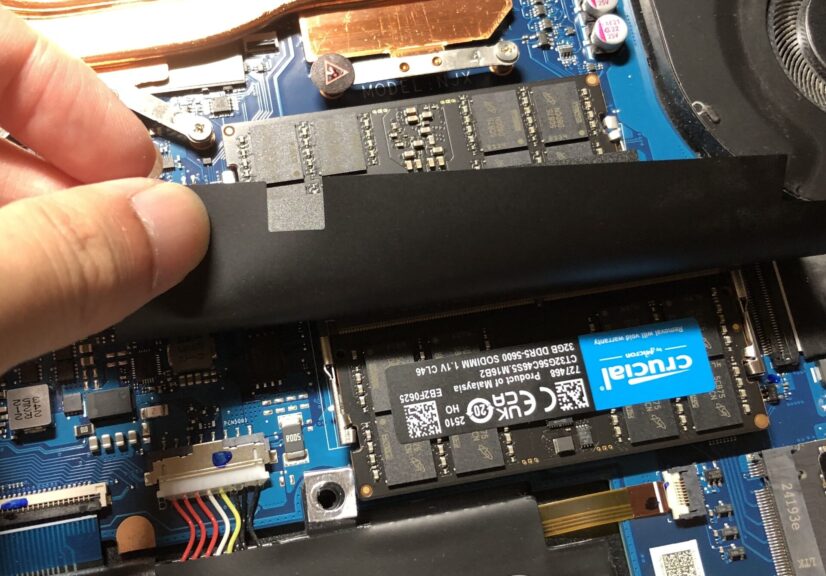
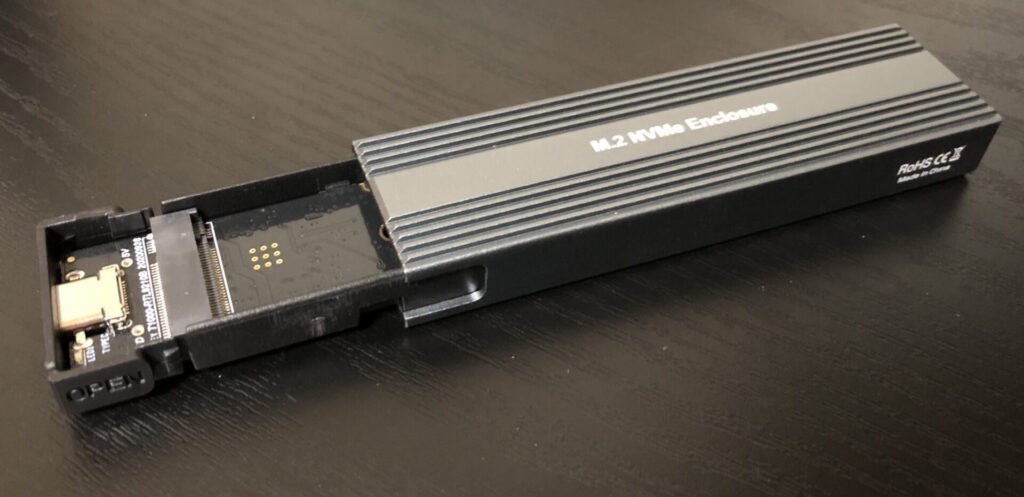
▼I had purchased a 256GB M.2 SSD.

Since I already had it, I decided to try using an enclosure that lets you use an M.2 SSD as external storage via a USB connector.
▼I bought this one.

▼You can slide it to insert the M.2 SSD. This seems like a great way to put spare SSDs to use.

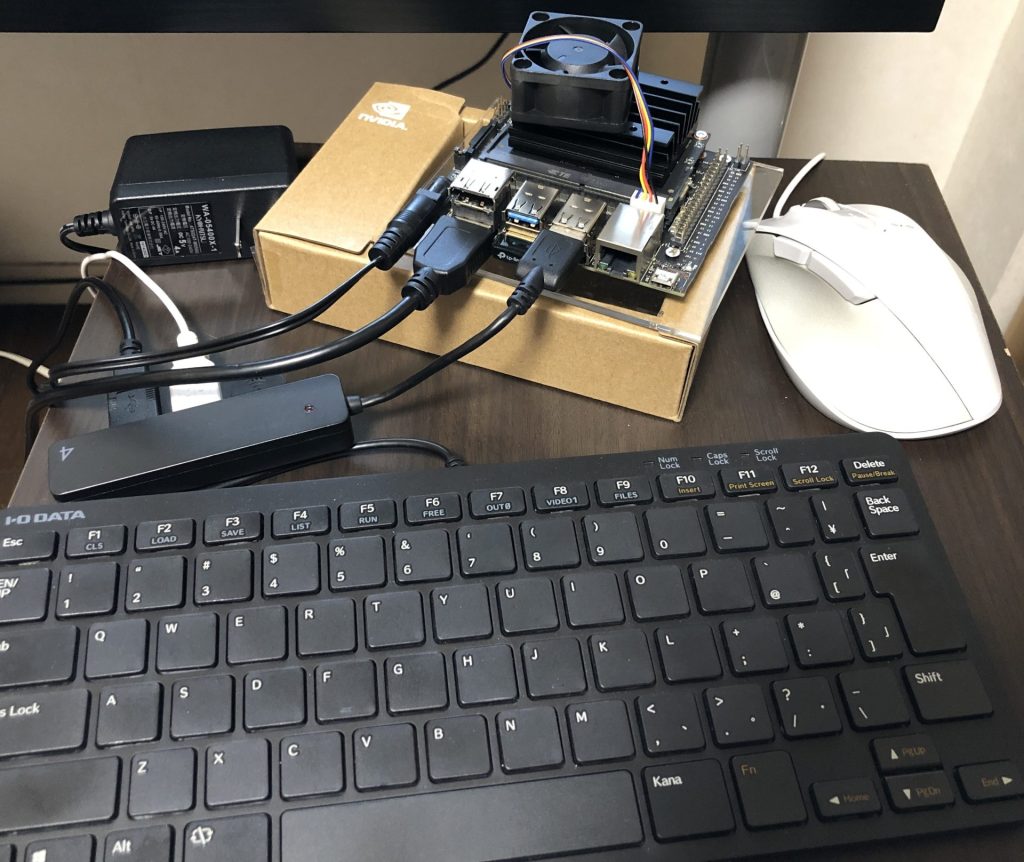
▼Here is what it looks like installed. It was recognized properly.
I will use this SSD for the setup in the following steps.
Setup via Micro SD Card
Regarding the OS setup for Jetson Xavier, the official documentation introduces a method using a micro SD card, so I tried that first.
▼I proceeded by referring to the following page:
Jetson Xavier NX Developer Kit - Get Started | NVIDIA Developer
I set up the micro SD card on a Windows PC.
▼I formatted my SD card first.
SD Memory Card Formatter for Windows Download - SD Association

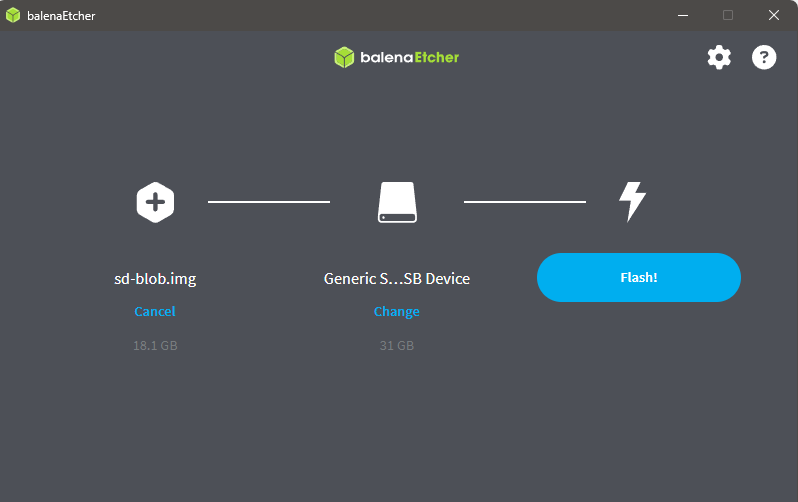
▼I used balenaEtcher for flashing.
balenaEtcher - Flash OS images to SD cards & USB drives
Choose the JetPack version compatible with Jetson Xavier.
▼Older JetPack versions can be found on the Archive page.
JetPack Archive | NVIDIA Developer
I downloaded JetPack 5.1.5. Please note that the total size is quite large, around 24GB.
▼I downloaded the "JETSON XAVIER NX DEVELOPER KIT & ORIN NANO DEVELOPER KIT" under the SD Card Image Method on the following page:
JetPack SDK | NVIDIA Developer
▼Select the image and the micro SD card in balenaEtcher and click Flash.
After that, I inserted the micro SD card and turned on the power, and it booted up without any issues.
I don't clearly remember if CUDA was recognized at this stage, but since I was worried about the capacity of the micro SD card, I decided to boot from the SSD I purchased.
Setup via SDK Manager
To set up using the software called SDK Manager, a host PC is required. Just like with the micro SD card method, you need a certain amount of free storage space.
Since I had previously used a laptop with Ubuntu 20.04 to set up a Jetson Orin Nano environment, I connected that PC to the Jetson Xavier via USB.
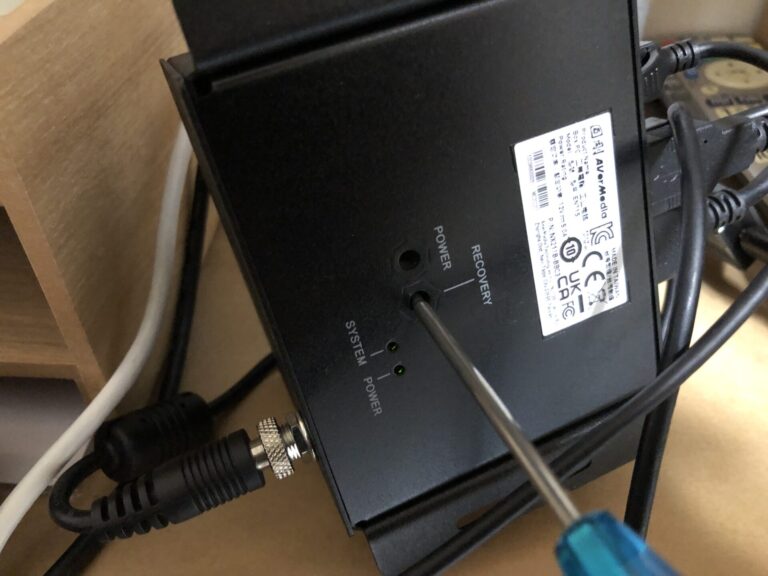
There is a Recovery button on the bottom of the Jetson Xavier. If you hold this button while turning on the power, it starts in Recovery Mode, allowing you to proceed with the setup.
▼In this case, the hole was deep, so I held it down with a screwdriver while turning on the power.
▼You can install the SDK Manager for various OS versions from the following page:
https://developer.nvidia.com/sdk-manager
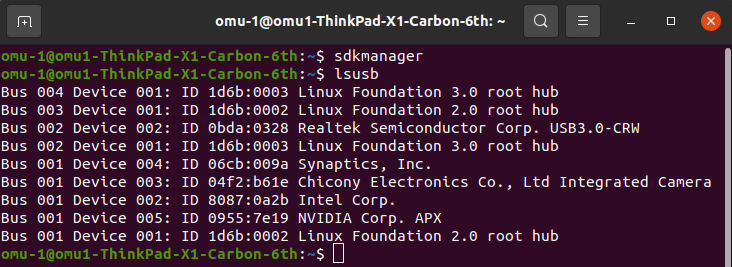
If it's already installed, running sdkmanager will launch the software.
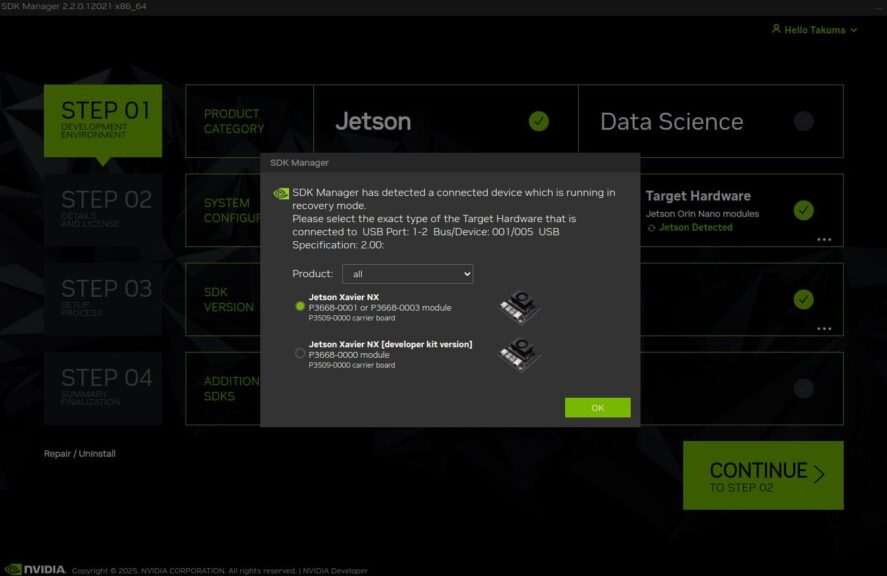
▼When started in Recovery Mode, it is recognized as "APX."
Proceed with the setup in the SDK Manager.
▼If the device is recognized, the option for Jetson Xavier will appear.
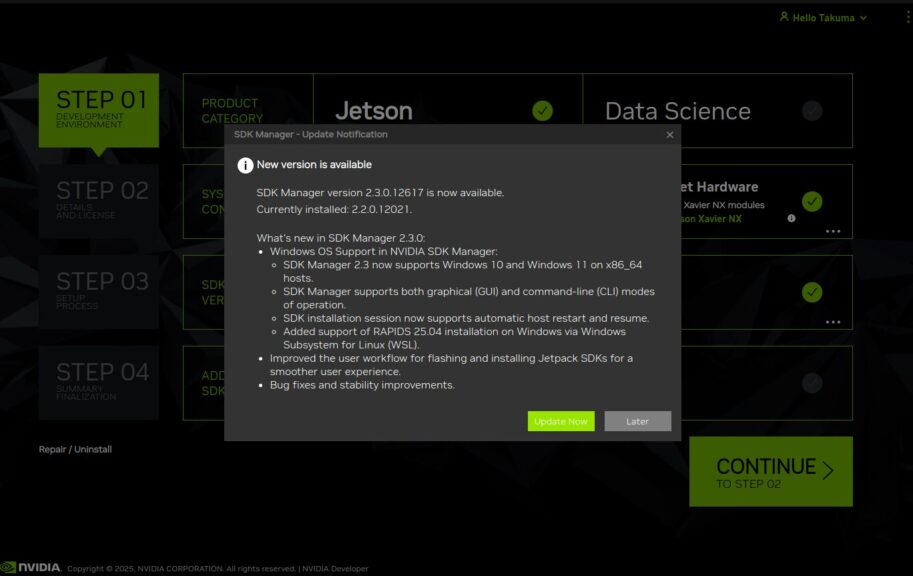
In my case, it had been a while since I last opened it, so there was an update.
▼I'm proceeding with the work after updating.
▼The SDK version is JetPack 5.1.5.
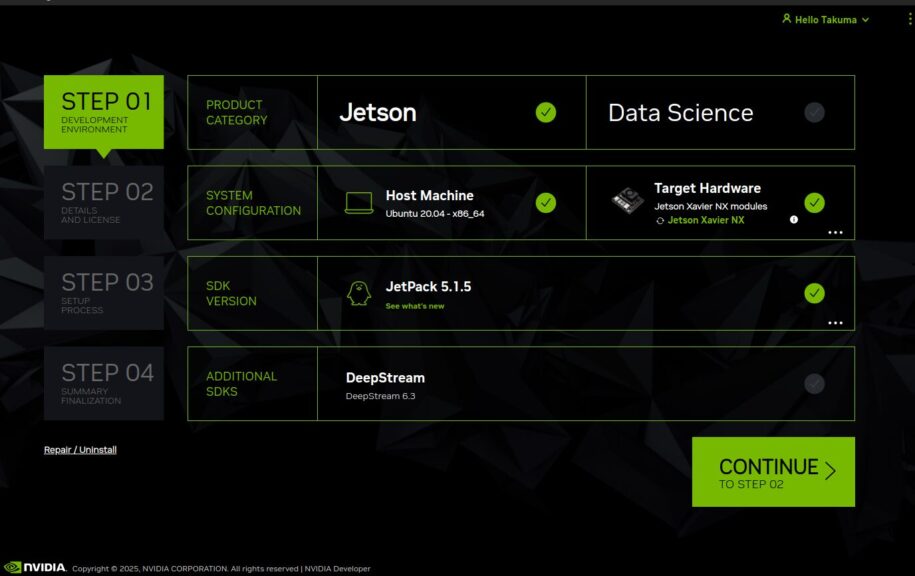
Click CONTINUE to proceed with the download and installation.
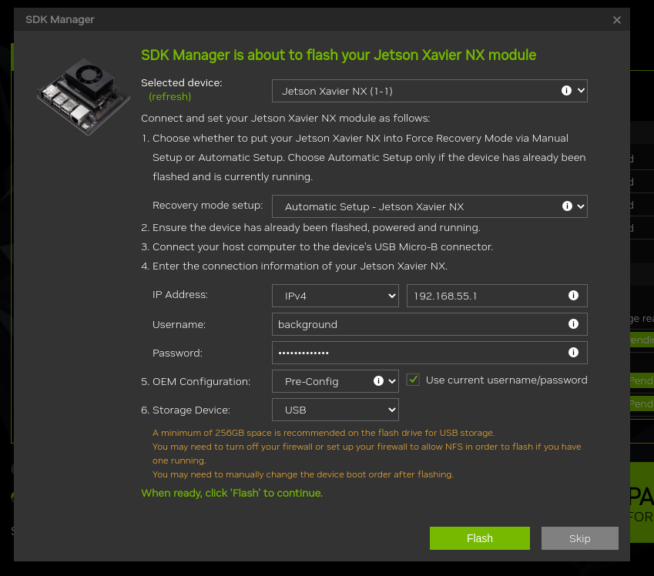
▼After a while, the Username and Password entry screen will appear.
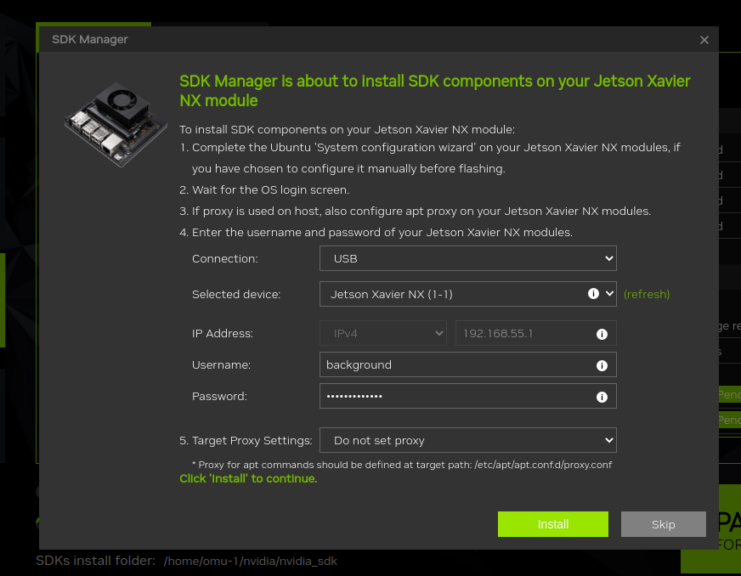
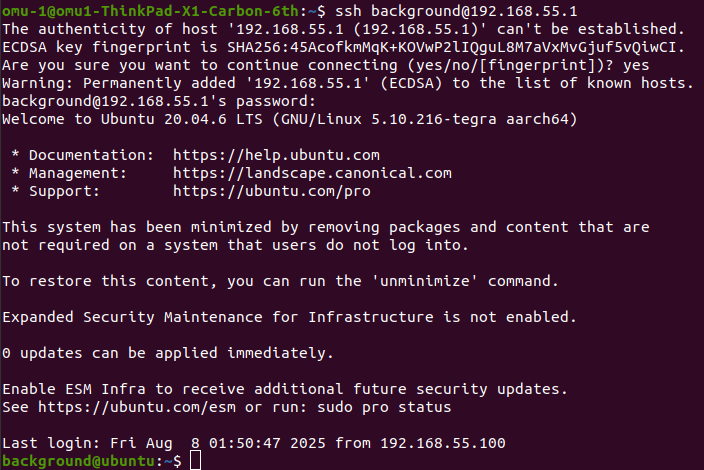
It will reboot once, and then you can log in via SSH.
Initially, I encountered a "Disk space is insufficient" error, possibly because I had set the Storage Device to eMMC in the subsequent options.
▼When I selected "Skip Check," the subsequent setup failed.
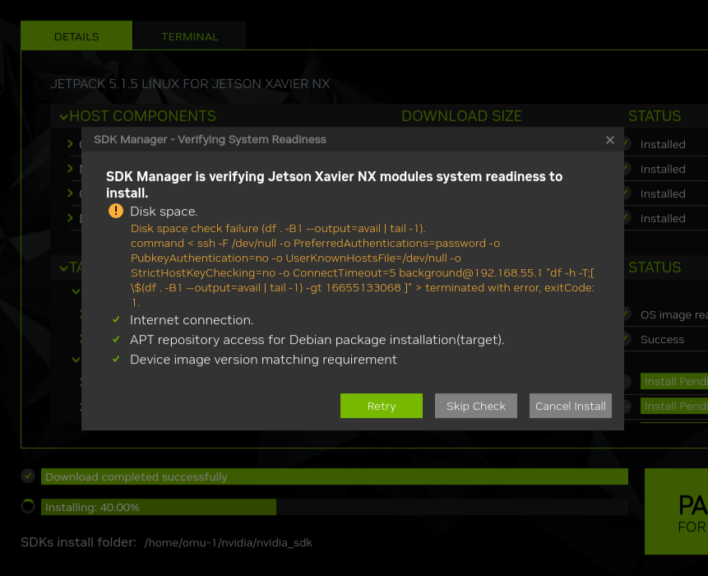
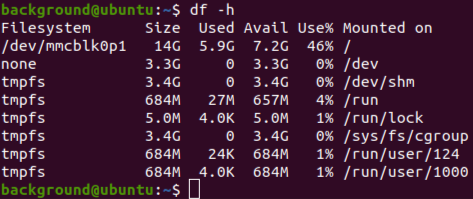
▼I logged in via SSH to check the disk capacity, and it indeed looked like it was running out.
▼Changing the Storage Device from eMMC to USB seemed to solve the problem.
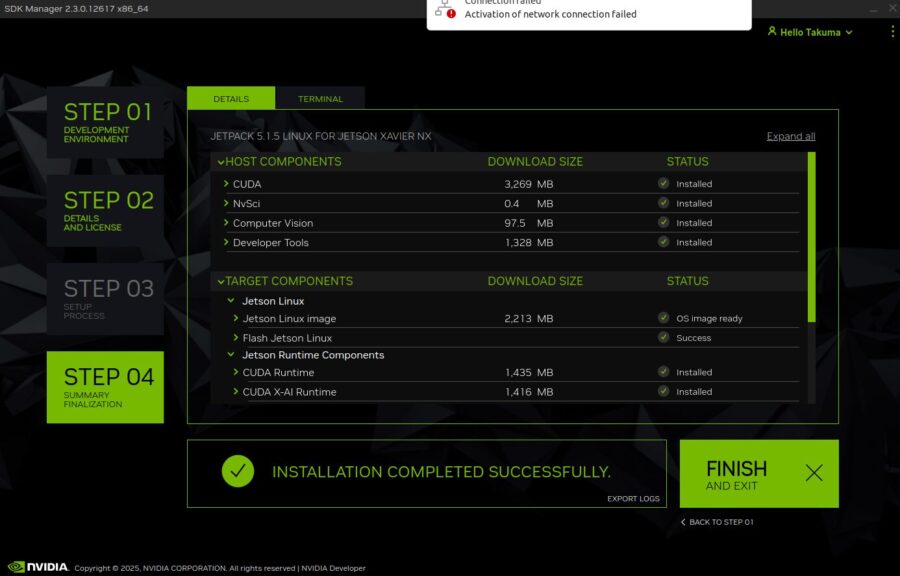
▼After a while, the installation was completed successfully!
During this process, I faced several issues, such as CUDA installation failures or the device no longer being recognized halfway through when using a Windows PC. I had to restart many times.
I highly recommend connecting a storage device with sufficient capacity to the Jetson Xavier and performing the setup using an Ubuntu PC.
Finally
After this, I set up the network and can now access it externally using Tailscale. I’ll summarize that in the next article.
I want to use this as a home server equipped with a GPU. I'm also working on setting up CUDA for that purpose, but Jetson Xavier seems to be a bit old, and I'm currently struggling with it…
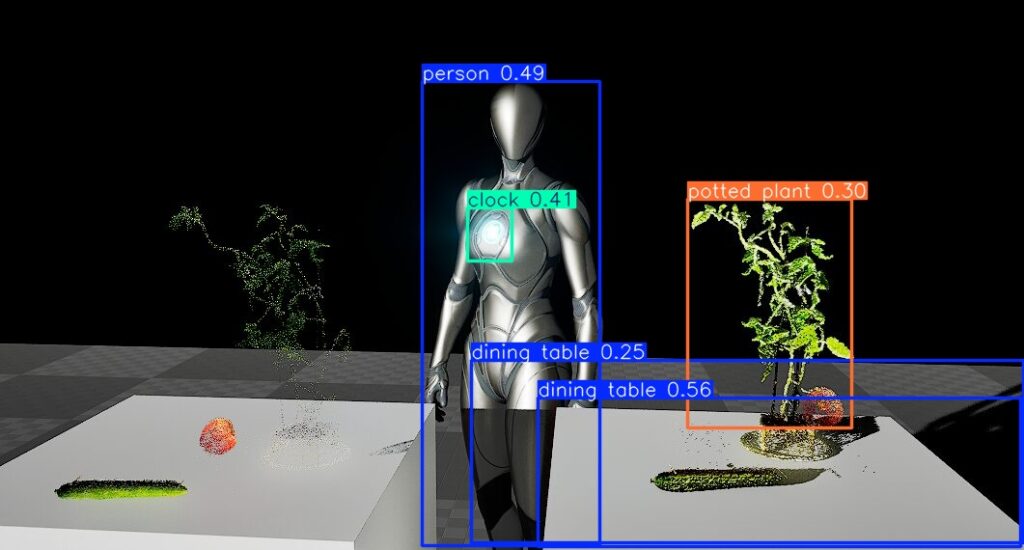
▼I have executed YOLO on a GPU in Windows before, but I'm encountering more version compatibility issues now than back then.
Object Detection with YOLO Part 4 (GPU Setup, CUDA 12.6)
Info This article is translated from Japanese to English. Introduction In this post, I tried object detection with YOLO using a GPU.According to the Ultralytic…