Designing a Case for Raspberry Pi Zero (3D Printing)
Introduction
In this post, I tried creating a case for the Raspberry Pi Zero using a 3D printer.
Perhaps due to the room getting colder in winter, I've been struggling with ABS filament peeling off the plate or warping. If I even think about ventilating the room, I can't get a decent print at all. I'm debating whether I should buy an enclosure.
▼I am using the Prusa MK4 3D printer.
Trying Out the Prusa MK4 (3D Printer)
Info This article is translated from Japanese to English. Introduction I finally bought my long-awaited 3D printer! The Prusa MK4!I had heard about Prusa from …

▼The Prusa MK 4 seems to be out of stock, but the MK4S appears to be available.

▼In Osaka, there is a community called "Dezimokukai," a gathering of people knowledgeable about electronic work and embedded systems. There are experts in 3D printers there, so I've been asking them for advice.
https://dezimoku.connpass.com/
▼I’m also receiving guidance from Open Creation Lab.
https://www.instagram.com/opencreationlab/?hl=ja
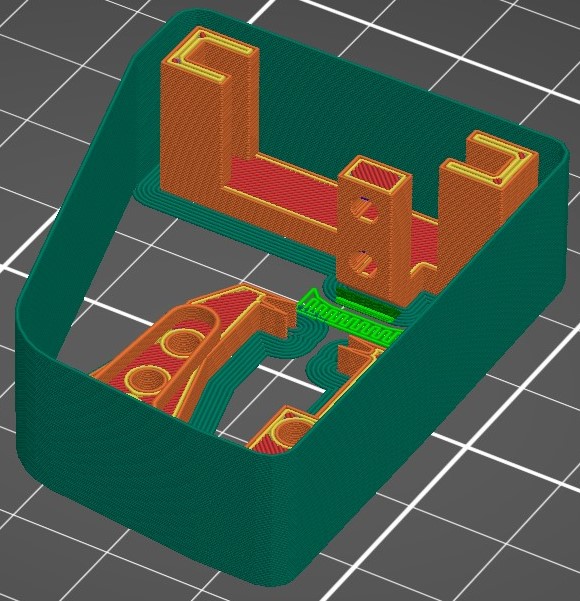
Designing in Fusion 360
▼I downloaded the CAD data for the Raspberry Pi Zero 2 W from GrabCAD. I believe it’s almost identical to the original Zero.
https://grabcad.com/library/raspberry-pi-zero-2-w-1
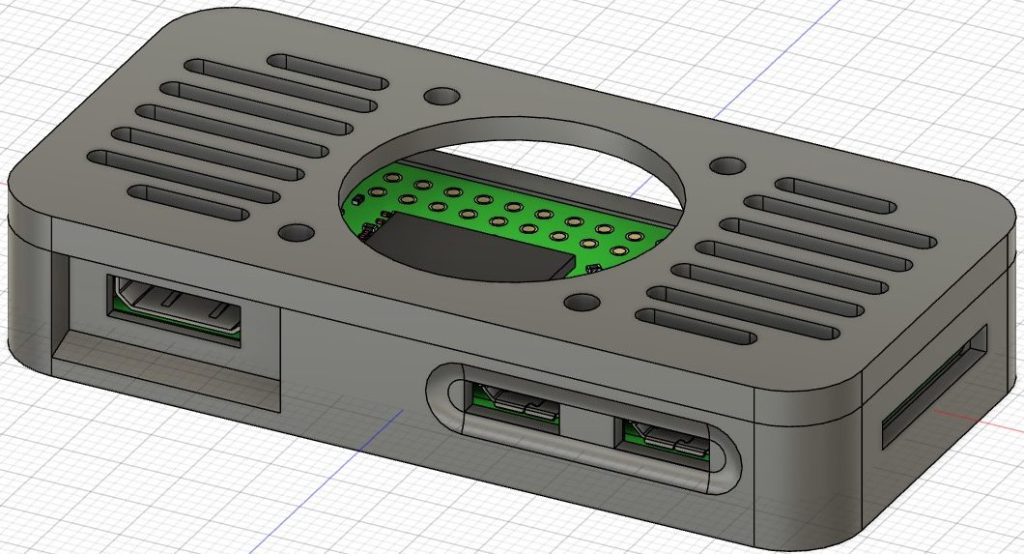
I designed it to accommodate an SD card, mini HDMI, USB micro-B, and camera ports. I also made sure an L-shaped pin header could protrude from the side. I included a mount for a fan as well, though I’m not an expert on thermal design. I’ve only read a bit about it in "Transistor Gijutsu" (Transistor Technology magazine), but apparently, you should be conscious of the airflow path. I’ve also heard that for heat dissipation, attaching a heatsink is highly recommended.
▼I adjusted the openings to ensure they don't interfere with the connectors.
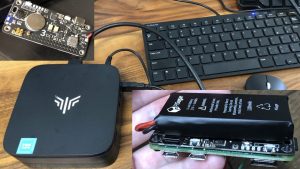
▼I purchased conversion adapters for the Raspberry Pi Zero. Since it lacks a USB Type-A port, you can't plug in an external keyboard without one…


▼I provided low-profile bosses. Since the SD card was hard to remove when flush with the surface, I added a recessed area.
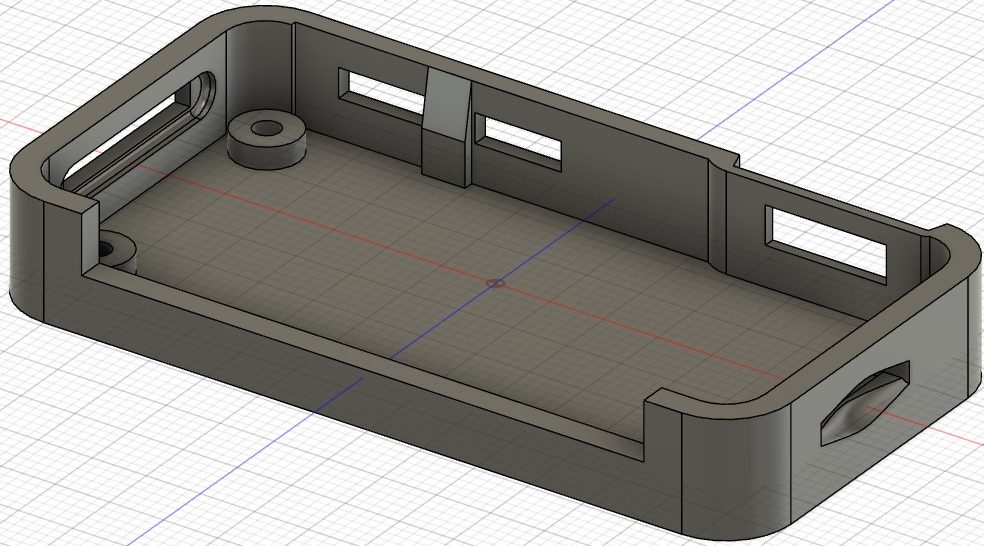
▼The lid is secured solely by friction against the walls. By setting the tolerance to 0, the layer lines interlock nicely, creating a satisfying "click" when it shuts.

Collection of Failures
The ABS filament I used this time is particularly sensitive to temperature.
▼I always buy my filament on Amazon.

▼Photos of failures caused by peeling or warping mid-print. The side facing the plate looks clean, but…


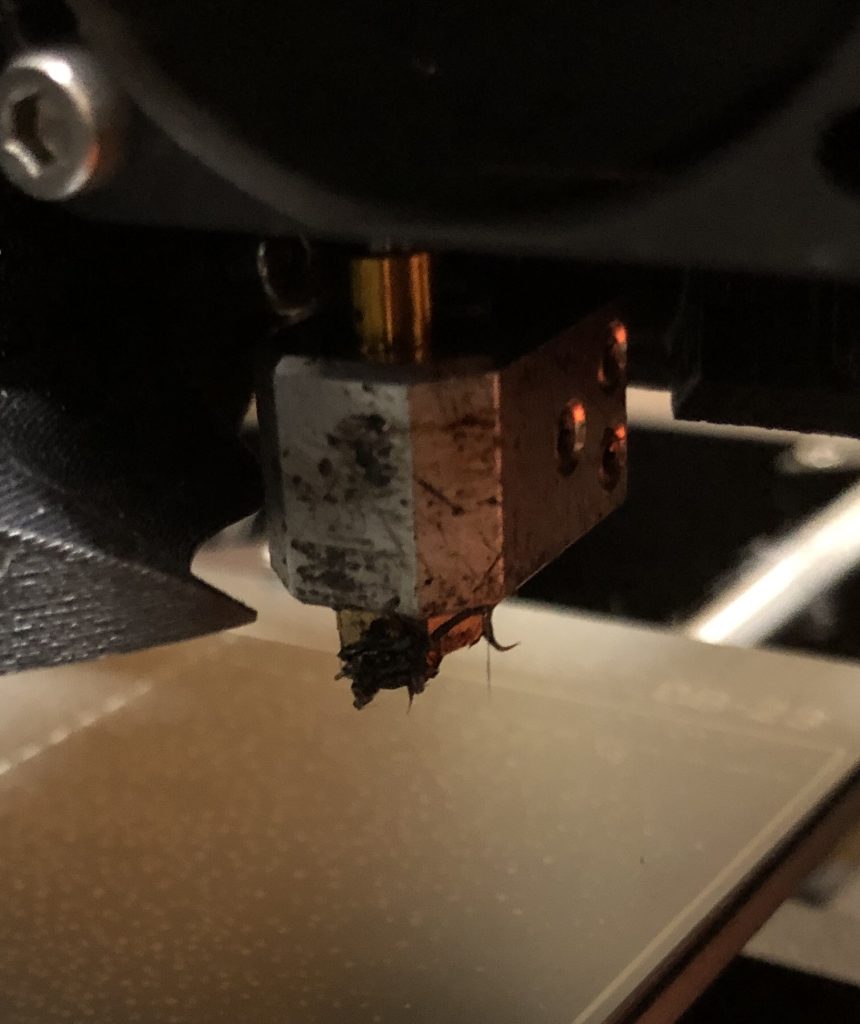
▼Another part that failed due to peeling mid-way. If left alone, the nozzle just keeps tracing through thin air.


▼When it starts printing in mid-air, filament sticks to the nozzle. Since it’s a small amount here, it’s not too bad, but failing a large part can be a disaster…
Setting a Raft
I tried various things like adjusting the temperature and slowing down the first layer speed. Among these, setting a "raft" led to the most stable output.
A base is generated under the part. While the base is peeled off later, it made the surface texture quite rough.
▼I tried 5-layer and 2-layer rafts; the thicker one was easier to peel off.


In the photo above, I tried a setting called "ironing," where the nozzle smooths out the surface to make it look clean. However, when I showed it to a 3D printing expert, they said it wasn't working well.
I heard that I might need to tighten the belt tension, so I’ll try that next. Since I assembled this 3D printer myself, it’s quite possible the belts are loose.
▼This is what it looks like after peeling off the raft. It’s usable, but it’s not exactly "clean."
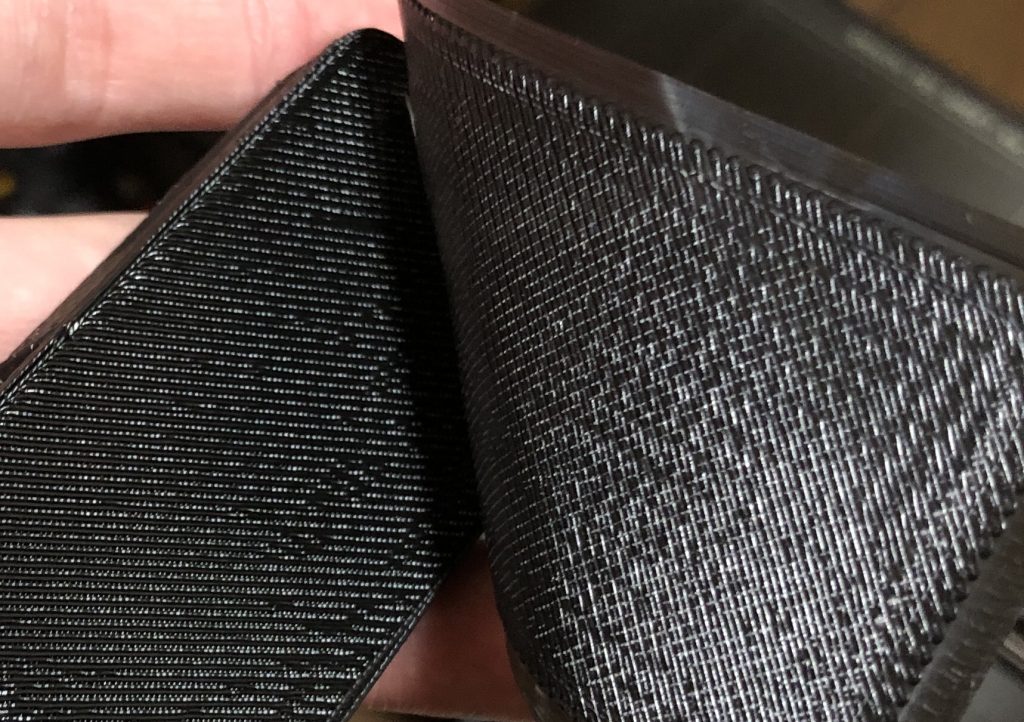
▼The lid side sometimes printed cleanly even without a raft. The surface finish is completely different.
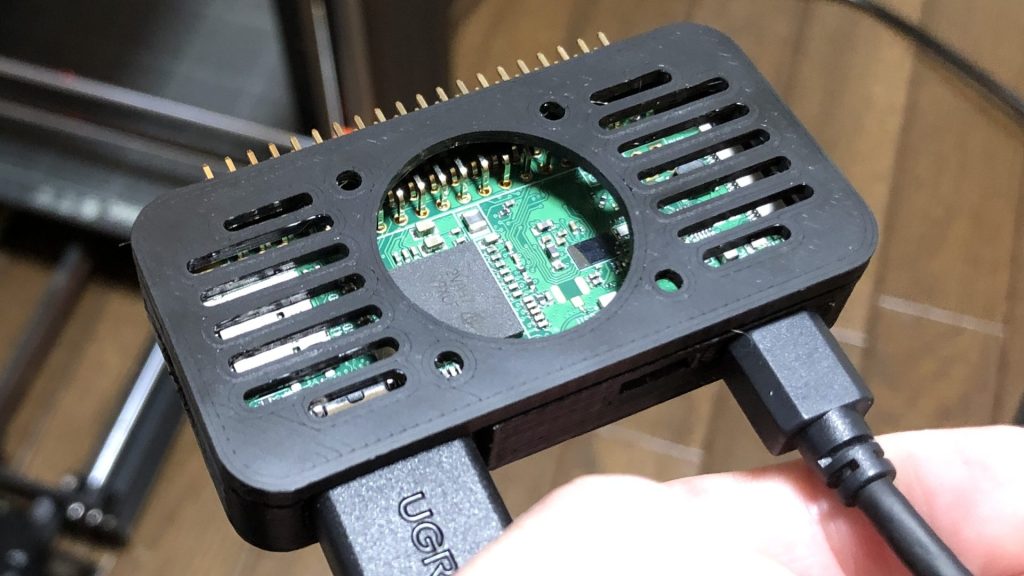
▼The adapters plugged in perfectly.
▼I also confirmed that it works.
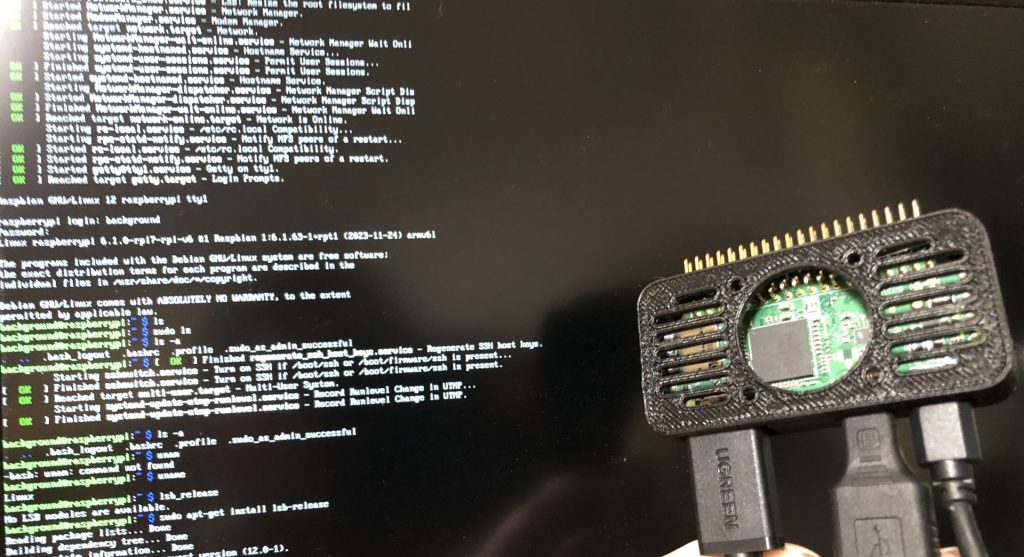
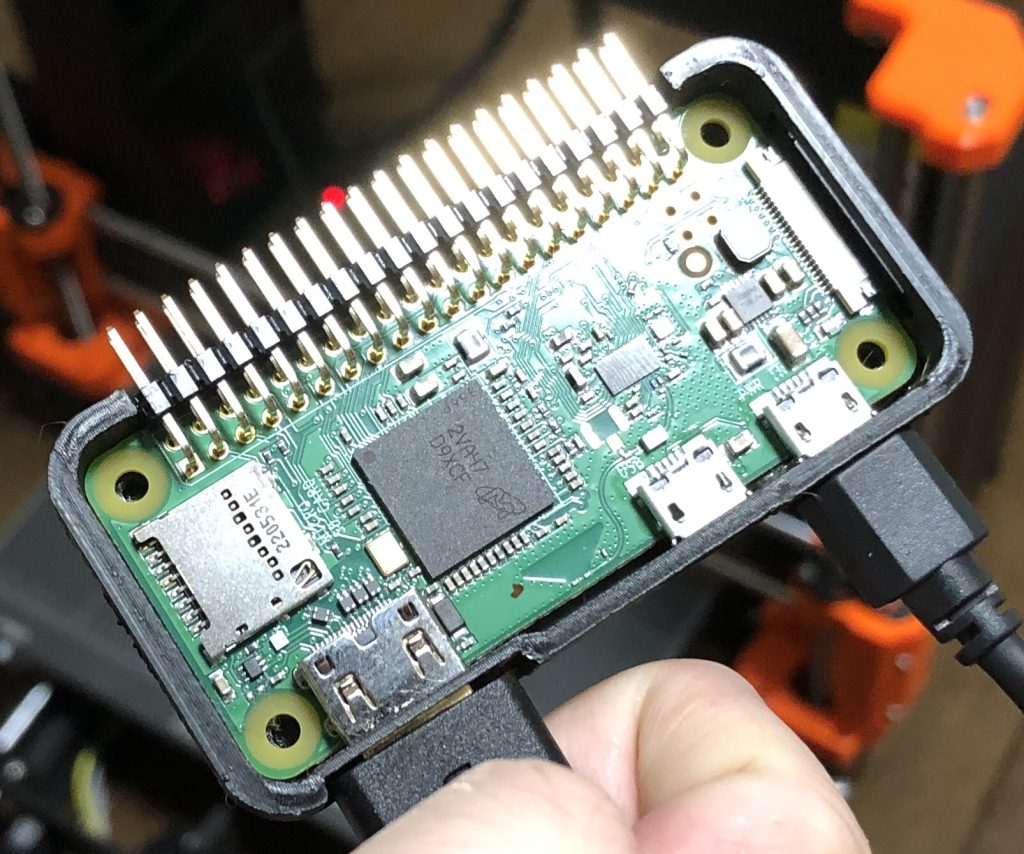
▼The fan was successfully mounted as well.


▼At Open Creation Lab., who I’m always indebted to, I was taught that you can clean up the surface with a heat gun. You essentially melt it slightly. This might be a way to improve the finish. Apparently, you can even fix minor warping this way.
https://www.instagram.com/opencreationlab/?hl=ja
▼At Open Creation Lab., they create the white and black parts shown in the photos using 3D printers. The side surfaces are printed very cleanly. My 3D printer should be capable of producing better results as well.
▼By the way, there was a setting to create a "shield" to prevent cooling from strong winds. Since I'm indoors, I didn't think it was necessary.
I’ve also tried "brims" before, but they didn't peel off cleanly. I was able to print without warping, though.
▼I was testing gear outputs. As expected, a Module 0.5 is a bit of a stretch. I received advice that changing to a smaller nozzle diameter might help.


Finally
I’ve been going through all this trial and error with ABS filament, but honestly, other filaments would probably solve these issues…
For those struggling with temperature-related failures, I recommend other filaments. PLA is very easy to print. I’ve also heard that PETG is highly recommended lately.
Now that the case is finished, I’m looking forward to trying various things with the Raspberry Pi Zero. I’m currently studying server construction and Python.