Trying Out Accelerometers Part 1 (MPU6050, ESP32, and Dual-Core)
Introduction
In this post, I experimented with the MPU6050 accelerometer. This sensor was included in the starter kit I always use. It has "GY-521" printed on it, but it functions identically to the MPU6050.
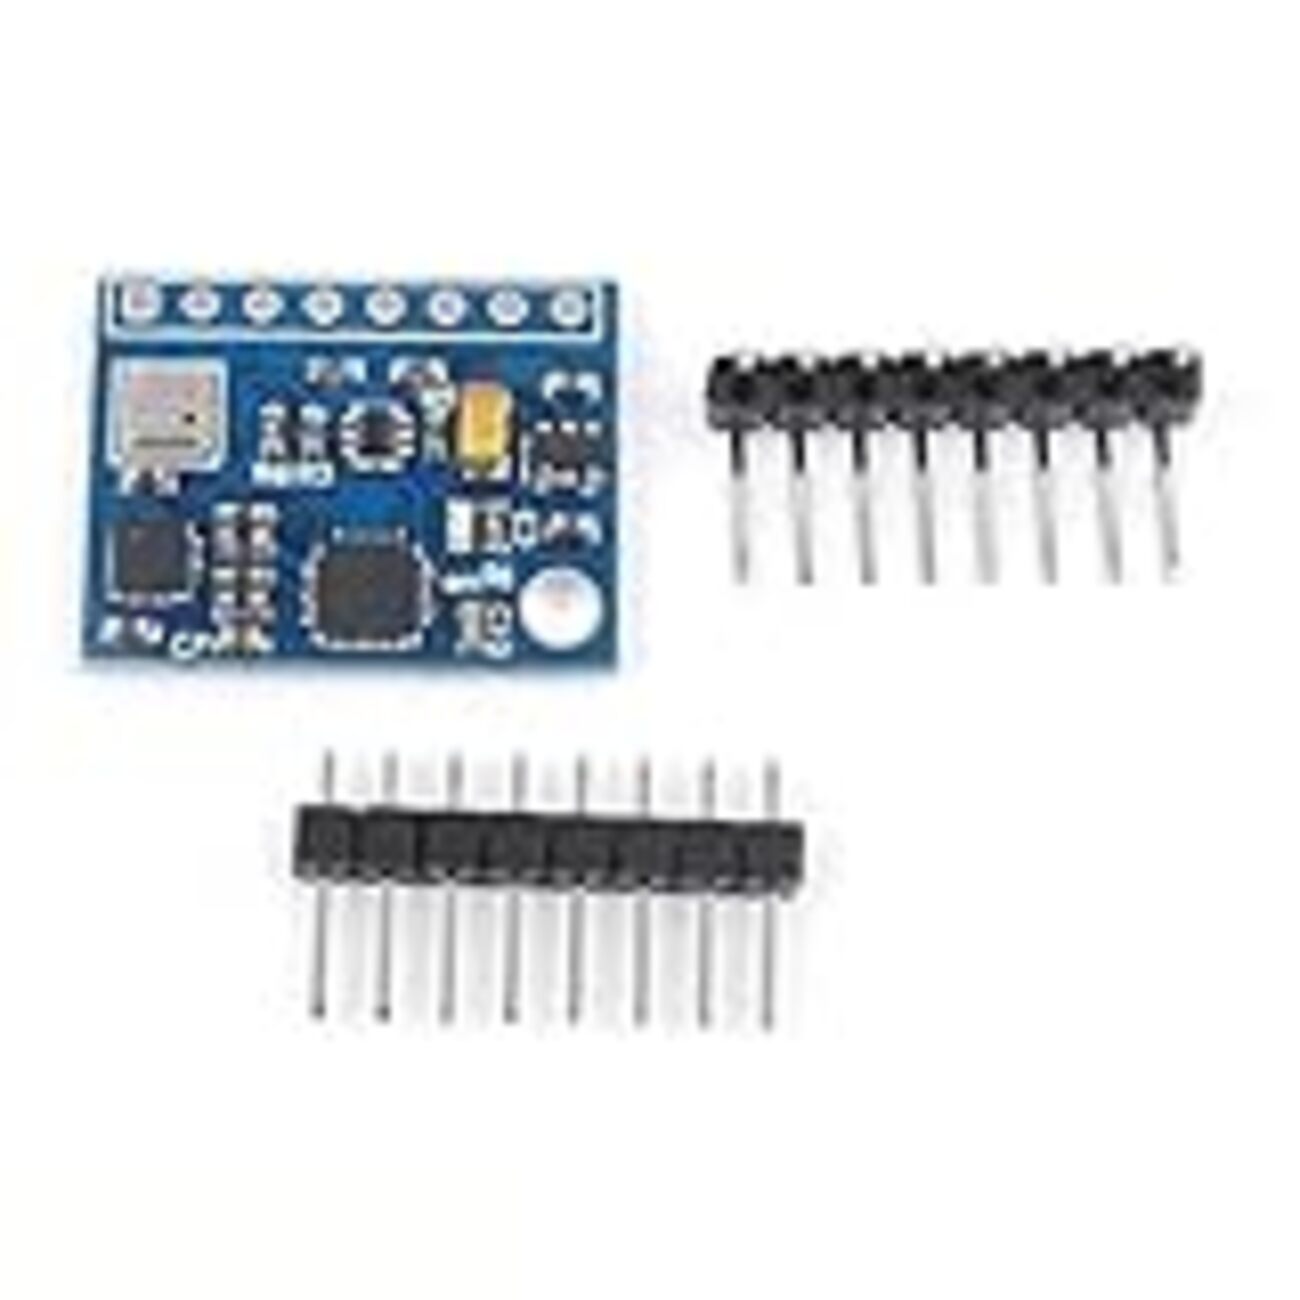
▼The GY-521 board. The chip itself is the MPU6050. It’s quite affordable.

Interestingly, it seems to be able to measure temperature as well, though I recall it wasn't particularly accurate...
My goal with the accelerometer is to build an inverted pendulum robot. While I eventually want to use the built-in accelerometer of the nRF52840, I decided to summarize my work with the MPU6050 first since I had been using it recently.
▼This article provides a very detailed explanation of accelerometer specifications and programming. I highly recommend giving it a read:
加速度ジャイロセンサMPU-6050をSTM32Nucleoボードで使ってみる | 即戦力モノづくり!エンジニアへの道標 (depfields.com)
Building the Circuit
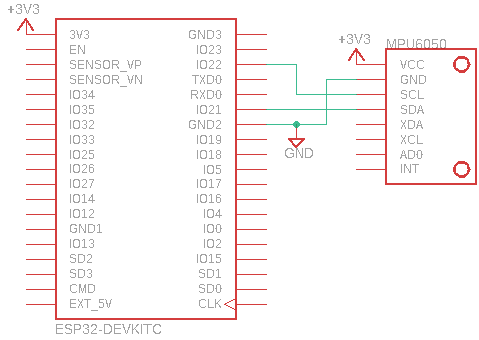
I used an ESP32 as the microcontroller. For I2C communication, I used pins 21 (SDA) and 22 (SCL) as designated in the pin layout.
▼I bought this ESP32 from Akizuki Denshi.
ESP32-DevKitC-VE ESP32-WROVER-E開発ボード 8MB: マイコン関連 秋月電子通商-電子部品・ネット通販 (akizukidenshi.com)
▼It is also available on Amazon.

Note that with the ESP32, you can use other pins for I2C communication depending on your code.
▼Looking at Wire.h in the arduino-esp32 library, there are several versions of begin. For example, you can use it like Wire.begin(sda_pin, scl_pin).
https://github.com/espressif/arduino-esp32/blob/master/libraries/Wire/src/Wire.h
▼Circuit diagram:
▼Wiring including a servo motor:

Running the Program
Testing a Sample Program
▼This is likely a sample program from the starter kit. It retrieves 6-axis data (acceleration and angular velocity).
The I2C address for the MPU6050 is set to 0x68. Note that it could be 0x69 depending on the state of the AD0 pin (address selection pin).
Creating a Dual-Core Program
I created various functions to retrieve acceleration and angles.
When calculating angles, I noticed that the values would drift if unnecessary delays occurred in the loop. To prevent this, I utilized the second core of the ESP32. The ESP32 is a dual-core processor, meaning it can essentially run two programs simultaneously. I set it up so that acceleration and angles are calculated on the second core and then used in the main loop().
One important note: all code related to Wire.h (I2C) must be handled within the same core. If you perform I2C initialization in the main setup() and then try to use it in another core, the ESP32 may enter a continuous reset loop.
▼This issue is pointed out in this article (Japanese):
https://www.mgo-tec.com/blog-entry-problem-i2c-0628-arduino-esp32.html
▼A minimal example of a dual-core program can be found here (Japanese):
https://qiita.com/Ninagawa123/items/5c3a9d40996836bd825f
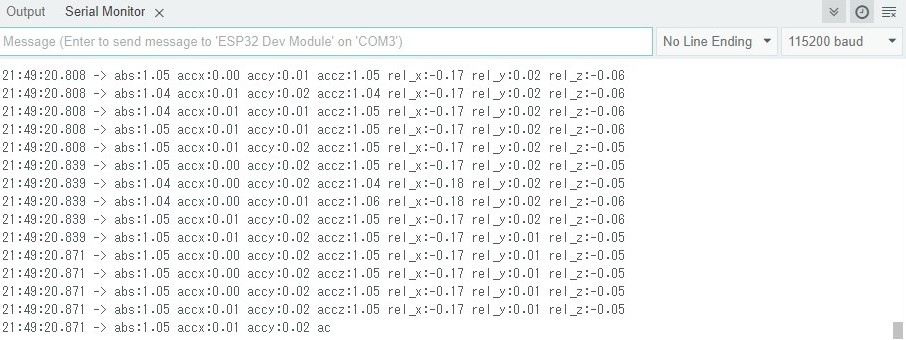
▼The complete integrated program:
▼Actual Serial Monitor output:
Retrieving Acceleration
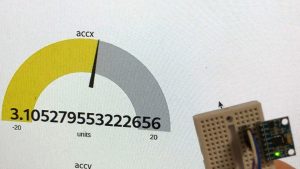
▼Here is a simplified program to retrieve only acceleration. The unit is "G" (gravitational force), familiar from roller coasters.
▼Execution result. The sensor was placed stationary on a desk.
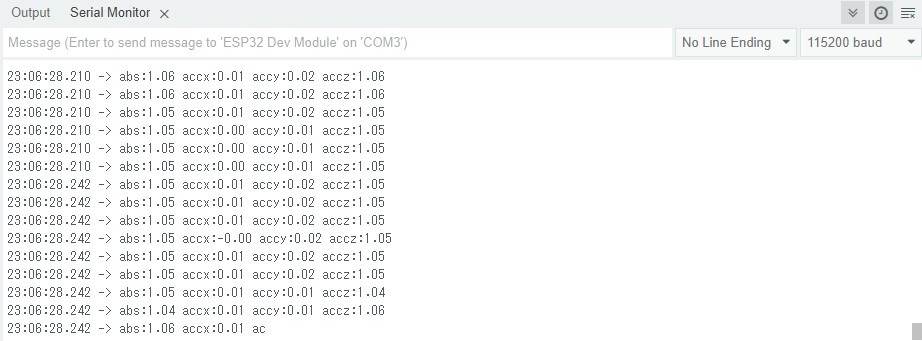
You can see that 1G of gravity is applied even when stationary. In some cases, you may want to remove this gravitational acceleration.
▼Here is an article about removing gravitational acceleration using a high-pass filter (Japanese):
【加速度センサー入門】~第10回 重力加速度を取り除いてみよう~ - 半導体事業 - マクニカ (macnica.co.jp)
Calculating Angles
▼I referred to this article for the angle calculation code. It also explains offset correction, so it's definitely worth reading:
ESP32 (ESP-WROOM-32)でMPU6050を使おう!(i2C) (Arduino IDE) - とっくんラボ
ESP32弄り日記第二弾は、安くて有名なInvenSense製6軸センサ、MPU6050を使おう!です。MPU6050には3軸加速度センサー、3軸ジャイロセンサーが積んであります。3+3=…
Important: When calculating angles, a calibration process runs immediately after startup to correct the sensor values. Please keep the accelerometer perfectly still for a few seconds after powering it on. If you move it during calibration, the values will drift significantly.
▼Here is a video of a servo motor rotating in response to the angle changes. The response is quite fast!
Finally
In this post, I summarized the basic usage of the MPU6050. I’ve actually been using it for a while now and have tried graphing the data with Python and plotting it in 3D space. I plan to summarize those projects in future articles as well.
I am still looking for a better way to handle the calibration process for angle calculation so that it doesn't require the sensor to be still every single time it starts.