Trying Out Unreal Engine 5 Part 10 (Scaniverse & Importing Point Cloud Data)
Introduction
In this post, I tried importing 3D scan data created with the "Scaniverse" app on an iPhone 15 Pro into Unreal Engine 5 (UE5). To import the data, I experimented with various tools like MeshLab, PlayCanvas, and Blender. However, since the file formats involved are quite specific, it took several conversions to finally get it working.
While there are paid plugins available for UE5 that might be faster, I focused on using free tools for this article.
▼Here is a popular paid plugin:
https://www.unrealengine.com/marketplace/ja/product/3d-gaussians-plugin
▼A developer's page for implementing this strictly in UE5. This is a great reference for advanced users:
https://zenn.dev/akiya_souken/articles/render-gaussian-splat-with-niagara
▼I found information on Unity.
https://note.com/oshimu/n/n430a3fc63804
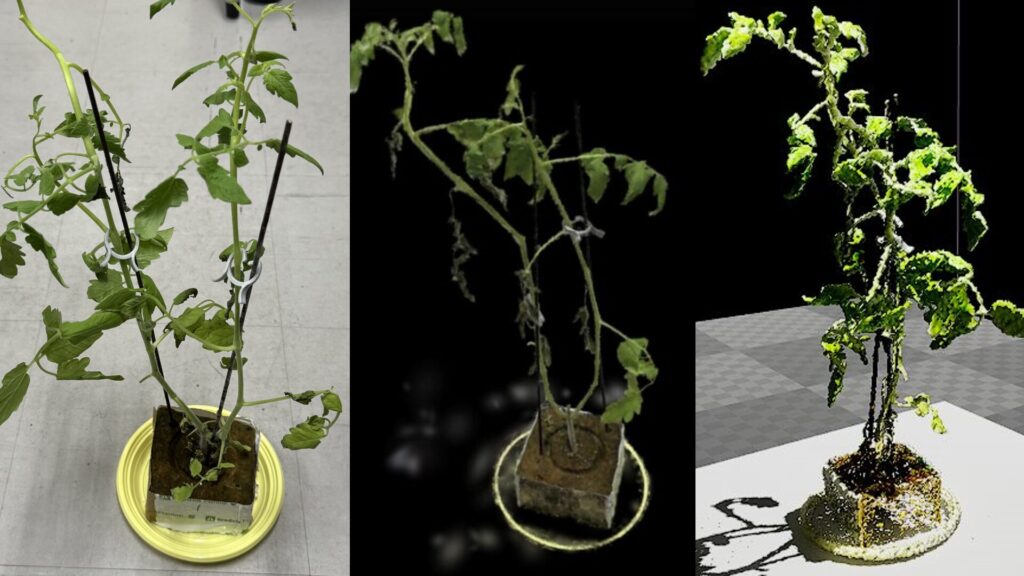
▼A comparison of the data: (From left to right) Photo, Scaniverse data, and UE5 data.
▼Previous articles:
Trying Out Unreal Engine 5 Part 1 (Datasmith, DUALSHOCK 4)
Introduction I have decided to use Unreal Engine 5 to simulate robots. I have been creating robots in both hardware and software, and I intend to use my expe…

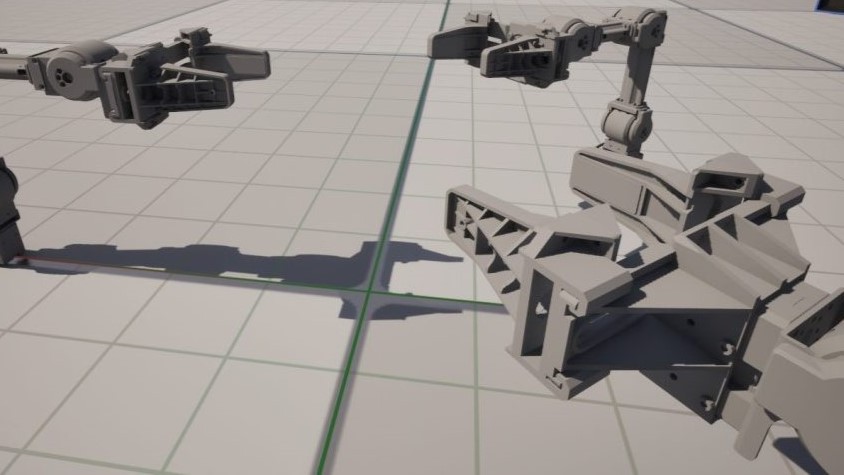
Trying Out Unreal Engine 5 Part 7 (Open Manipulator)
Info This article is translated from Japanese to English. Introduction In the previous post, I created a basic robotic arm in Unreal Engine 5 (UE5). This time,…
Scanning with Scaniverse
▼Scaniverse Official Page:
Note: The UI and features may change with future updates. In this guide, I will be using the "Splat" mode to import data into UE5.
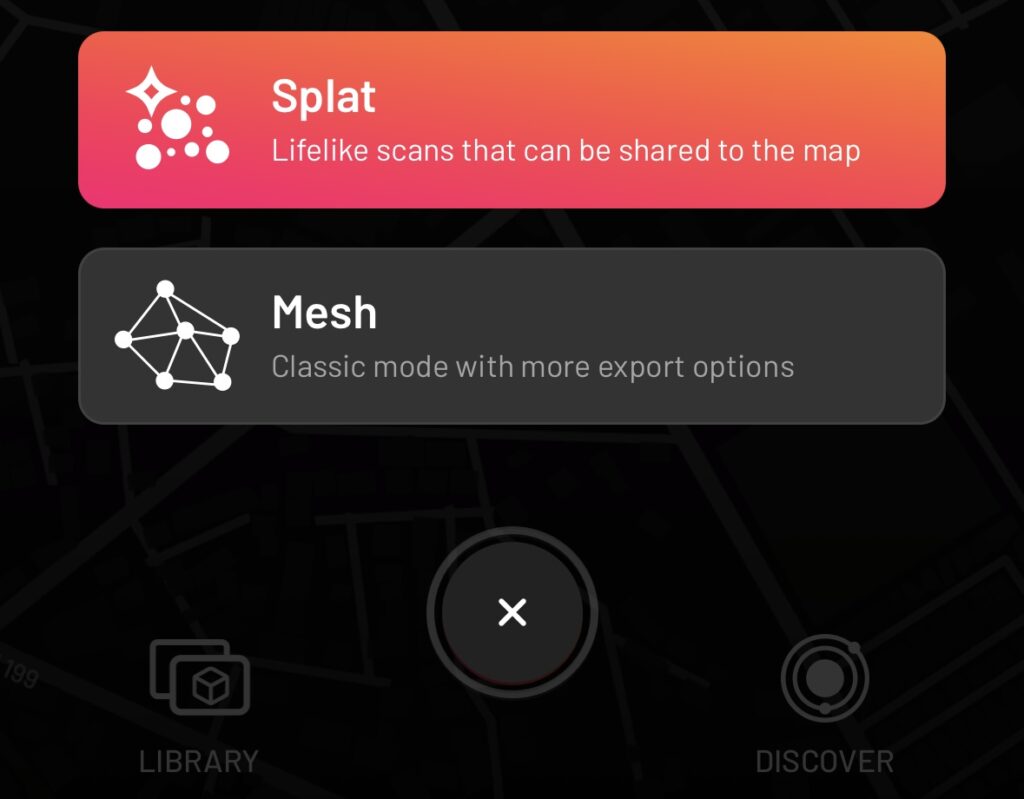
Importing in Splat Mode
Scaniverse offers "Splat" and "Mesh" modes. I started with Splat mode.
▼Press the center "+" button to start scanning.

▼Select "Splat."
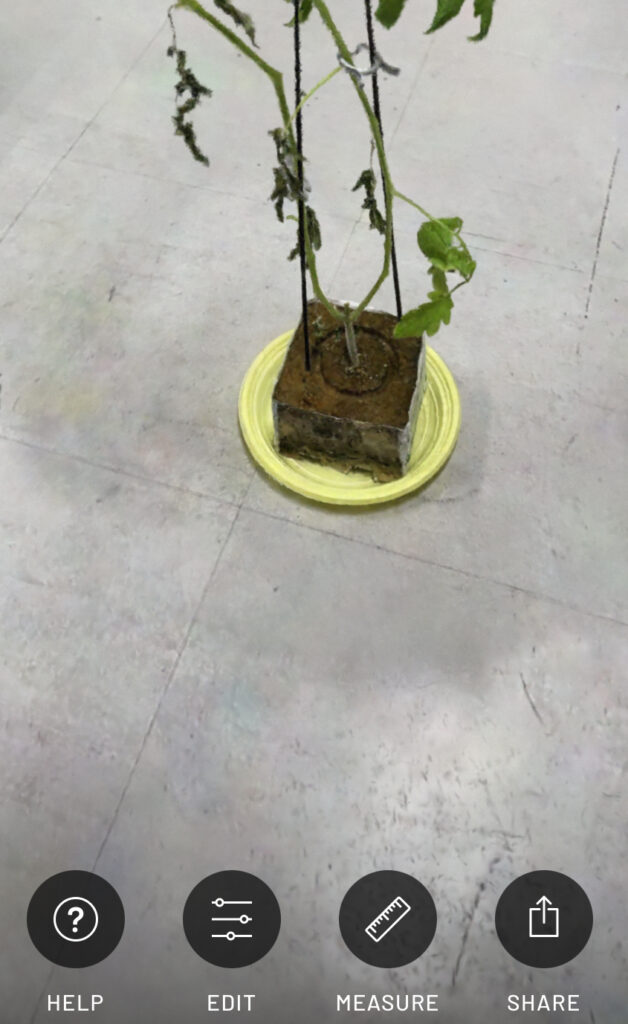
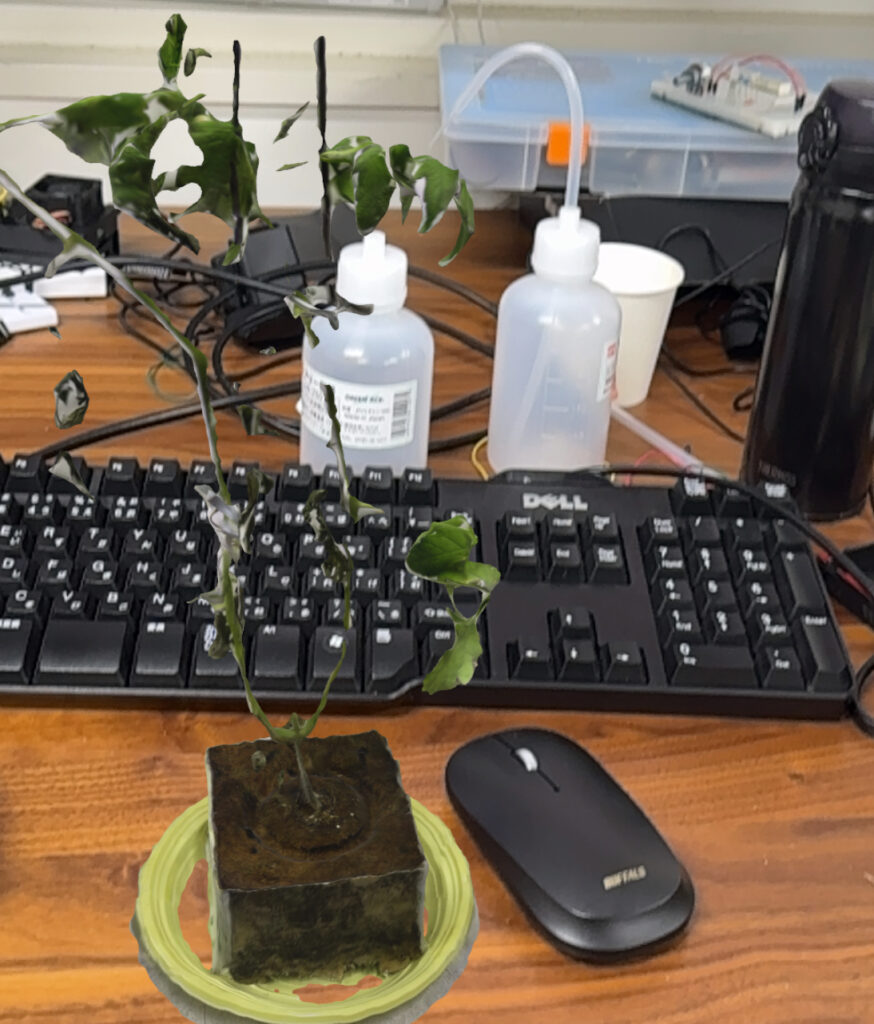
▼For this test, I scanned this tomato seedling I received at a conference.
If an object is placed on a desk, the underside may not be scanned properly. I recommend scanning in an area without obstructions.
▼Scan the object from all possible angles.

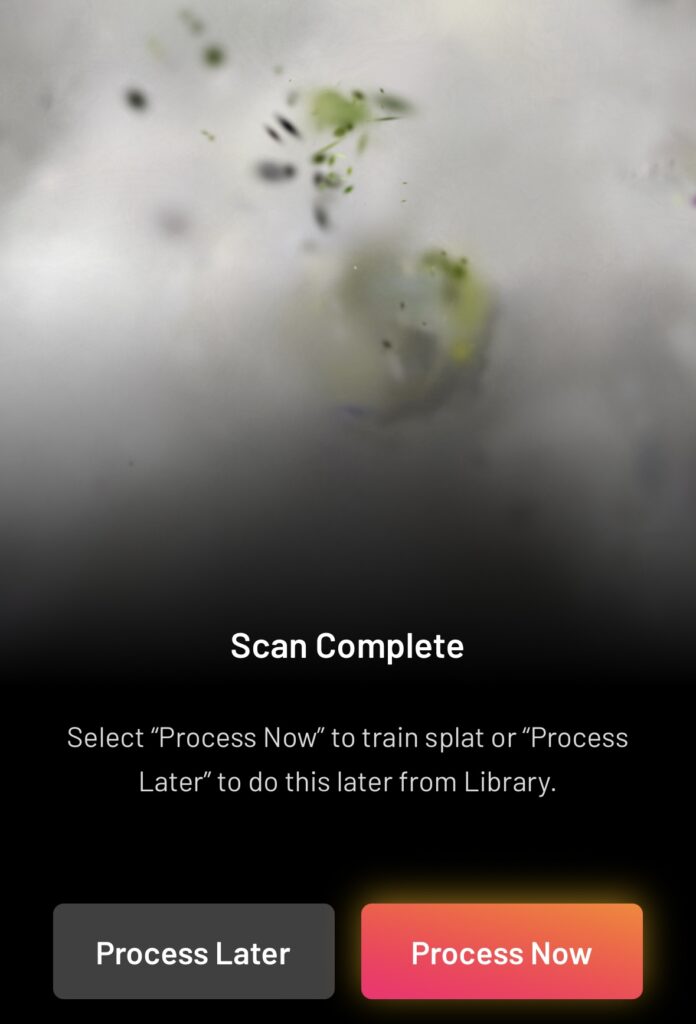
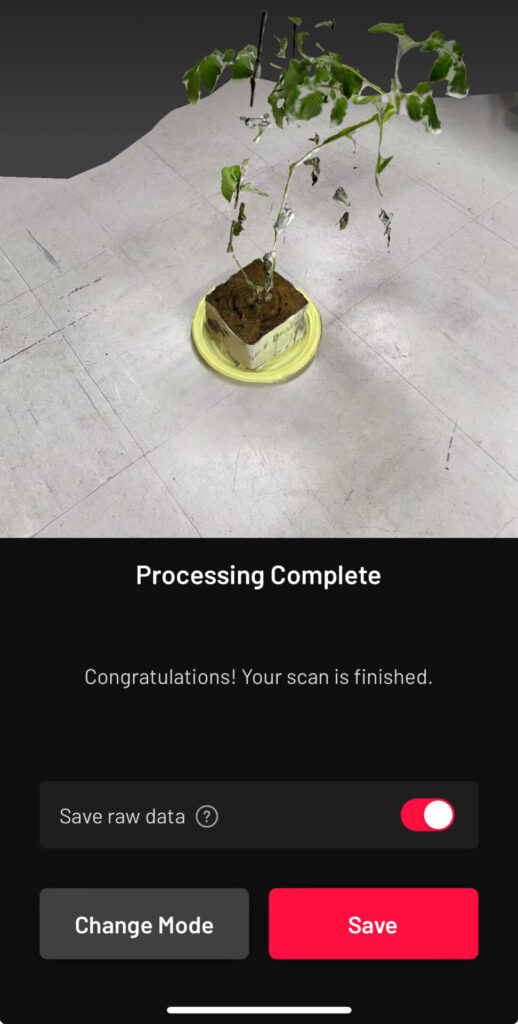
▼After finishing, select "Process Now" to begin processing.
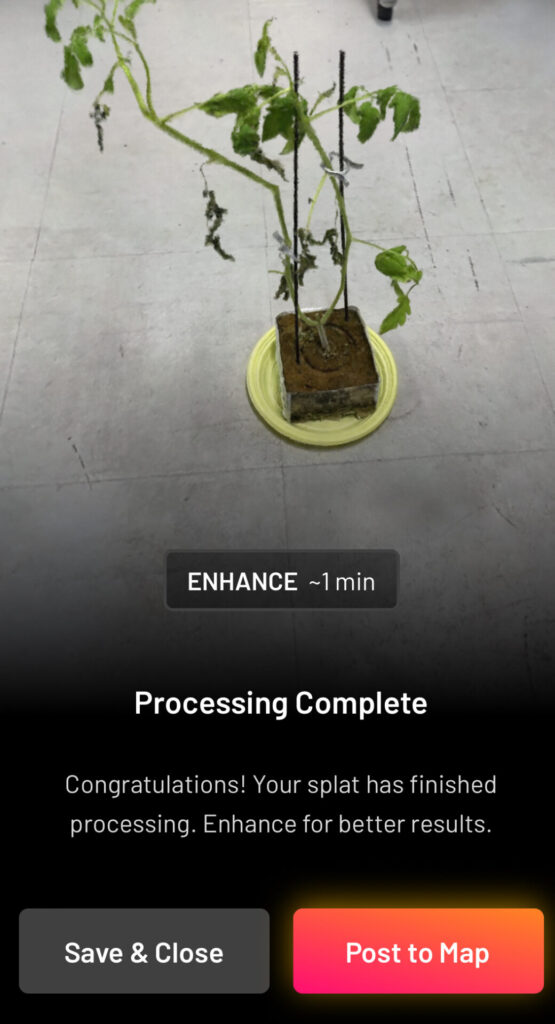
▼The processed result looks almost like a photo, but it is actually 3D scan data. You can swipe to view it from different angles.
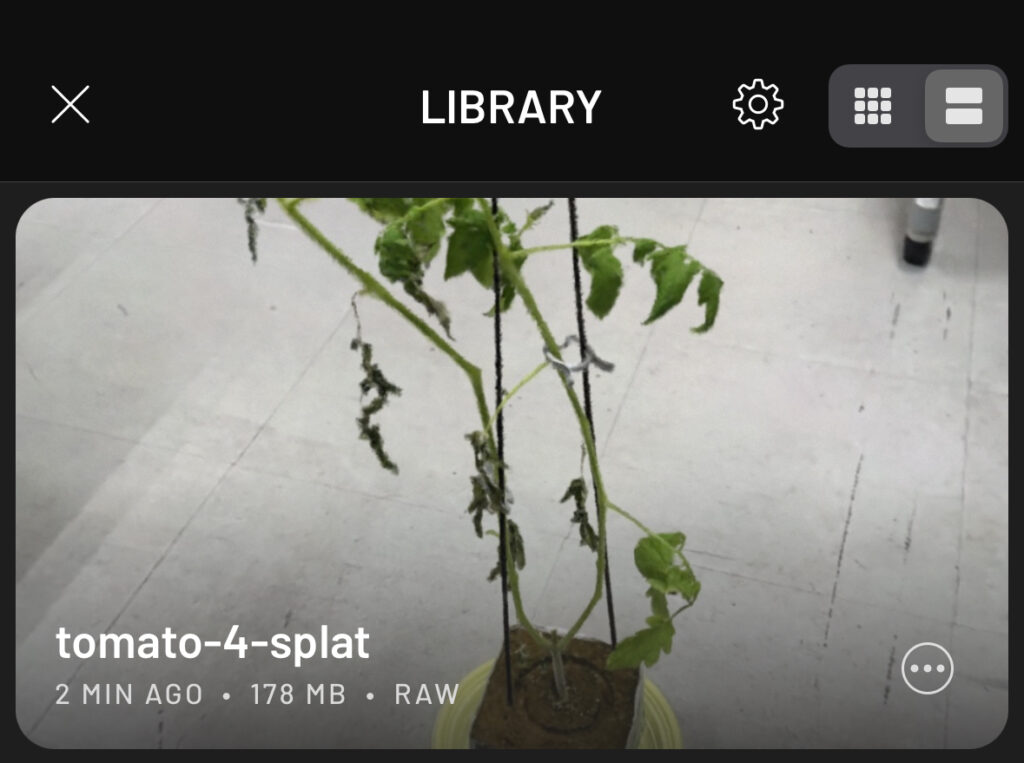
▼Once saved, it is stored in your "LIBRARY."
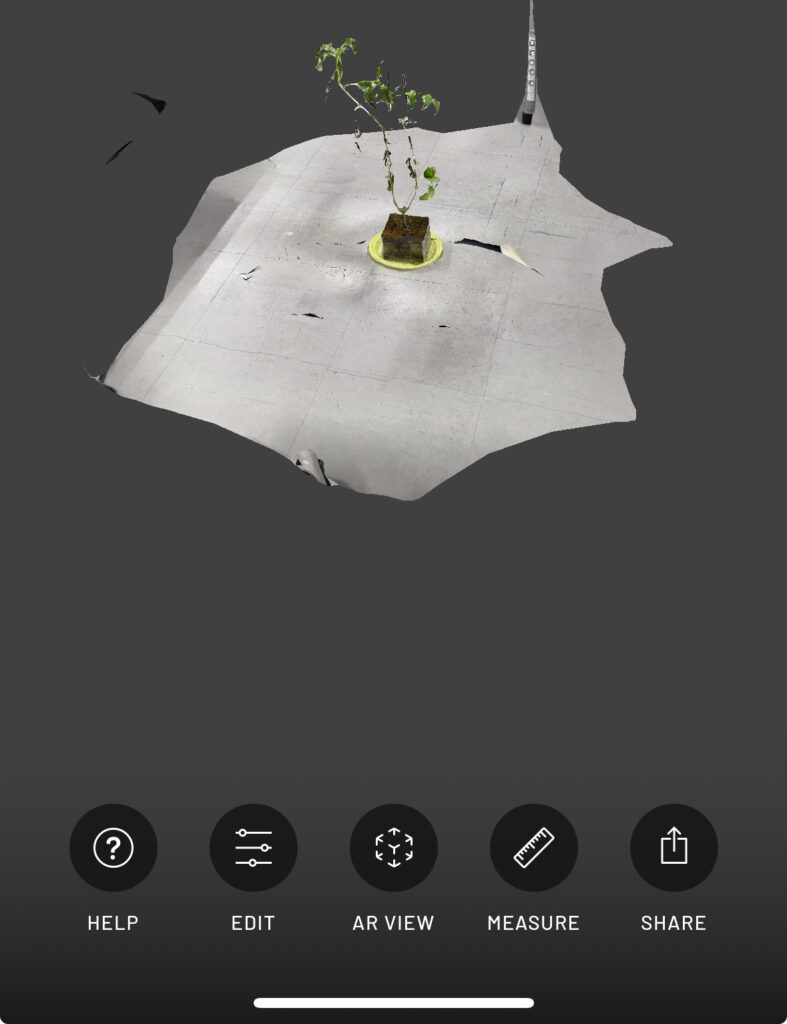
▼Selecting the data opens several options.
You can refine the data using EDIT and export it using SHARE.
▼Using CROP in the EDIT menu allows you to narrow down the data range and remove unnecessary surroundings.

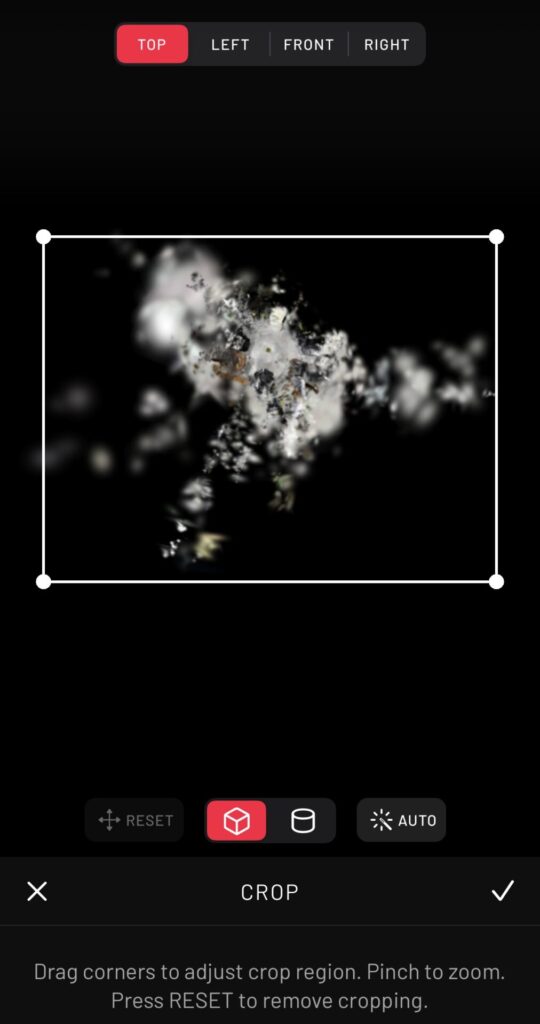
The AUTO feature is quite powerful and automatically focuses on the target object.
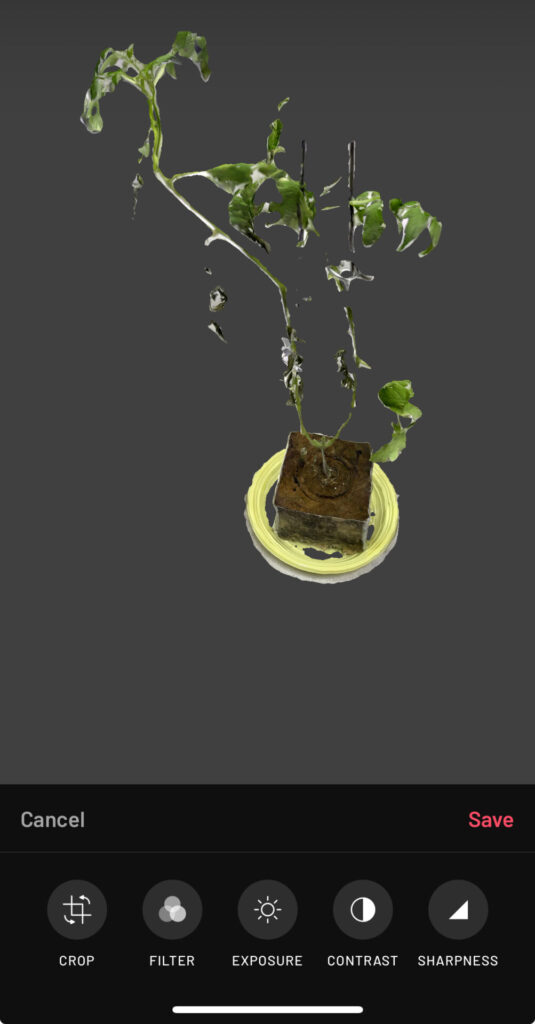
▼After applying AUTO:
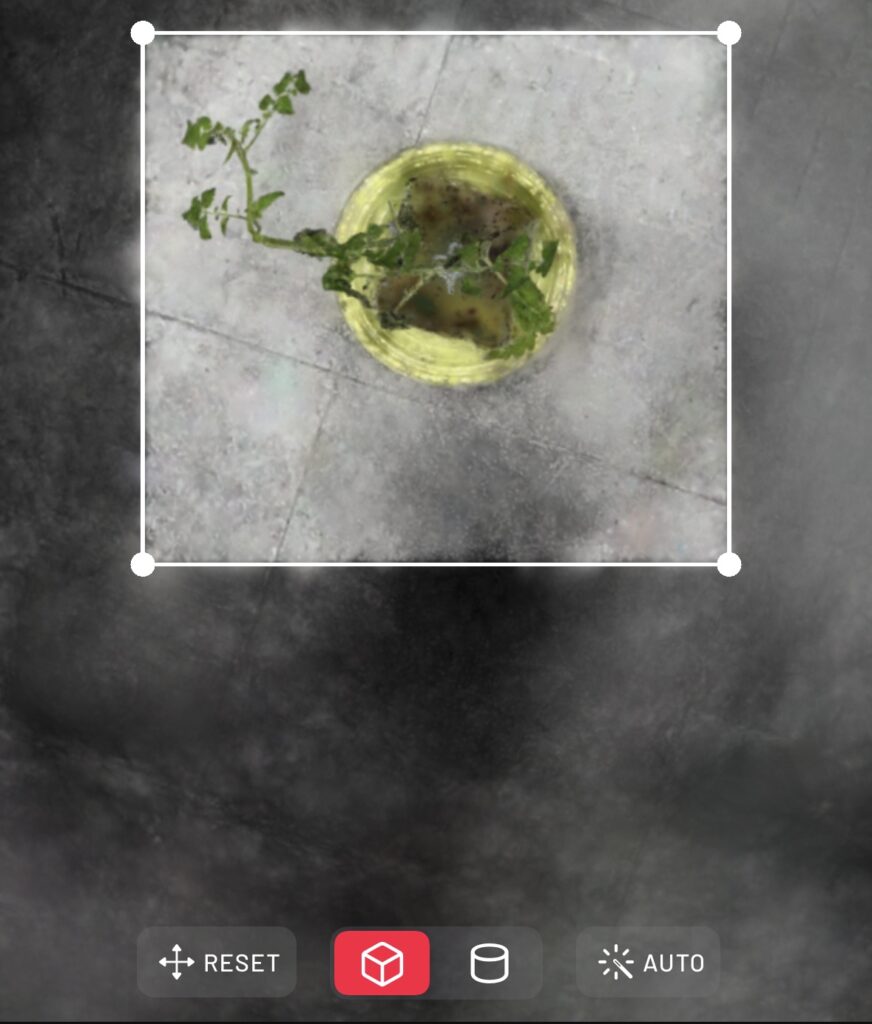
▼After further manual cropping, only the seedling remains.

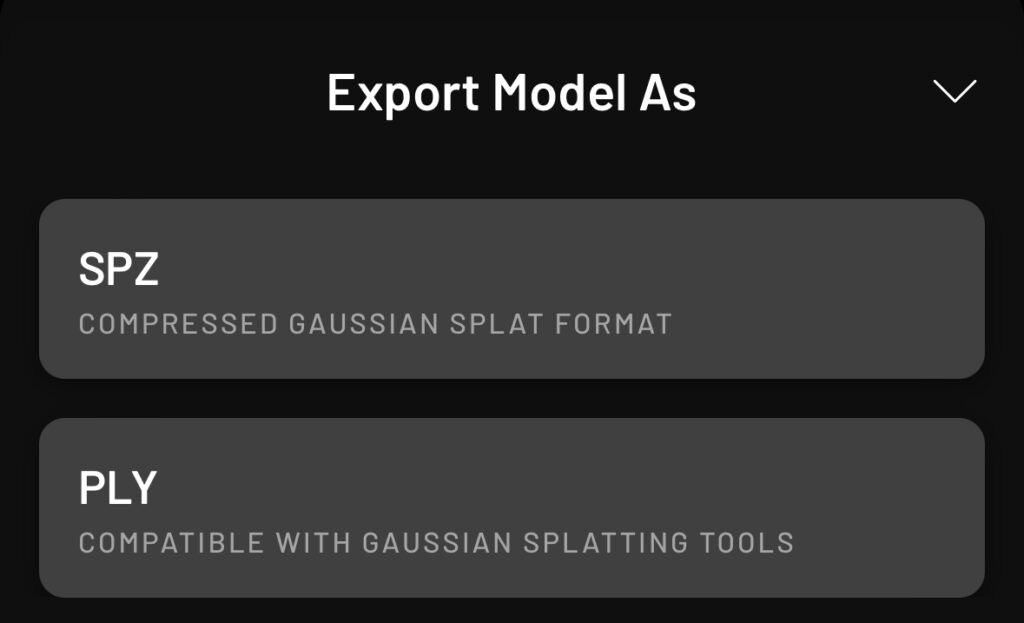
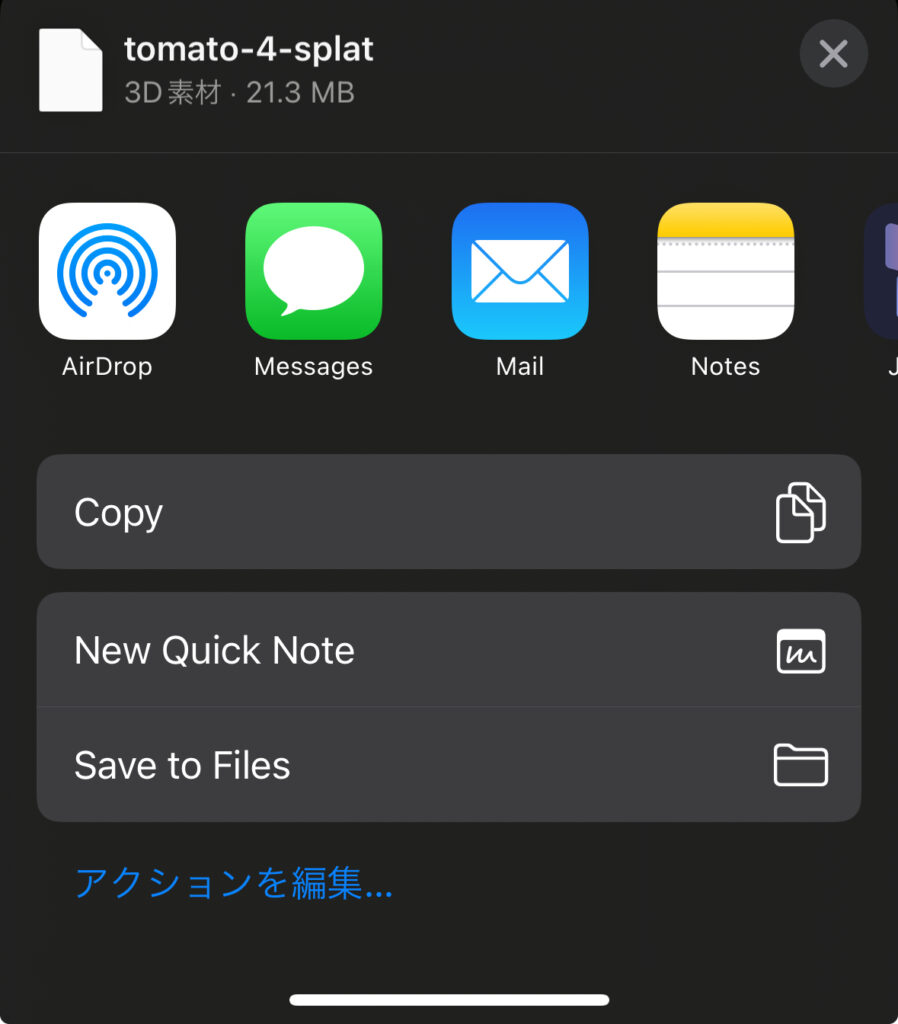
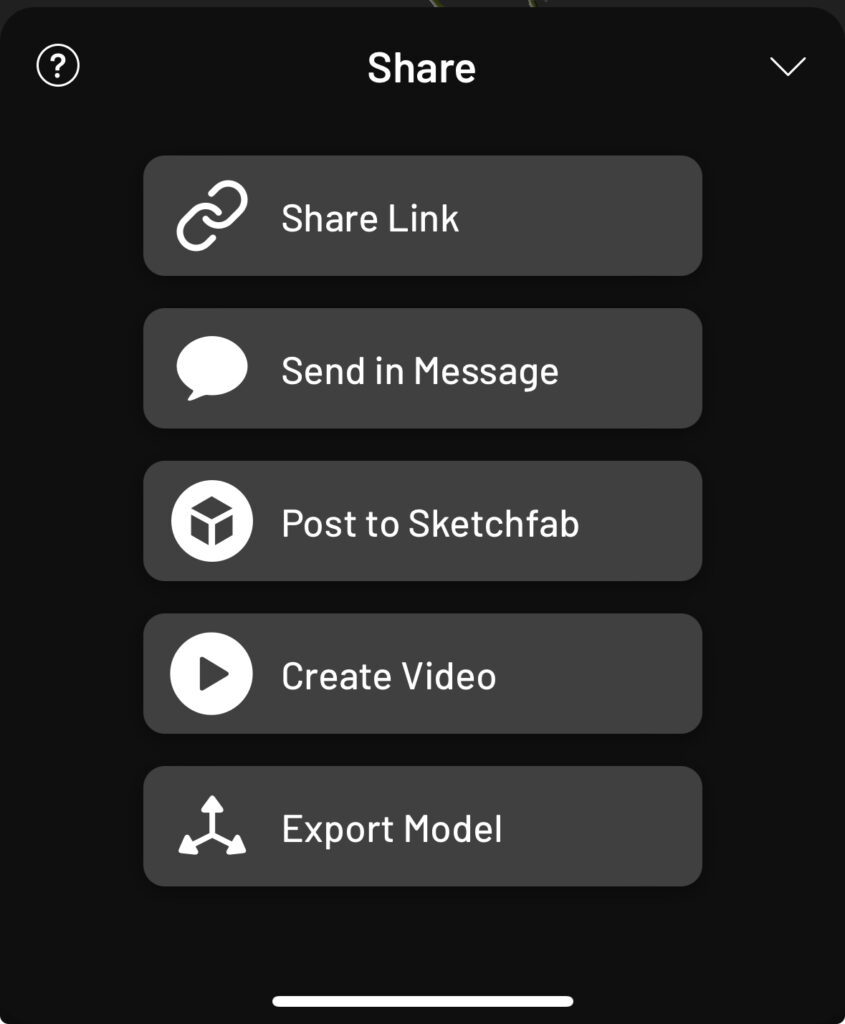
▼Go to SHARE and select Export Model.

▼You can choose between SPZ or PLY. I chose PLY for this project.
▼I saved the file to my iPhone's "Files" app to transfer it to my PC later.
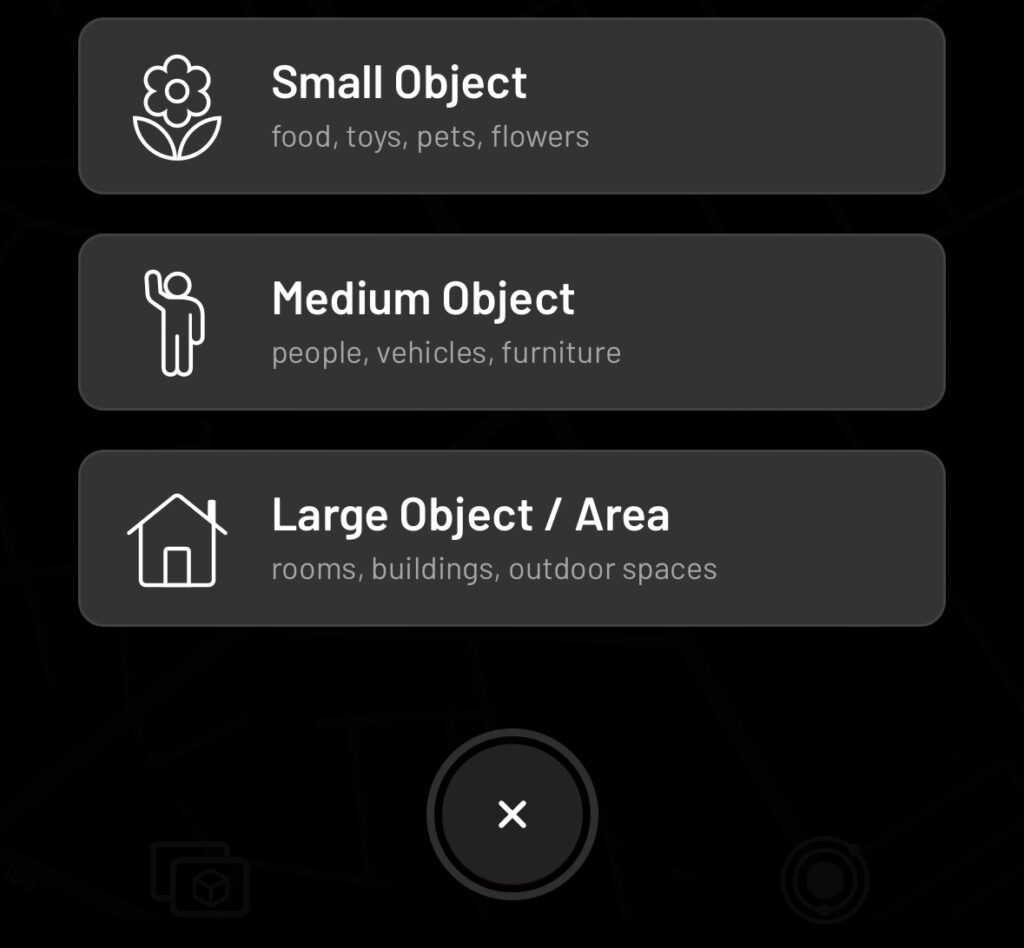
Importing in Mesh Mode
I also tried "Mesh" mode, which offers more export formats and features.
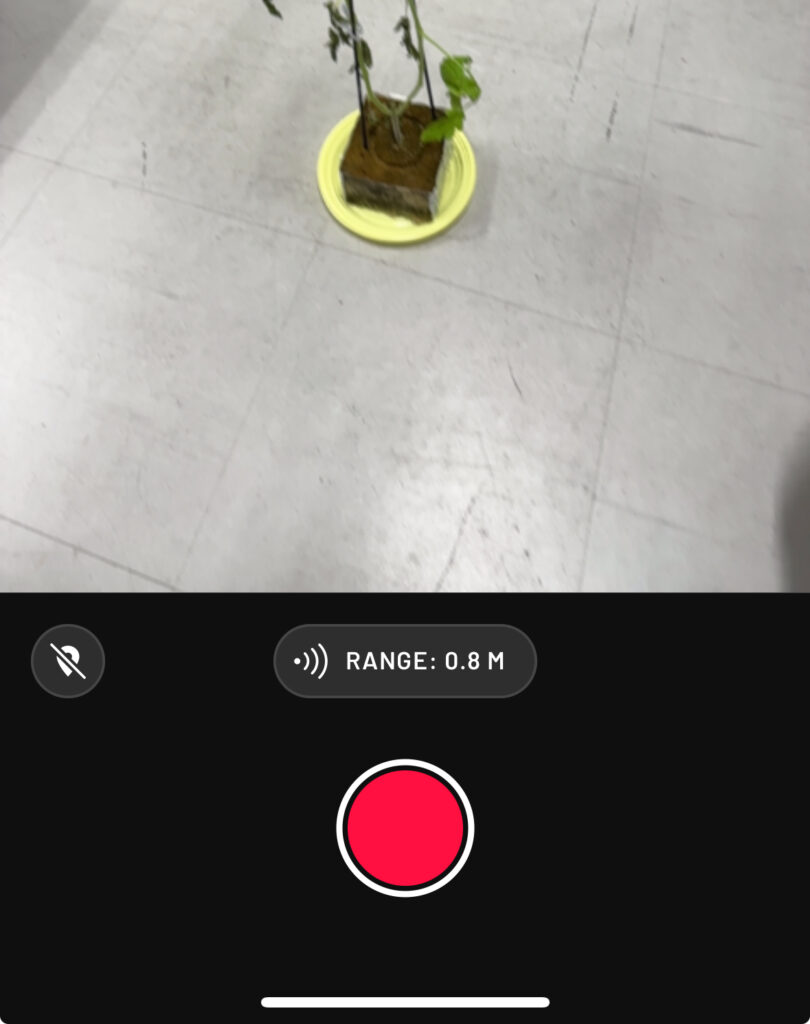
▼I selected "Small Object" and scanned the target.
▼You can limit the distance using the RANGE setting.
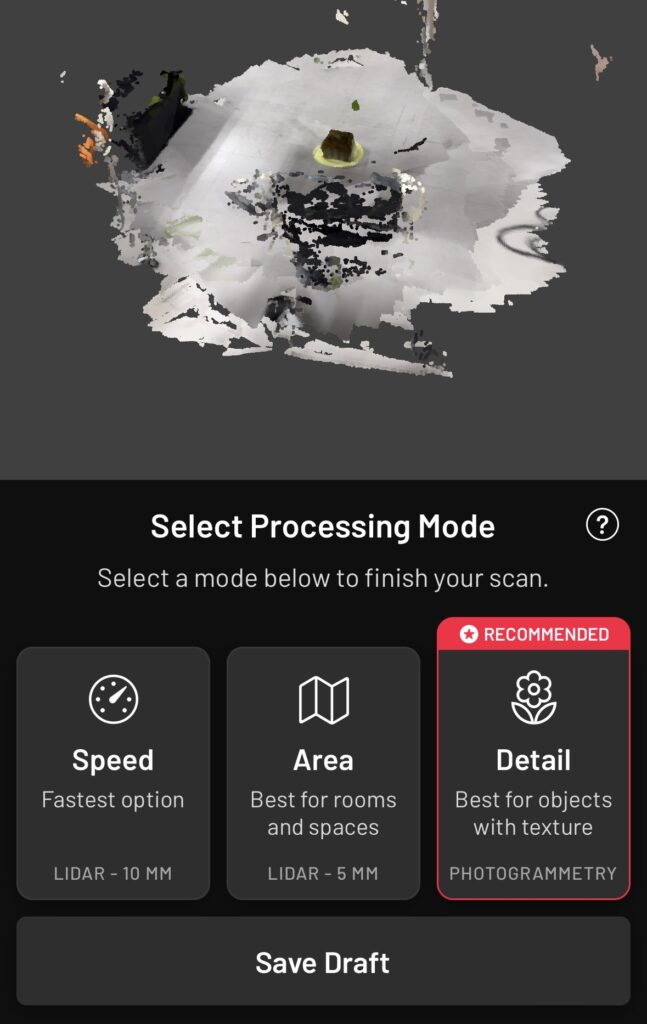
▼For processing, I selected "Detail."
▼Saved the data after processing.
▼Checking the data after saving. This mode also includes an "AR VIEW."
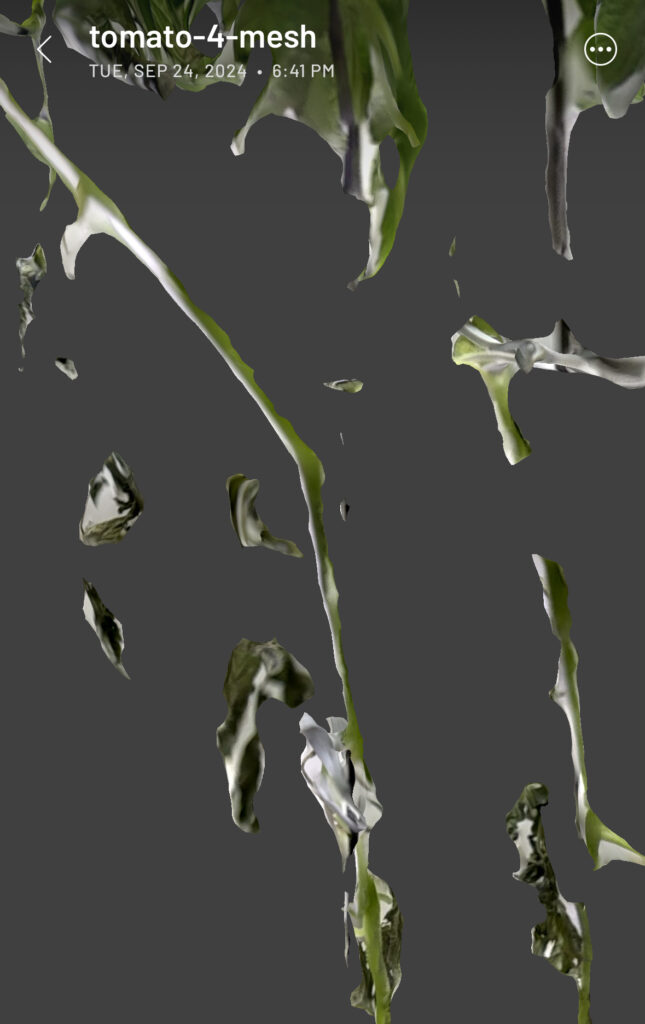
▼Here is the data after cropping.
▼Zooming into the scanned data looks like this. There are some gaps. If you want a more detailed scan, is Splat better, or do you just need to scan more thoroughly…?
▼Testing the AR feature. It appeared in the real world at nearly actual size.
▼Export data via "Export Model" in "SHARE."
▼There are more export formats available than in Splat mode. FBX seems like the best choice for importing into Unreal Engine.

Sending Files to a PC
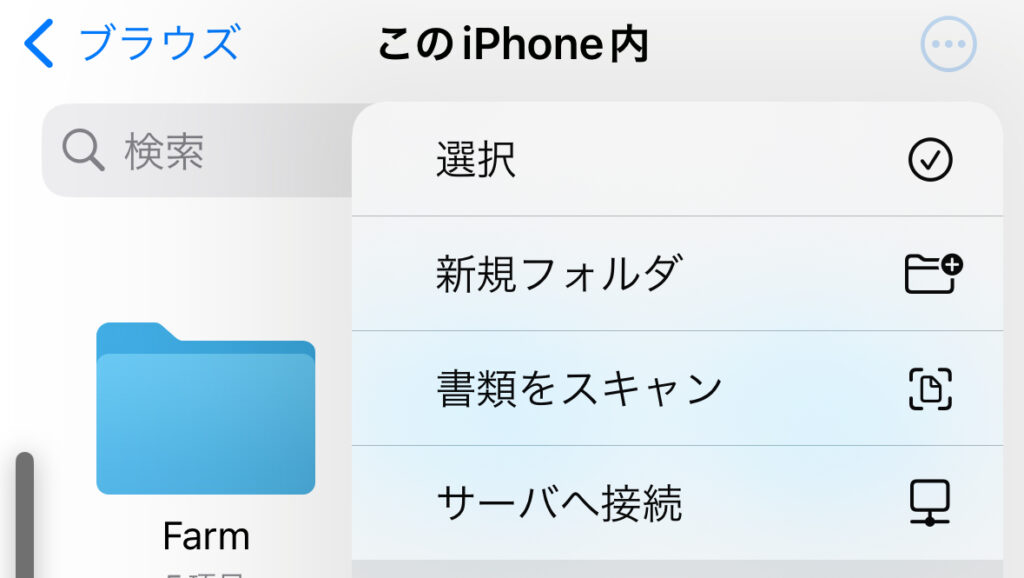
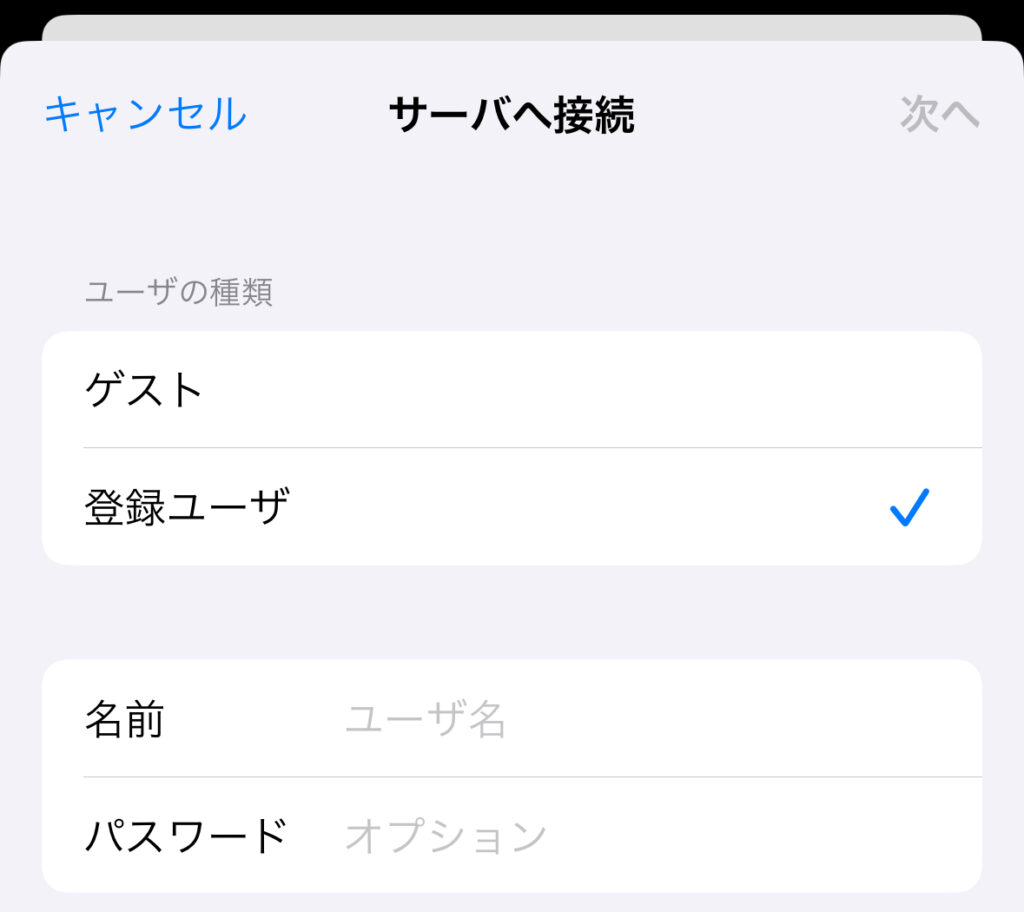
I tried the "Connect to Server" feature in the iPhone "Files" app.
▼The "Connect to Server" option is found under the three-dot menu in the top-right.
▼Enter the server address here.
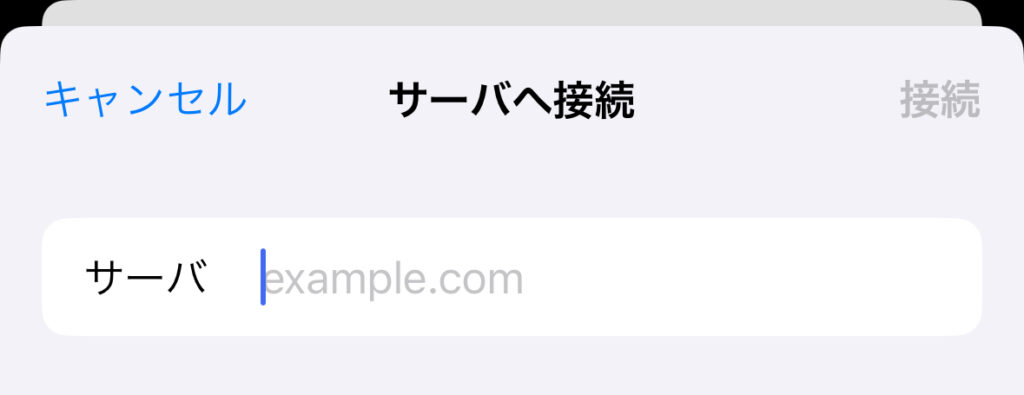
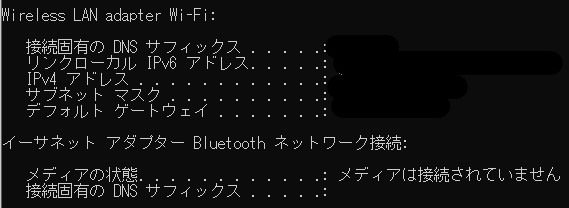
This time, I am sending data to a Windows PC. Please ensure the iPhone and PC are connected to the same Wi-Fi. Run ipconfig in the Command Prompt to check your IP address.
▼The IPv4 address will be displayed as shown below; enter this into the server field.
▼It seems necessary to switch the Windows PC to a local account. I referred to the following article for this:
https://kakitamablog.com/iphone-windows-connect
▼I was able to connect using the username and password used to log into the PC.
Once connected to the server, send the files.
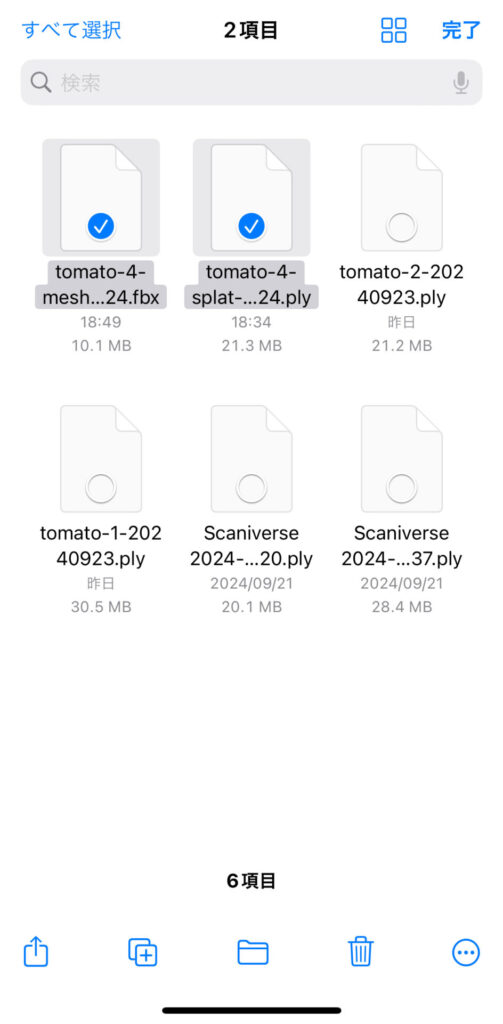
▼Select the files you want to send.
▼You can access the directory under the Windows user files.
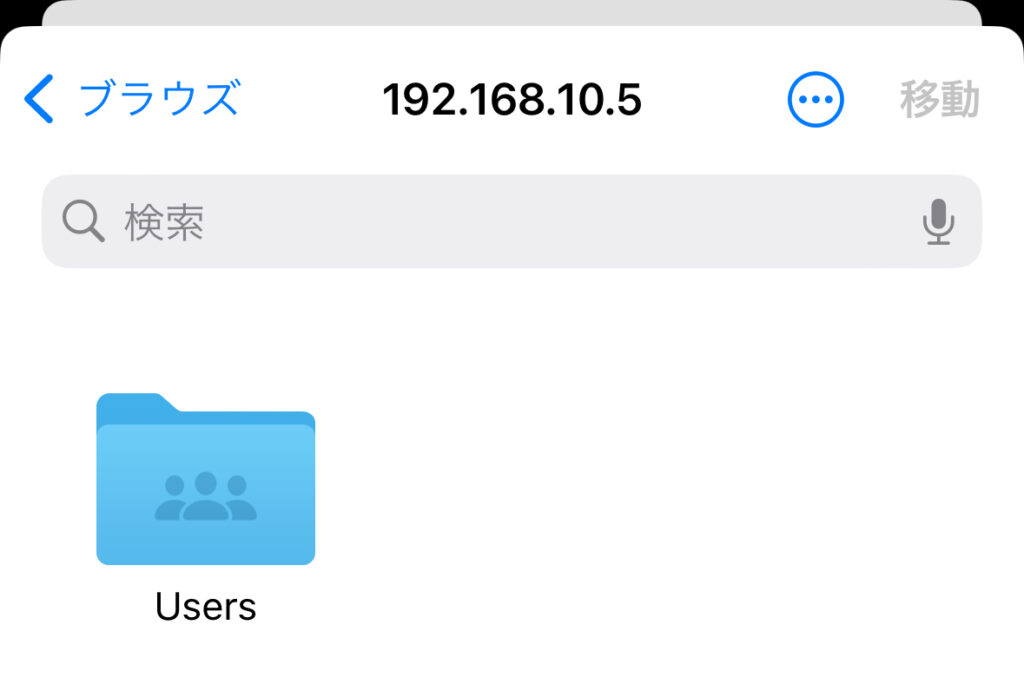
By copying the files here, they are sent to the PC. Note that the IP address may change if you switch networks or reconnect.
Importing into Unreal Engine
Converting with 3dgsconverter
I used the VS Code extension vscode-3d-preview to view the PLY file exported from Scaniverse Splat mode.
▼PLY files are supported.
vscode-3d-preview - Visual Studio Marketplace
▼It was displayed like this:
While the point cloud data is present, the color data has been lost. Even converting it with "Cloud Compare" (mentioned later) in this state did not restore the color information. So, I tried "3dgsconverter," a data conversion tool introduced in the Unity article.
▼GitHub Repository:
https://github.com/francescofugazzi/3dgsconverter
I created a virtual environment and installed 3dgsconverter using the following commands:
python -m venv pyenv
cd pyenv
.\Scripts\activate
pip install git+https://github.com/francescofugazzi/3dgsconverter.git
I prepared a Python script to specify the PLY file path as an argument and save the converted file with the same name in the current directory.
▼The Python script:
import subprocess
import sys
from pathlib import Path
import os

input = sys.argv[1]
output = os.path.join(Path.cwd(), os.path.basename(input))

subprocess.run(f'3dgsconverter -i {input} -o {output} -f cc --rgb')
Running the following command completed the conversion:
python convert.py <path_to_ply_file>▼Although it is upside down, the appearance looks correct.
Converting with Cloud Compare
To import the data into Unreal Engine, I tried several software options for further conversion. Ultimately, I was able to import the data by converting it with "Cloud Compare."
▼Cloud Compare download page:
▼Click the folder button to import the file converted earlier.
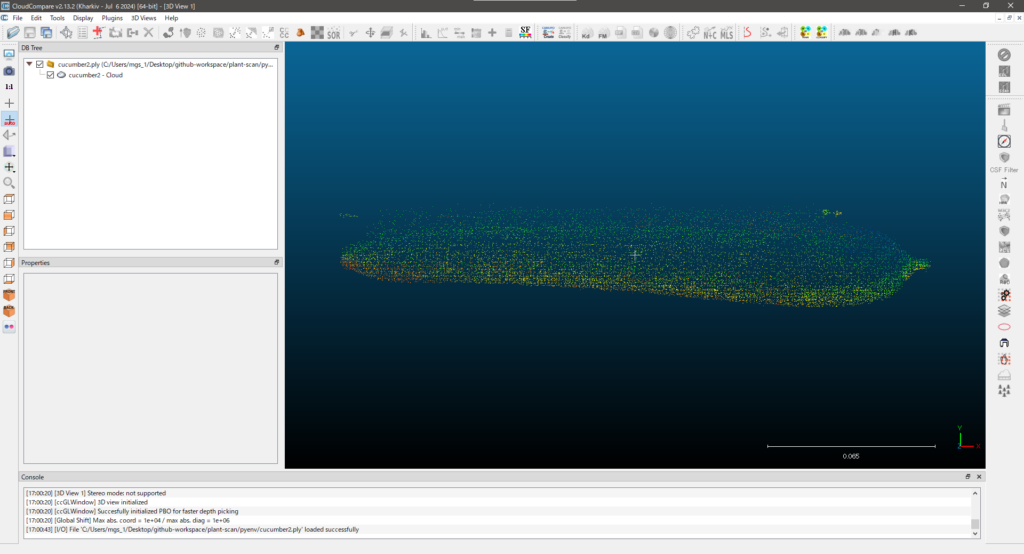
▼This is the cucumber data; it looks like this when imported.
▼With the object you want to export selected, click the Save button.
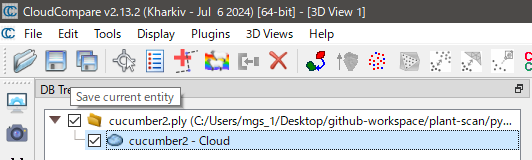
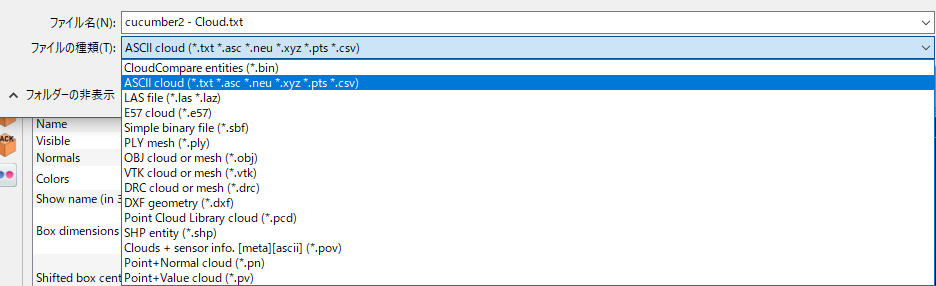
▼You can choose the file format when saving. This time, I saved it as a .txt file.
▼As a side note mentioned in forums, saving as an .e57 file allowed for import, but the colors were sometimes distorted.
https://forums.unrealengine.com/t/lidar-point-cloud-plugin-imported-cloud-colors/903981
Meshing with the LiDAR Point Cloud Plugin
▼Enable the "LiDAR Point Cloud Support" plugin via Edit -> Plugins in UE5.

Although this plugin handles point clouds, PLY files are not among the supported formats. This is why I saved the file as a .txt in Cloud Compare.
▼List of supported formats for the LiDAR Point Cloud Plugin:
When you drag and drop the .txt file, the LiDAR Point Cloud Import Options will launch. You must specify which columns correspond to Red, Green, and Blue.
▼I assigned Rf to Red, Gf to Green, and Bf to Blue.

▼The data was imported as shown. The point cloud is sparse and looks quite thin.
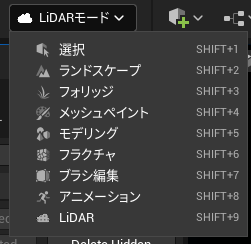
Switching the selection mode to "LiDAR Mode" allows you to use the plugin's features.
▼Note that you cannot move objects while in LiDAR Mode.
▼Selecting "Create Static Mesh" allows you to generate a static mesh.
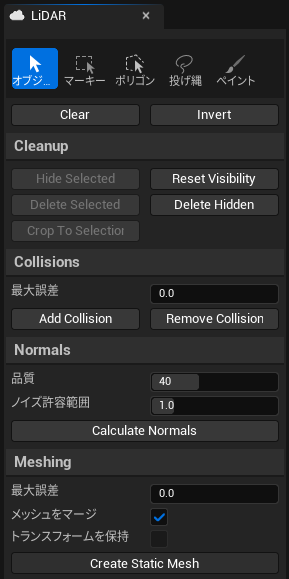
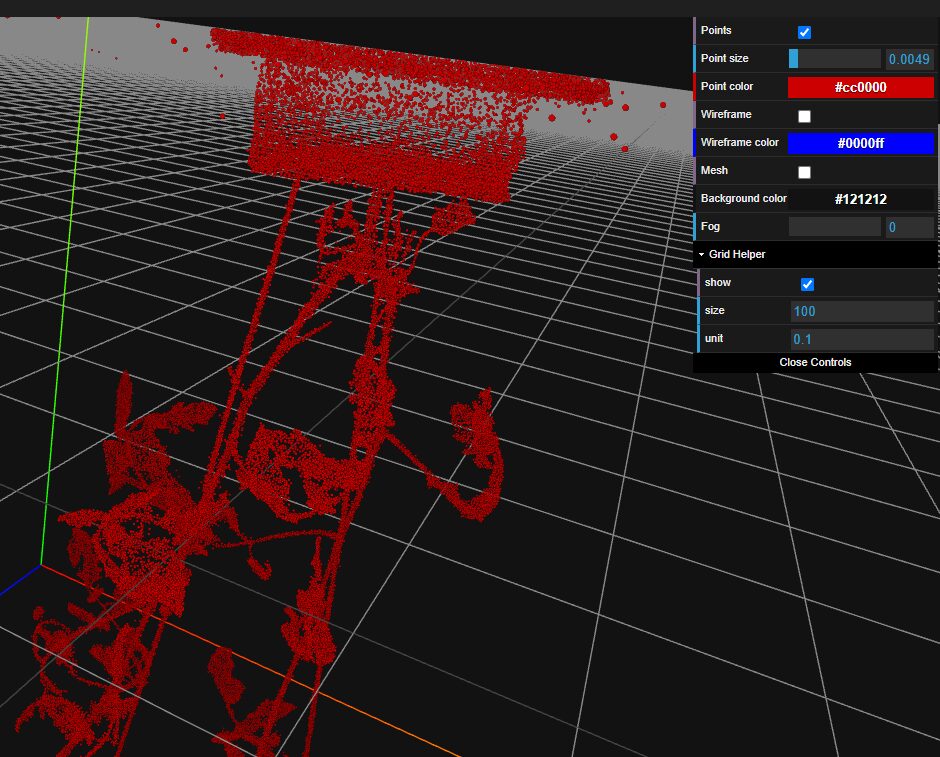
▼Here is the result after creating the static mesh. The tomato seedling is displayed clearly, but the tomato itself remains thin.
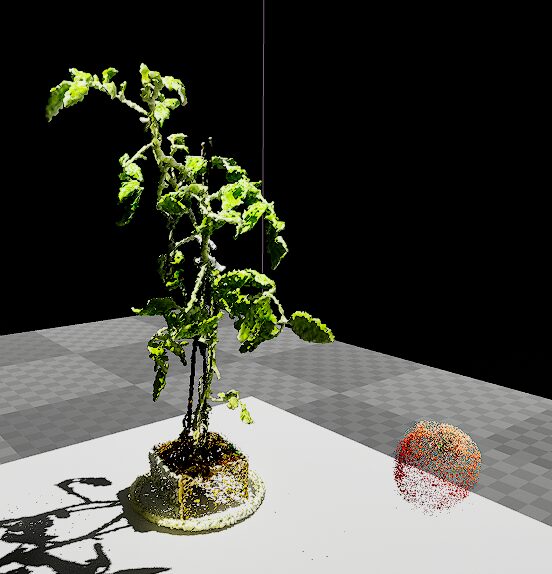
Areas lacking data will inevitably appear thin, so it seems necessary to capture more detailed data during the scanning process.
Moving the Light Source
One thing I was curious about when importing point cloud data was how it would look when moving the light source. I wanted to perform simulations using Unreal Engine's graphic processing, so it would be a problem if the lighting didn't reflect on the point cloud. I checked how it reacts.
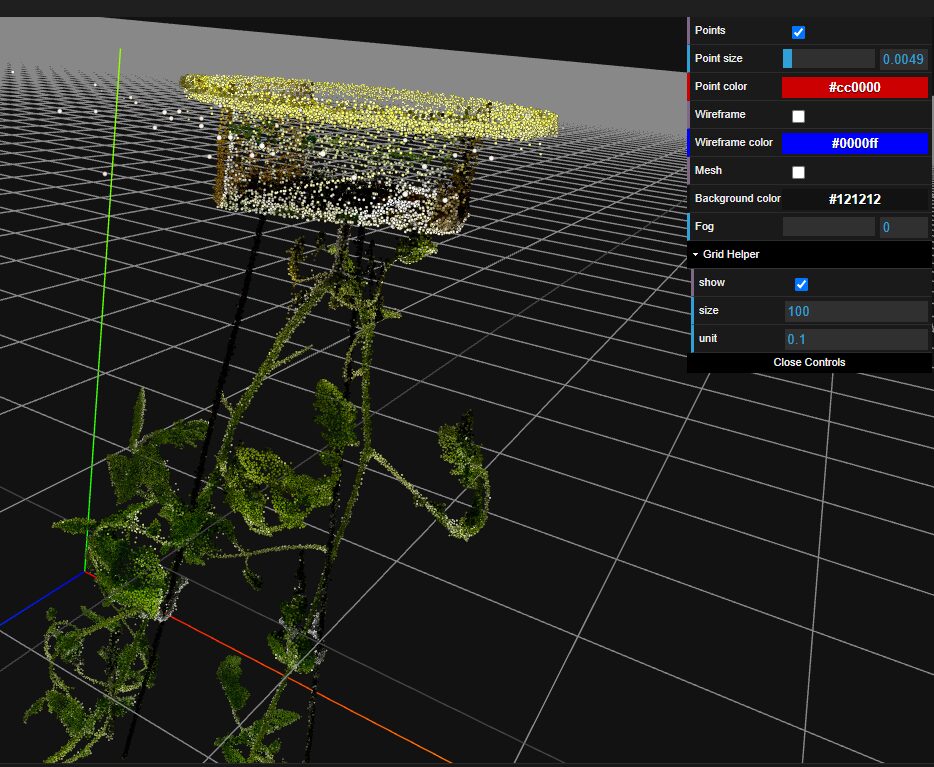
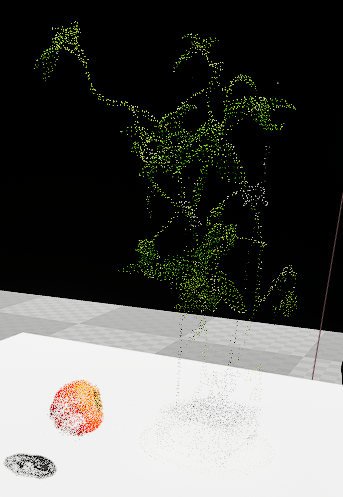
▼Changing the light source position produces the results below. The left is the point cloud data, and the right is the meshed data.
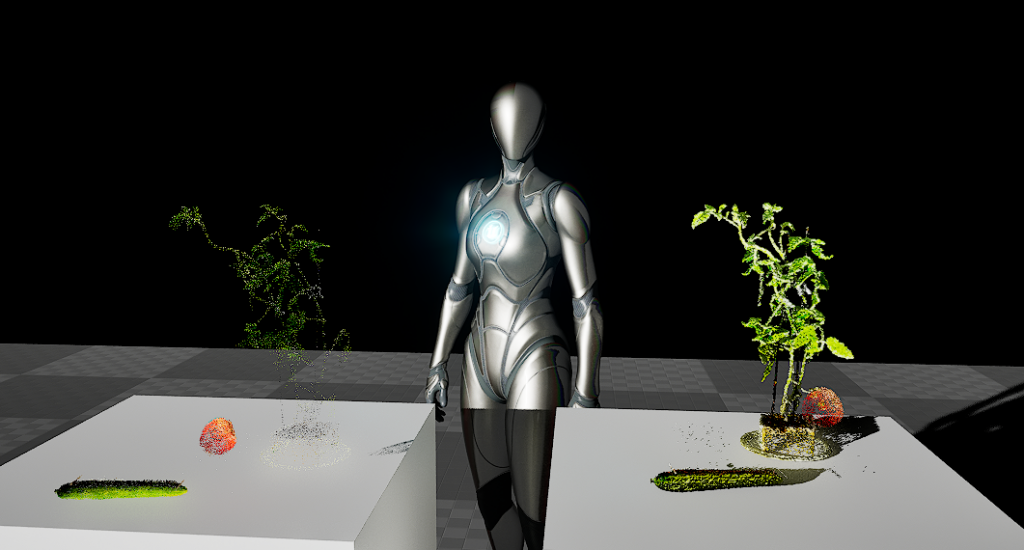
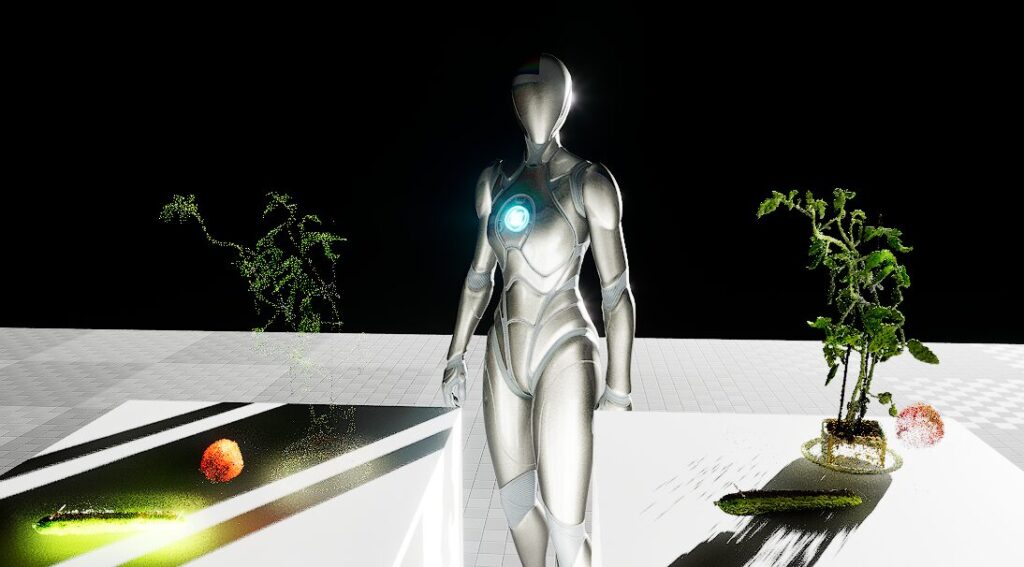
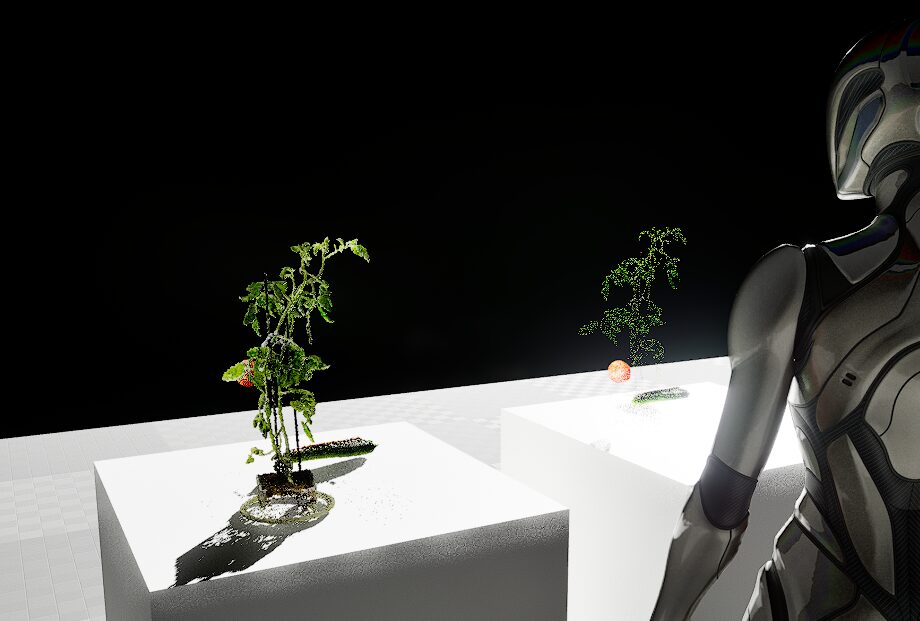
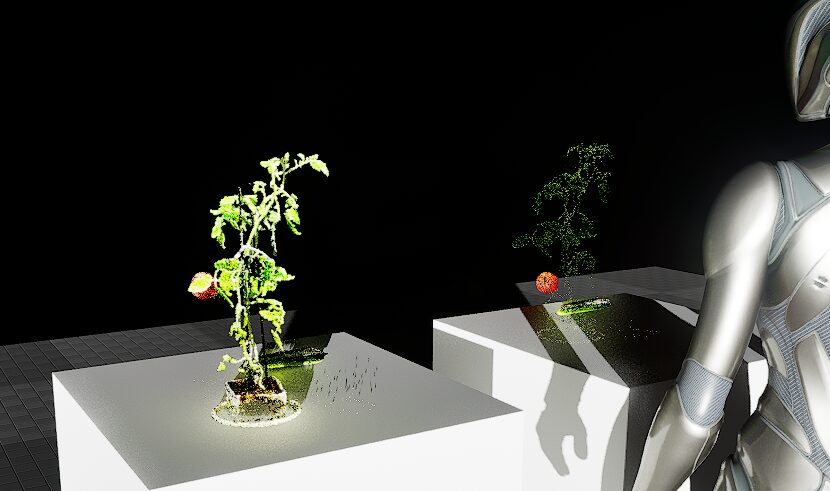
Shadows seemed to be reflected correctly. However, the point cloud data has significant gaps. I wonder if these gaps would be filled if I changed the equipment or the scanning method.
▼Video of moving within UE5:
Additionally, I thought the tomato might fall if I ran a physics simulation, but it turns out "Simulate Physics" cannot be enabled for these objects.
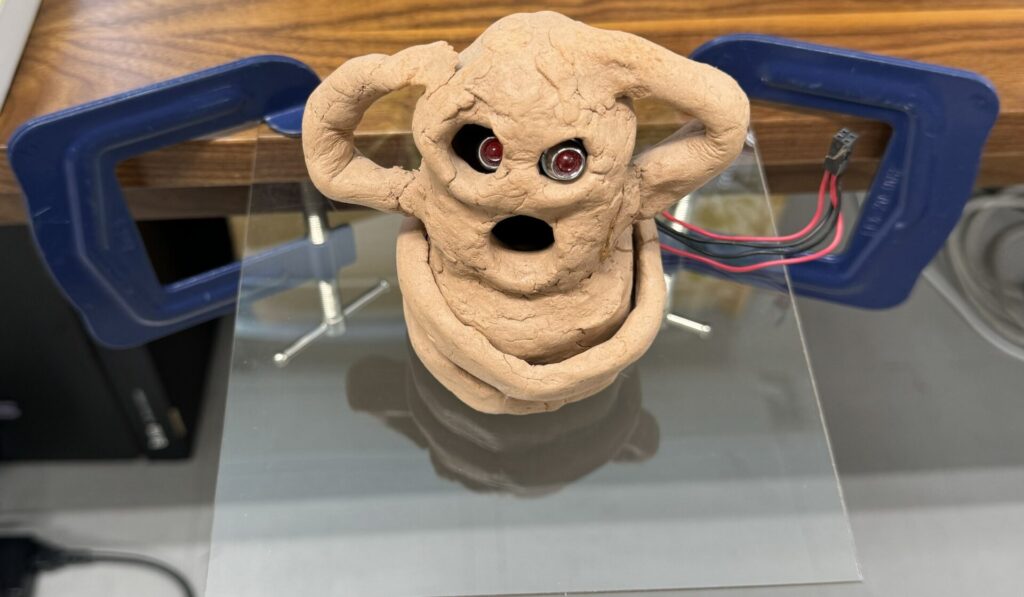
Scanning and Importing a Haniwa
Based on my experience so far, I figured I could make the point cloud denser by taking more time to scan thoroughly. I tried this with my "Haniwa" (terracotta clay figure).
▼Here is the data exported from Scaniverse. Feel free to use it for practice.
▼This is the Haniwa. It now has LEDs in its eyes.
After scanning for over 10 minutes, I converted the data using 3dgsconverter and Cloud Compare.
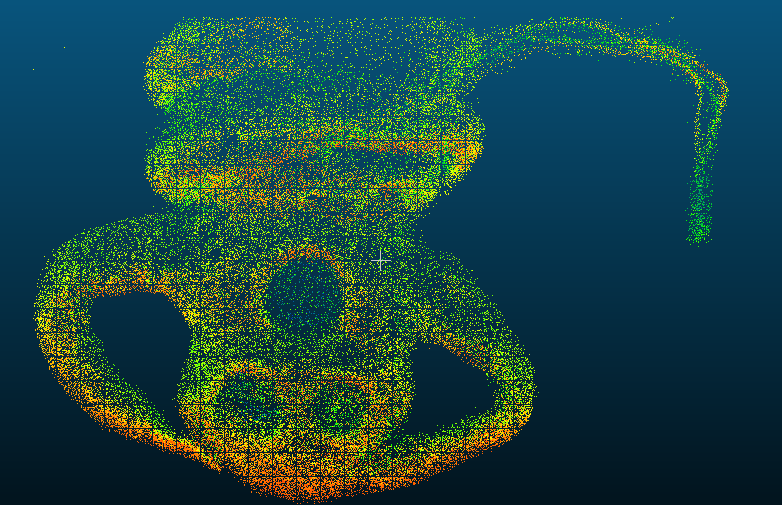
▼Viewing it in vscode-3d-preview, the point cloud already feels much denser.
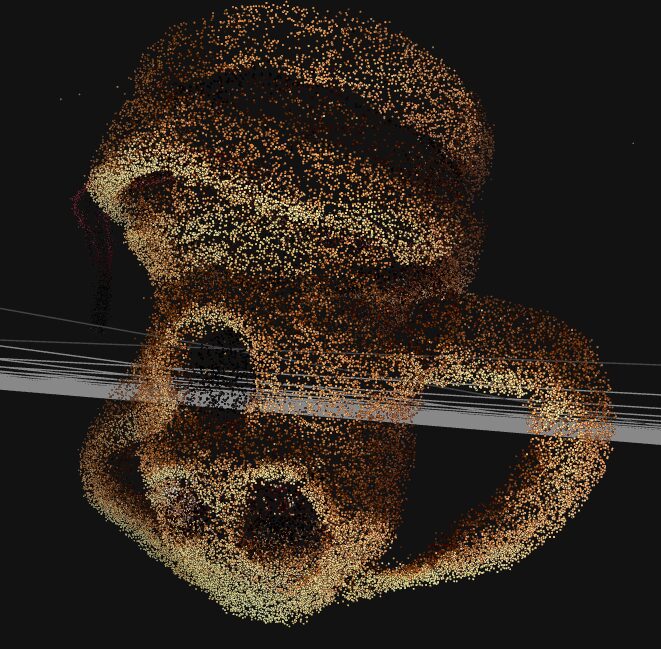
▼Imported into Cloud Compare. It looks a bit like "The Scream" by Munch.
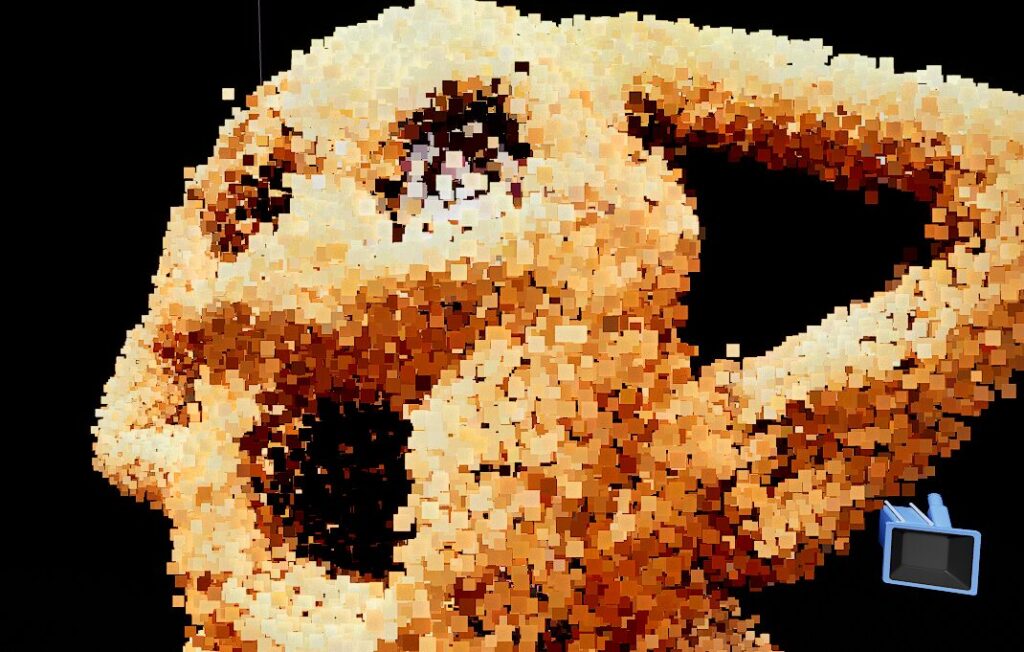
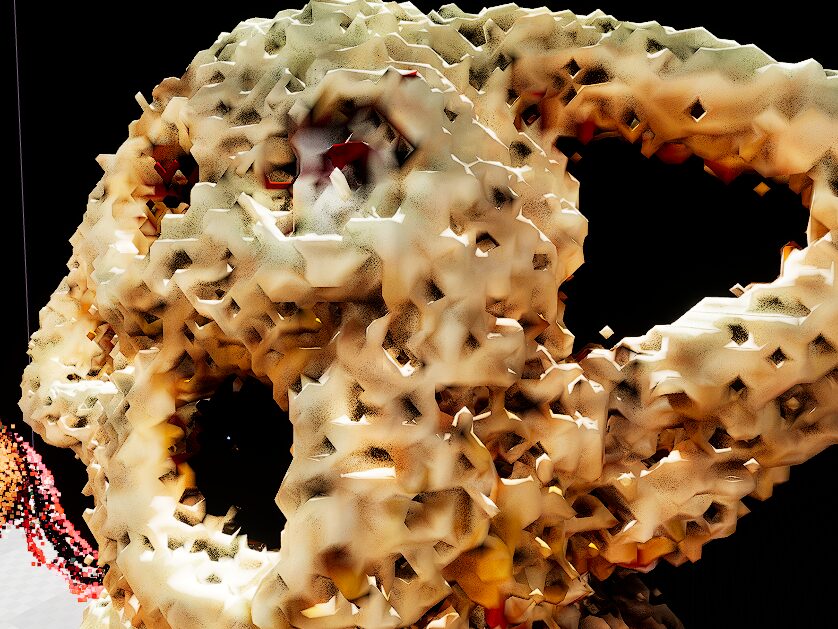
I imported it into Unreal Engine and meshed it. While the point cloud is denser than before, the surface still appears rough.
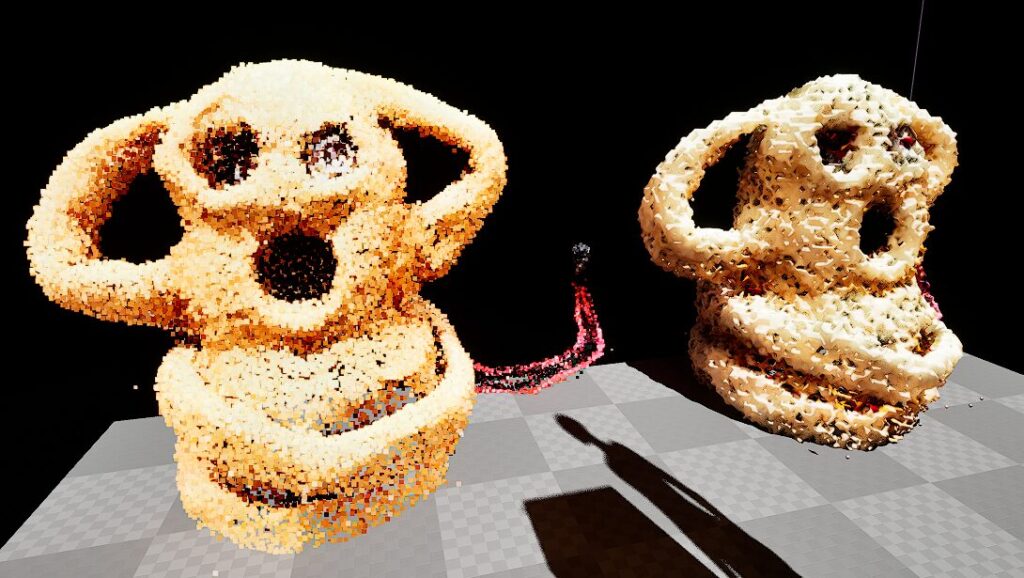
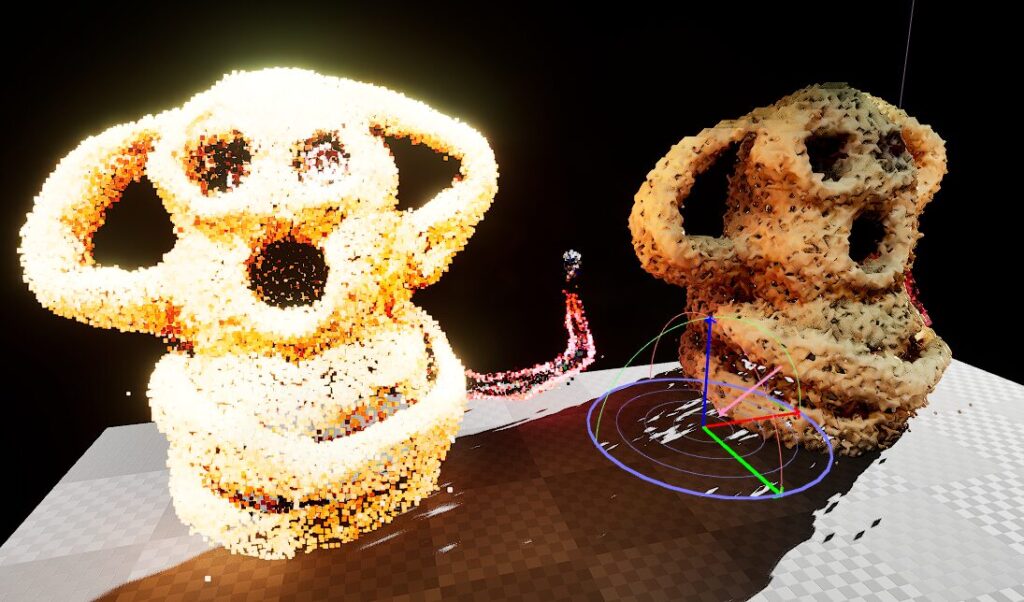
▼The left is point cloud data, and the right is meshed data. Interestingly, the point cloud data sometimes appears to emit light when moving the light source.
Finally
While I feel there might be better ways to handle point cloud data, I was at least able to import it. However, the surface remains rough, so other methods may need to be considered if you require fine detail. It might not be noticeable from a distance, such as a Third-Person Character viewpoint. It really depends on the application.
▼LiDAR Point Cloud Plugin Documentation. There might be features somewhere to display data more cleanly.