Trying Out XIAO ESP32C3 Part 5 (Bluefruit Connect, BLE Communication with iPhone)
Introduction
In this post, I experimented with BLE (Bluetooth Low Energy) communication between the XIAO ESP32C3 and a smartphone app called "Bluefruit Connect." Previously, I used an app called "LightBlue" for communication, but this is a different tool.
▼In this previous article, I used LightBlue:
Using XIAO ESP32C3 Part 1 (Battery, Bluetooth)
Introduction The previous article was about my exhibit at Maker Faire Kyoto 2023. This time I will talk about the microcontroller I used for our exhibit, the…
LightBlue doesn't have the capability to display data as a graph (like a serial plotter), so I was looking for another app. Bluefruit Connect allowed me to visualize numerical data as a real-time graph.
▼It looks like this:
However, I struggled quite a bit because there isn't much information available on how to use Bluefruit Connect with non-Adafruit devices. This time, I am focusing solely on the "UART" and "Plotter" functions.
▼The product page for the XIAO ESP32C3 is here:
https://akizukidenshi.com/catalog/g/g117454
Seeed Studio XIAO ESP32C3 — スイッチサイエンス
Bluetooth Low EnergyとWi-Fiを搭載した小型マイコンボードです。IoTや携帯するアプリケーションに最適です。工事設計認証を取得しています。


▼Previous articles in this series:
Trying Out XIAO ESP32C3 Part 2 (analogWrite Function and Servo Motors)
Info This article is translated from Japanese to English. Introduction In this post, I experimented with the analogWrite function and servo motor control using…
Trying Out XIAO ESP32C3 Part 3 (OLED Display and Continuous Rotation Servo)
Info This article is translated from Japanese to English. Introduction In this post, I experimented with controlling an OLED display and a continuous rotation …
Related Information
▼Adafruit's official page:
https://learn.adafruit.com/bluefruit-le-connect/ios-setup
Essentially, this app is designed to be used with devices sold by Adafruit. While there are sample programs, they didn't run immediately on the XIAO ESP32C3. If you want to utilize all the app's features, it might be better to buy a supported Adafruit device.
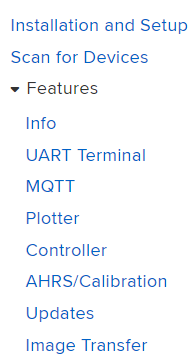
▼By clicking "Features" on the left side of that page, you can see explanations for each function. I tried several sample programs, but many failed to run (e.g., stopping at "factory reset"). I haven't investigated the details this time.
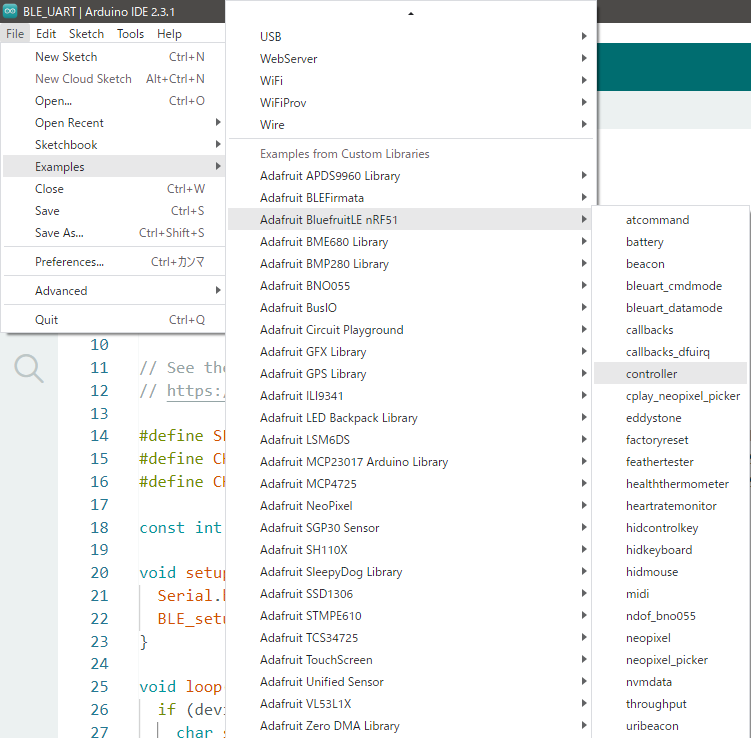
In the Arduino IDE, there is a library called Adafruit BluefruitLE nRF51 which includes various samples. However, likely because it’s meant for Adafruit's nRF51822, I couldn't get it to run on the XIAO ESP32C3.
▼I couldn't run this sample.
https://www.arduino.cc/reference/en/libraries/adafruit-bluefruitle-nrf51
▼Adafruit's nRF51822 can even act as a sniffing tool to send data to Wireshark:

nRF51822搭載 Bluefruit LE Sniffer — スイッチサイエンス
Bluetooth Low Energy(BLE)用のスニッフィングツールデバイスです。二つのBLEデバイス間のデータをキャプチャーし、ネットワーク分析を行うオープンソースソフトウェア…

▼I’ve seen this mentioned in books about IoT device security. It feels like a very specialized microcontroller.

For this test, I installed Bluefruit Connect on my iPhone 8 to verify the operation.
▼App Store link:
https://apps.apple.com/us/app/bluefruit-connect/id830125974
▼Google Play link:
https://play.google.com/store/apps/details?id=com.adafruit.bluefruit.le.connect
About BLE UART Communication
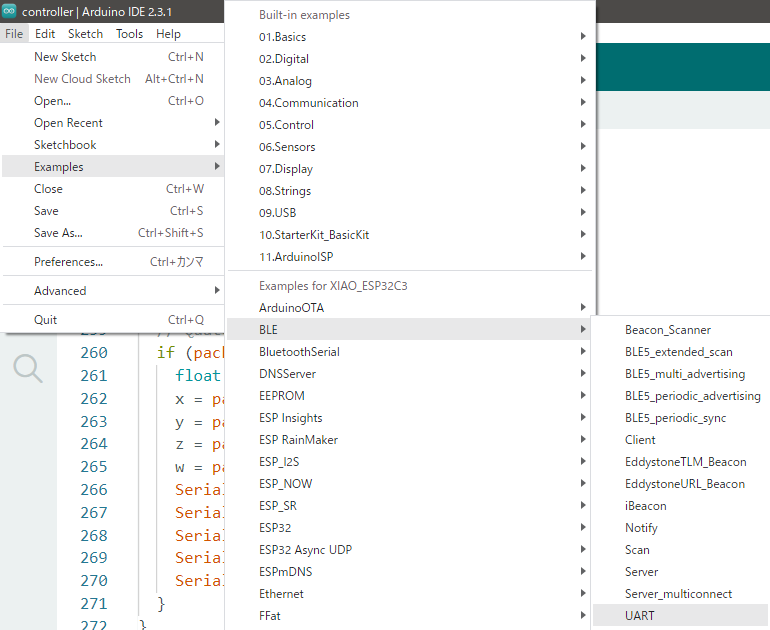
To display graphs in Bluefruit Connect, I referred to the BLE UART sample program found in the ESP32 BLE Arduino library.
▼You can find it under Examples -> BLE -> UART.
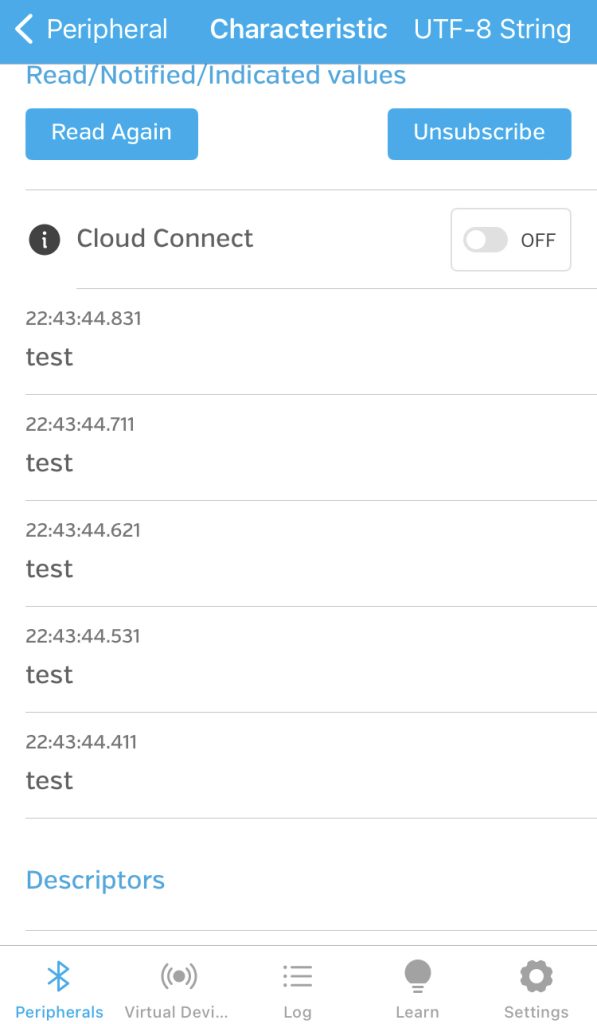
If you just want to send data continuously, you can use "Notify." In LightBlue, subscribing to a characteristic allowed me to see data updates continuously.
▼This is how it appears in LightBlue:
The reason I’m using the UART sample as a reference this time is that Bluefruit Connect requires BLE UART communication to display data in the Plotter. This was mentioned in the app's Plotter Help section.
▼Here is the Help screen for the Plotter:

Writing the Program
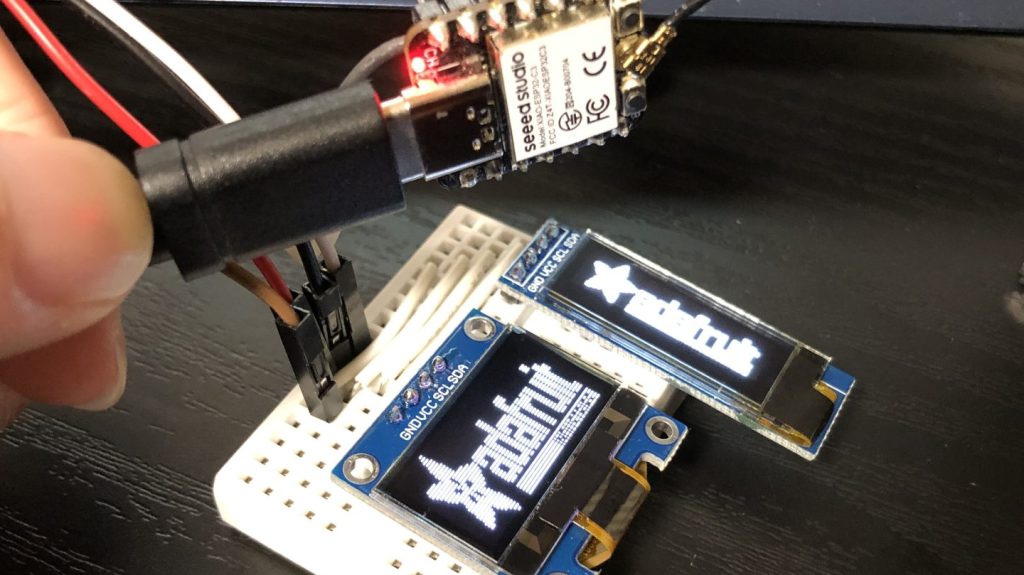
For this experiment, I connected a potentiometer to the A0 pin of the XIAO ESP32C3. The program reads the value using analogRead() and sends that number via BLE.
▼Breadboard wiring:
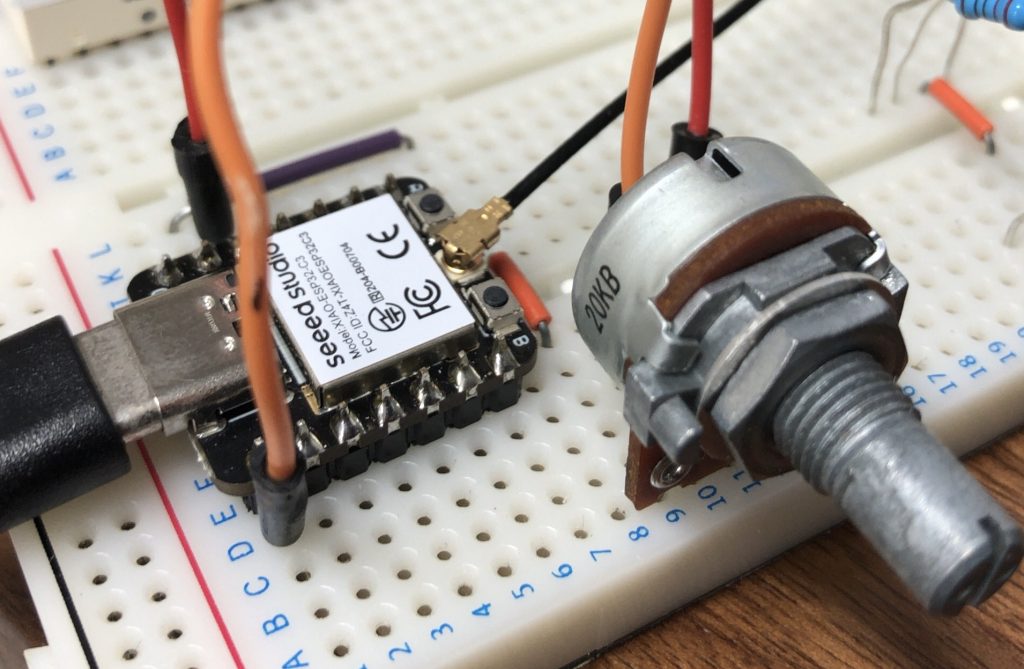
▼I added the analogRead() logic to the sample program and modularized the setup.
#include <BLEDevice.h>
#include <BLEServer.h>
#include <BLEUtils.h>
#include <BLE2902.h>

BLEServer *pServer = NULL;
BLECharacteristic *pTxCharacteristic;
bool deviceConnected = false;
bool oldDeviceConnected = false;

// See the following for generating UUIDs:
// https://www.uuidgenerator.net/

#define SERVICE_UUID "6E400001-B5A3-F393-E0A9-E50E24DCCA9E"  // UART service UUID
#define CHARACTERISTIC_UUID_RX "6E400002-B5A3-F393-E0A9-E50E24DCCA9E"
#define CHARACTERISTIC_UUID_TX "6E400003-B5A3-F393-E0A9-E50E24DCCA9E"

const int pin = A0;

void setup() {
  Serial.begin(115200);
  BLE_setup("XIAO ESP32C3");
}

void loop() {
  if (deviceConnected) {
    char str[8];
    int data = analogRead(pin);

    sprintf(str, "%d\n", data);
    Serial.println(str);
    pTxCharacteristic->setValue(str);
    pTxCharacteristic->notify();
    delay(10);  // bluetooth stack will go into congestion, if too many packets are sent
  }

  // disconnecting
  if (!deviceConnected && oldDeviceConnected) {
    delay(500);                   // give the bluetooth stack the chance to get things ready
    pServer->startAdvertising();  // restart advertising
    Serial.println("start advertising");
    oldDeviceConnected = deviceConnected;
  }
  // connecting
  if (deviceConnected && !oldDeviceConnected) {
    // do stuff here on connecting
    oldDeviceConnected = deviceConnected;
  }
}

class MyServerCallbacks : public BLEServerCallbacks {
  void onConnect(BLEServer *pServer) {
    deviceConnected = true;
  };

  void onDisconnect(BLEServer *pServer) {
    deviceConnected = false;
  }
};

class MyCallbacks : public BLECharacteristicCallbacks {
  void onWrite(BLECharacteristic *pCharacteristic) {
    String rxValue = pCharacteristic->getValue();

    if (rxValue.length() > 0) {
      Serial.println("*********");
      Serial.print("Received Value: ");
      for (int i = 0; i < rxValue.length(); i++) {
        Serial.print(rxValue[i]);
      }

      Serial.println();
      Serial.println("*********");
    }
  }
};

void BLE_setup(String name) {
  // Create the BLE Device
  BLEDevice::init(name);

  // Create the BLE Server
  pServer = BLEDevice::createServer();
  pServer->setCallbacks(new MyServerCallbacks());

  // Create the BLE Service
  BLEService *pService = pServer->createService(SERVICE_UUID);

  // Create a BLE Characteristic
  pTxCharacteristic = pService->createCharacteristic(CHARACTERISTIC_UUID_TX, BLECharacteristic::PROPERTY_NOTIFY);
  pTxCharacteristic->addDescriptor(new BLE2902());
  BLECharacteristic *pRxCharacteristic = pService->createCharacteristic(CHARACTERISTIC_UUID_RX, BLECharacteristic::PROPERTY_WRITE);
  pRxCharacteristic->setCallbacks(new MyCallbacks());

  // Start the service
  pService->start();

  // Start advertising
  pServer->getAdvertising()->start();
  Serial.println("Waiting a client connection to notify...");
}
In line 30, I use sprintf() to append \n to the numerical value read by analogRead(). This is essential for the Bluefruit Connect Plotter function to recognize the data correctly.
▼Looking at the Help section again, it specifies that each data point must end with \n, and multiple data points should be separated by specific characters like commas or spaces.
Communicating with Bluefruit Connect
Open Bluefruit Connect and connect to the XIAO ESP32C3.
▼I set the device name to "XIAO ESP32C3."

Once connected, the app displays the functions available via BLE.
▼We will use UART and Plotter this time.
▼In the UART screen, numerical data is displayed continuously.
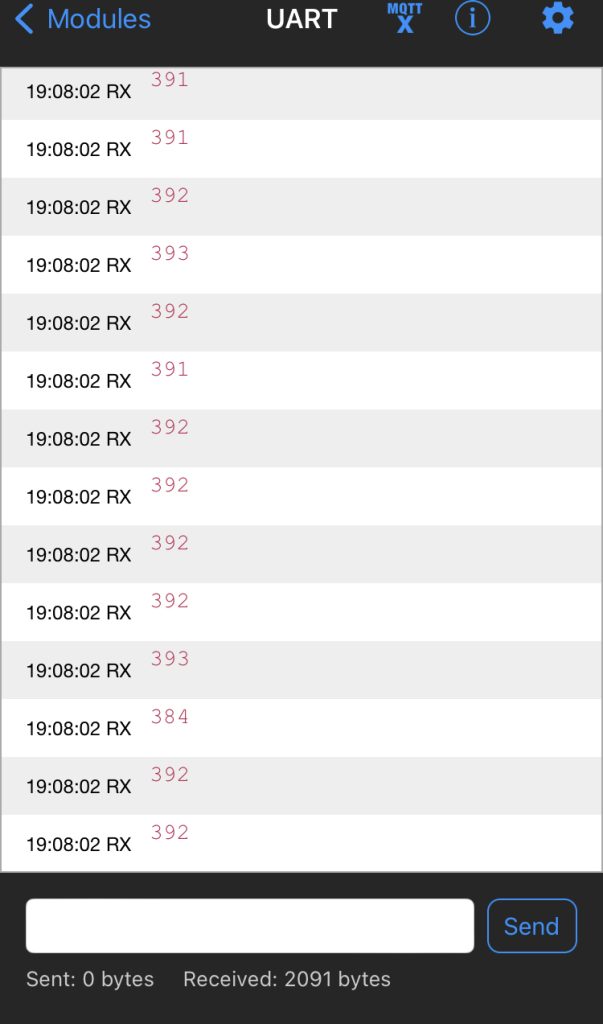
You can also type text at the bottom and click "Send."
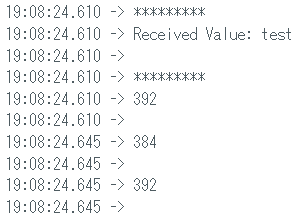
▼The sent string is displayed in the Arduino IDE Serial Monitor.
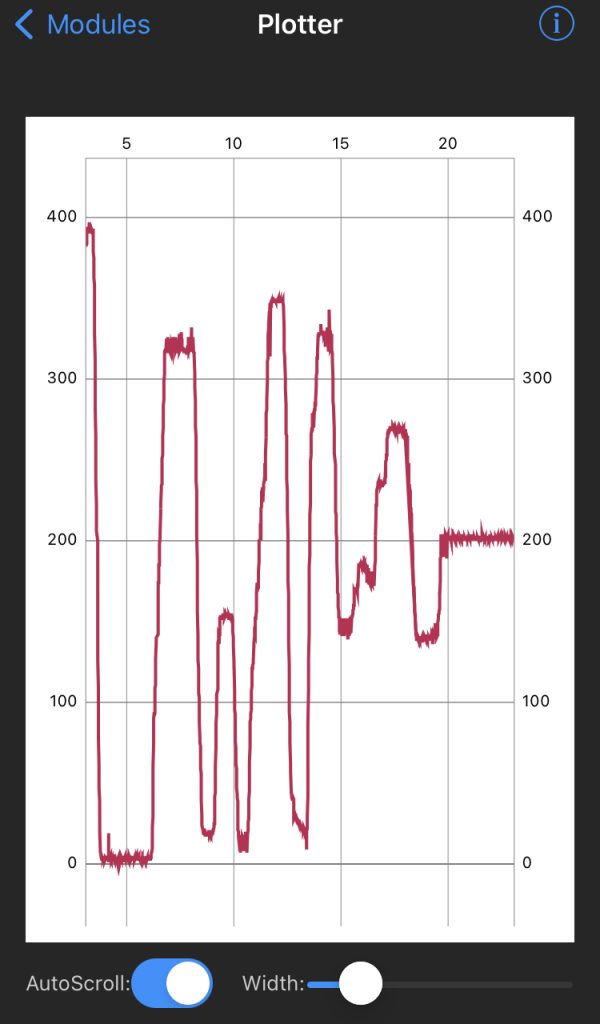
In the Plotter, the numerical data is shown as a graph.
▼It’s immediately obvious how the value changes as you turn the potentiometer.
Finally
Using Bluefruit Connect, I was able to connect to the XIAO ESP32C3 via BLE and visualize data. The layout is quite similar to the Serial Monitor and Serial Plotter in the Arduino IDE.
While I only used UART and Plotter today, I’m curious about other features like Pin I/O and Image Transfer. I tried commenting out the parts of the sample programs that were causing errors, but they still didn't run on the XIAO ESP32C3. I haven't used Adafruit's own BLE devices yet, so I might give those a try in the future to see the full potential of the app.