Trying Out YDLIDAR X4 Pro Part 2 (Mini PC, Operation Check on Linux)
Introduction
In this post, I performed an operation check of the YDLIDAR X4 Pro in a Linux environment. My previous test was on Windows, but since the PC I intend to mount on the robot is a Mini PC running Linux, I needed to verify its operation in that specific environment.
▼I tested the Windows environment in the following article:
Trying Out YDLIDAR X4 Pro Part 1 (Windows, Operation Check with GUI App)
Info This article is translated from Japanese to English. Introduction I recently purchased a LiDAR sensor and decided to perform an operation check.LiDAR sens…
▼Sales page for the YDLIDAR X4 Pro is here


▼Previous related articles:
Trying Out Jetson Xavier Part 5 (NoMachine and Remote Desktop Connection)
Info This article is translated from Japanese to English. Introduction In this post, I tried using NoMachine to establish a remote desktop connection from my P…
ROS2を使ってみる その3(環境構築、WSL2 Ubuntu 22.04)
はじめに 最近WSL2でUbuntu環境を複数インストールできるようになったので、ROS2の環境を改めて構築してみました。 大学の研究でロボットの遠隔操作にも取り組み始め…
Setting Up the Environment
Verification of the Execution Environment
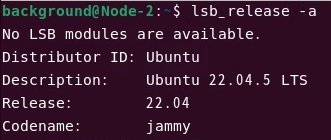
I am using a Mini PC where I previously installed Ubuntu 22.04.
▼Details on the Ubuntu installation can be found here:
Installing Ubuntu on a Mini PC via USB Drive (Rufus)
Info This article is translated from Japanese to English. Introduction In this post, I tried installing Ubuntu on a mini PC using a USB drive.I knew this was p…
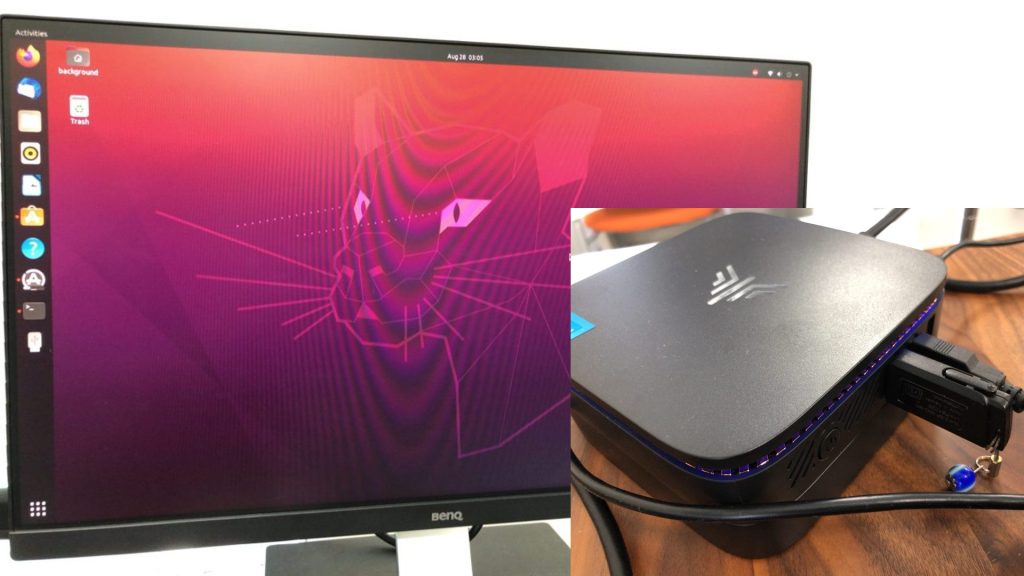
▼Ubuntu 22.04 is installed.
I connect to the Mini PC using Google Remote Desktop.
▼Details on the remote desktop connection:
Trying Out Google Chrome Remote Desktop
Info This article is translated from Japanese to English. Introduction In this post, I tried using Google Chrome Remote Desktop.I usually carry a laptop with m…

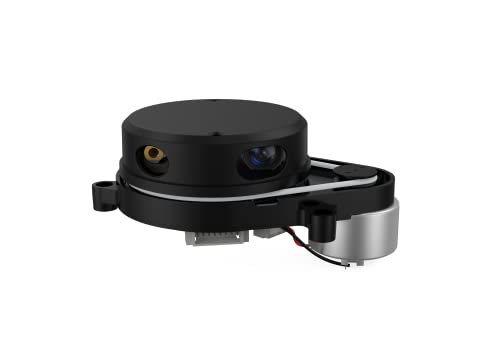
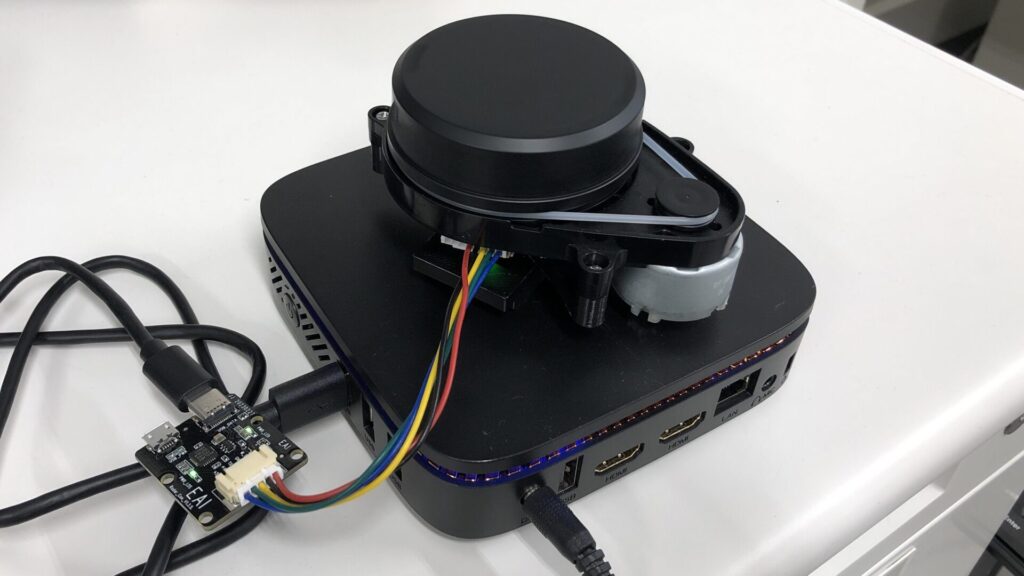
I connected the LiDAR to the Mini PC using the USB adapter board.
▼Mounting the LiDAR on top of the PC seems to result in a nice, compact setup.
Building the YDLidar-SDK
While the LiDAR I'm using supports ROS, I wanted to be able to use it with simple Python code, so I built the SDK from source.
▼The GitHub page for building and installing is here:
https://github.com/YDLIDAR/YDLidar-SDK/blob/master/doc/howto/how_to_build_and_install.md
I encountered some errors while running the commands, but I resolved them one by one by consulting with Gemini. First, I tried the following commands:
git clone https://github.com/YDLIDAR/YDLidar-SDK.git
cd YDLidar-SDK
mkdir build
cd build
cmake ..
make
sudo make install
▼Upon execution, errors occurred stating that "cmake" and "make" were not found.
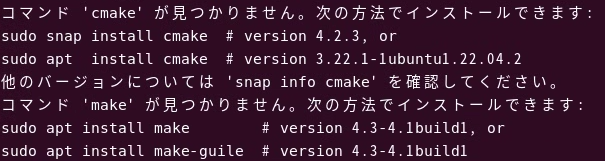
I installed cmake, make, and other necessary build packages via apt:
sudo apt install cmake
sudo apt install make
sudo apt install build-essential
sudo apt install swig python3-dev python3-pip
Running the initial commands again allowed the process to complete. I also built the Python bindings:
cd
cd YDLidar-SDK/
pip install .
python3 setup.py build
sudo python3 setup.py install
▼If everything goes smoothly, the ydlidar package is installed.
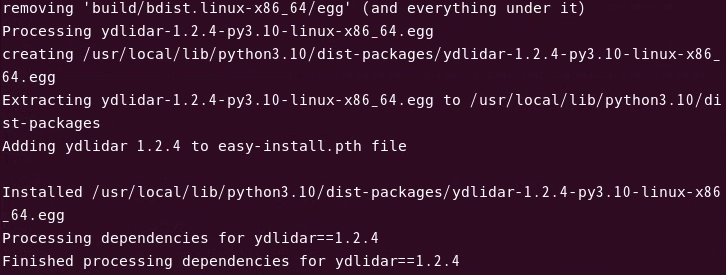
Verifying Operation
The cloned repository contained sample code in the python/examples folder, but running them resulted in errors.
▼The error was as follows:
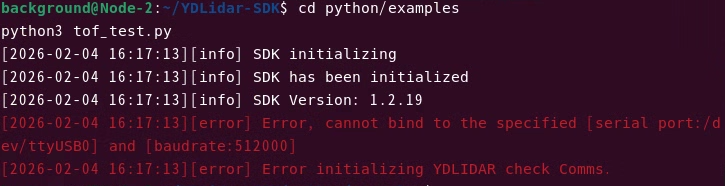
[error] Error, cannot bind to the specified [serial port:/dev/ttyUSB0] and [baudrate:512000]
[error] Error initializing YDLIDAR check Comms.
The USB device was recognized correctly:
ls /dev/ttyUSB*
When I previously checked the operation on Windows, the Baudrate was 128000. Additionally, since the sample code wasn't specifically for the X4 Pro, it required modification.
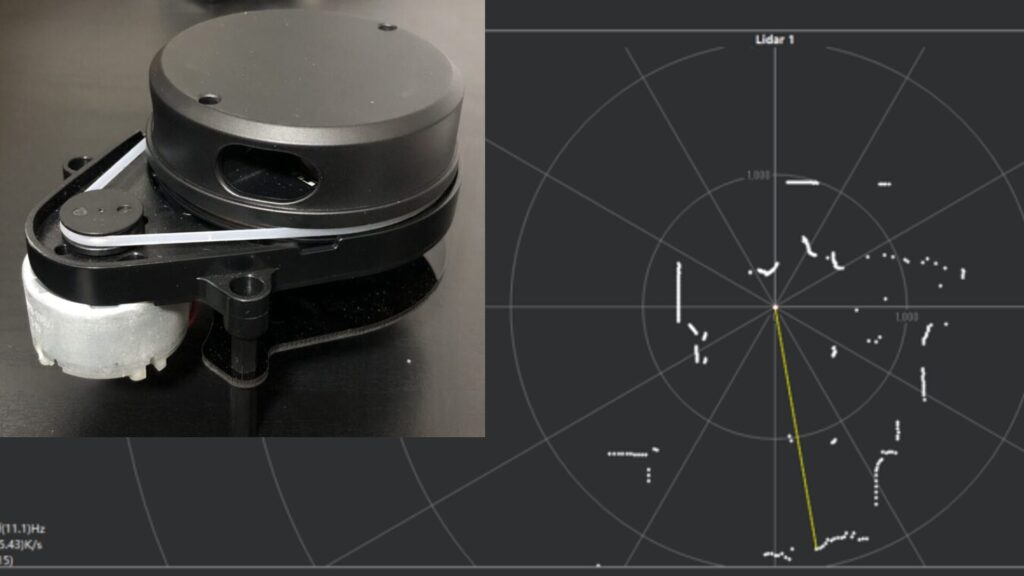
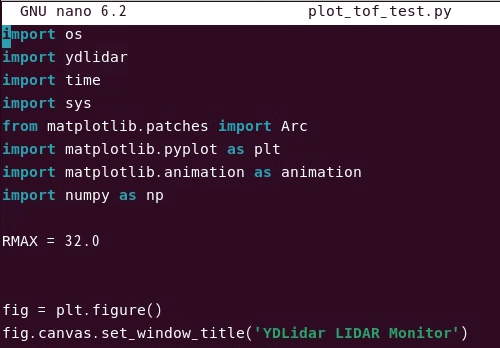
I decided to modify the plot_tof_test.py sample to see if it would work. This sample plots the LiDAR scan results.
pip install numpy
pip install matplotlib
python3 plot_tof_test.py
Initially, an error occurred at the fig.canvas.set_window_title part of the plotting logic.
▼Here is the section.
I changed fig.canvas.set_window_title to fig.canvas.manager.set_window_title and adjusted the LiDAR parameters to match the X4 Pro.
▼I modified the following sections:
# --- before modify ---
# laser.setlidaropt(ydlidar.LidarPropSerialBaudrate, 512000)
# laser.setlidaropt(ydlidar.LidarPropLidarType, ydlidar.TYPE_TOF);
# laser.setlidaropt(ydlidar.LidarPropSampleRate, 20);
# laser.setlidaropt(ydlidar.LidarPropSingleChannel, False);

# --- after modify ---
laser.setlidaropt(ydlidar.LidarPropSerialBaudrate, 128000)
laser.setlidaropt(ydlidar.LidarPropLidarType, ydlidar.TYPE_TRIANGLE)
laser.setlidaropt(ydlidar.LidarPropSampleRate, 5)
laser.setlidaropt(ydlidar.LidarPropSingleChannel, True)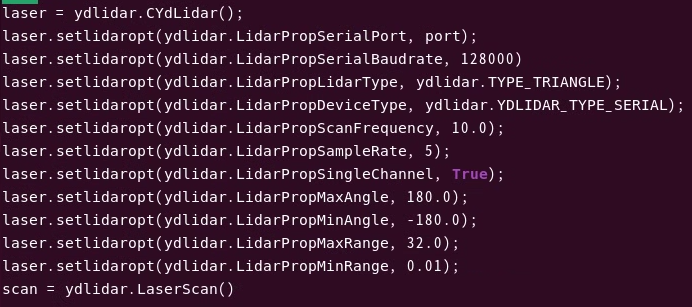
In particular, failing to set LidarPropSingleChannel to True caused an error.
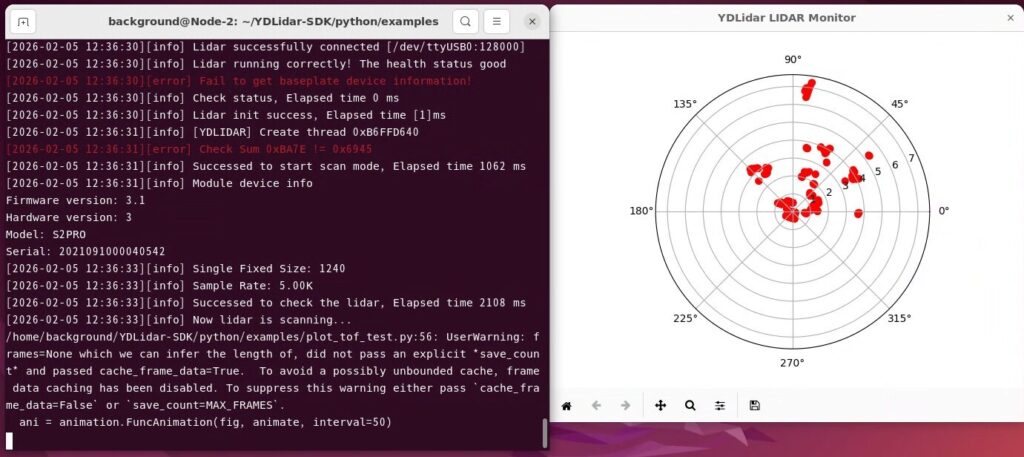
I ran the code again.
▼I was able to acquire the LiDAR data and plot it!
Finally, I confirmed operation with the following complete script:
import os
import ydlidar
import time
import sys
from matplotlib.patches import Arc
import matplotlib.pyplot as plt
import matplotlib.animation as animation
import numpy as np

RMAX = 32.0


fig = plt.figure()
fig.canvas.manager.set_window_title('YDLidar LIDAR Monitor')
lidar_polar = plt.subplot(polar=True)
lidar_polar.autoscale_view(True,True,True)
lidar_polar.set_rmax(RMAX)
lidar_polar.grid(True)
ports = ydlidar.lidarPortList();
port = "/dev/ydlidar";
for key, value in ports.items():
    port = value;

laser = ydlidar.CYdLidar();
laser.setlidaropt(ydlidar.LidarPropSerialPort, port);
laser.setlidaropt(ydlidar.LidarPropSerialBaudrate, 128000)
laser.setlidaropt(ydlidar.LidarPropLidarType, ydlidar.TYPE_TRIANGLE);
laser.setlidaropt(ydlidar.LidarPropDeviceType, ydlidar.YDLIDAR_TYPE_SERIAL);
laser.setlidaropt(ydlidar.LidarPropScanFrequency, 10.0);
laser.setlidaropt(ydlidar.LidarPropSampleRate, 5);
laser.setlidaropt(ydlidar.LidarPropSingleChannel, True);
laser.setlidaropt(ydlidar.LidarPropMaxAngle, 180.0);
laser.setlidaropt(ydlidar.LidarPropMinAngle, -180.0);
laser.setlidaropt(ydlidar.LidarPropMaxRange, 32.0);
laser.setlidaropt(ydlidar.LidarPropMinRange, 0.01);
scan = ydlidar.LaserScan()

def animate(num):

    r = laser.doProcessSimple(scan);
    if r:
        angle = []
        ran = []
        intensity = []
        for point in scan.points:
            angle.append(point.angle);
            ran.append(point.range);
            intensity.append(point.intensity);
        lidar_polar.clear()
        lidar_polar.scatter(angle, ran, c=intensity, cmap='hsv', alpha=0.95)

ret = laser.initialize();
if ret:
    ret = laser.turnOn();
    if ret:
        ani = animation.FuncAnimation(fig, animate, interval=50)
        plt.show()
    laser.turnOff();
laser.disconnecting();
plt.close();
Improving the Code
Based on the code that was confirmed to work, I had Gemini improve it. My requests were to reduce the size of the plotted points and to implement UDP communication so that data could be received on another PC.
import os
import ydlidar
import time
import sys
import socket
import json
import matplotlib.pyplot as plt
import matplotlib.animation as animation
import numpy as np

# --- 通信設定 (受信するPCのIPに合わせて変更してください) ---
UDP_IP = "localhost"  # 例: 受信側のPCのIPアドレス
UDP_PORT = 5005          # 受信側のポート番号

# --- LiDAR設定 ---
RMAX = 12.0              # 表示する最大距離 (m) X4 Pro/S2 Proに合わせて調整
SCAN_FREQ = 10.0         # スキャン周波数 (Hz) : 高速化
SAMPLE_RATE = 5          # サンプルレート (K)

# ソケットの準備
sock = socket.socket(socket.AF_INET, socket.SOCK_DGRAM)

# グラフの初期設定
fig = plt.figure(figsize=(8, 8))
fig.canvas.manager.set_window_title('YDLidar X4/S2 Pro Monitor & UDP Sender')
lidar_polar = plt.subplot(polar=True)
lidar_polar.autoscale_view(True, True, True)
lidar_polar.set_rmax(RMAX)
lidar_polar.grid(True)

# LiDARポートの検索と設定
ports = ydlidar.lidarPortList()
port = "/dev/ttyUSB0"

laser = ydlidar.CYdLidar()
laser.setlidaropt(ydlidar.LidarPropSerialPort, port)
laser.setlidaropt(ydlidar.LidarPropSerialBaudrate, 128000)
laser.setlidaropt(ydlidar.LidarPropLidarType, ydlidar.TYPE_TRIANGLE)
laser.setlidaropt(ydlidar.LidarPropDeviceType, ydlidar.YDLIDAR_TYPE_SERIAL)

# --- スペックに合わせた高速化設定 ---
laser.setlidaropt(ydlidar.LidarPropScanFrequency, SCAN_FREQ)
laser.setlidaropt(ydlidar.LidarPropSampleRate, SAMPLE_RATE)
laser.setlidaropt(ydlidar.LidarPropSingleChannel, True) # 重要
laser.setlidaropt(ydlidar.LidarPropMaxAngle, 180.0)
laser.setlidaropt(ydlidar.LidarPropMinAngle, -180.0)
laser.setlidaropt(ydlidar.LidarPropMaxRange, 16.0)
laser.setlidaropt(ydlidar.LidarPropMinRange, 0.05)

scan = ydlidar.LaserScan()

def animate(num):
    r = laser.doProcessSimple(scan)
    if r:
        angle = []
        ran = []
        intensity = []

        # 送信用データリスト (JSON用)
        # データ量を減らすため、距離が0の点は除外しても良い
        export_points = []

        for point in scan.points:
            # プロット用データ
            angle.append(point.angle)
            ran.append(point.range)
            intensity.append(point.intensity)

            # UDP送信用データの作成
            # フォーマット: [角度(rad), 距離(m), 強度]
            # 通信量削減のため小数点以下3桁に丸める
            if point.range > 0:
                export_points.append([
                    round(point.angle, 3),
                    round(point.range, 3),
                    int(point.intensity)
                ])

        # --- 1. プロットの更新 ---
        lidar_polar.clear()
        lidar_polar.set_rmax(RMAX)
        lidar_polar.grid(True)
        # s=2.0 で点を小さくし、高密度でも見やすくする
        lidar_polar.scatter(angle, ran, c=intensity, cmap='hsv', s=2.0, alpha=0.8)

        # --- 2. UDP送信処理 ---
        try:
            # タイムスタンプと点群データをJSON化
            payload = {
                "t": time.time(),     # タイムスタンプ
                "c": len(export_points), # 点の数
                "d": export_points    # データ本体 [[ang, dist, int], ...]
            }
            json_data = json.dumps(payload).encode('utf-8')

            # データサイズが大きすぎる場合は警告 (UDPパケット制限への配慮)
            if len(json_data) > 60000:
                print(f"Warning: Payload size {len(json_data)} bytes is too large for UDP.")
            else:
                sock.sendto(json_data, (UDP_IP, UDP_PORT))

        except Exception as e:
            print(f"UDP Send Error: {e}")

ret = laser.initialize()
if ret:
    ret = laser.turnOn()
    if ret:
        # intervalを短くして描画更新を速くする
        ani = animation.FuncAnimation(fig, animate, interval=10)
        plt.show()
    laser.turnOff()
laser.disconnecting()
plt.close()
The data format sent via UDP is as follows:
{
"t": 1707103500.123, // タイムスタンプ (UNIX time)
"c": 405, // 点群の数 (Count)
"d": [ // データ配列 (Data)
[ -3.141, 2.501, 10 ], // [ 角度(ラジアン), 距離(メートル), 強度 ]
[ -3.120, 2.505, 12 ],
...
]
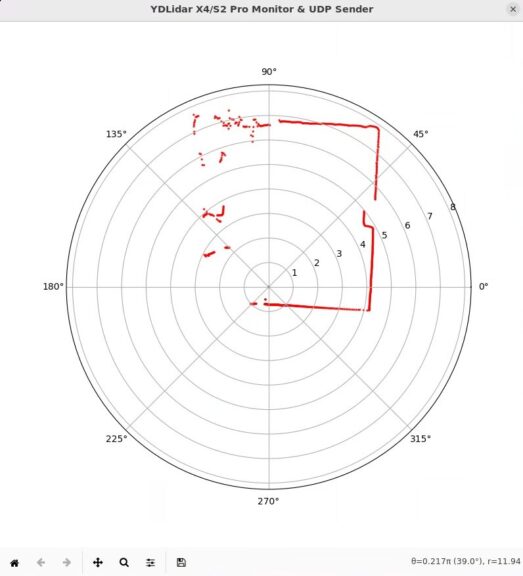
}I ran the improved code.
▼The plot now features smaller points, making it much cleaner.
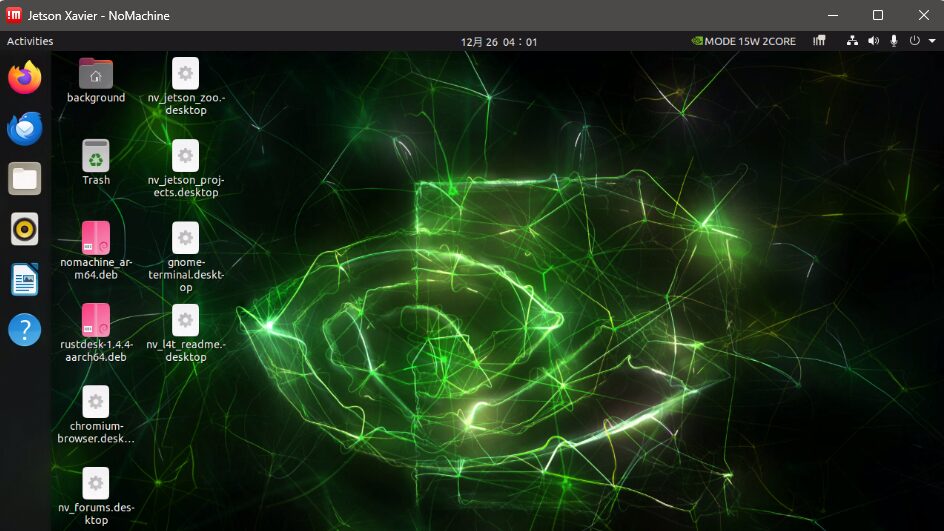
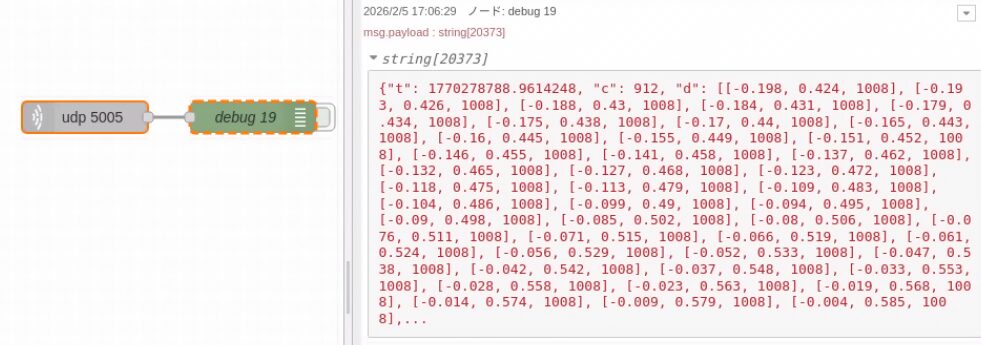
I also checked if the data could be received by Node-RED on a Jetson Xavier connected via a Tailscale VPN.
▼The Jetson Xavier environment was set up in this article:
Trying Out Jetson Xavier Part 2 (Communication Settings, Node-RED, and Tailscale)
Info This article is translated from Japanese to English. Introduction In this post, I configured the communication settings for the Jetson Xavier, following t…
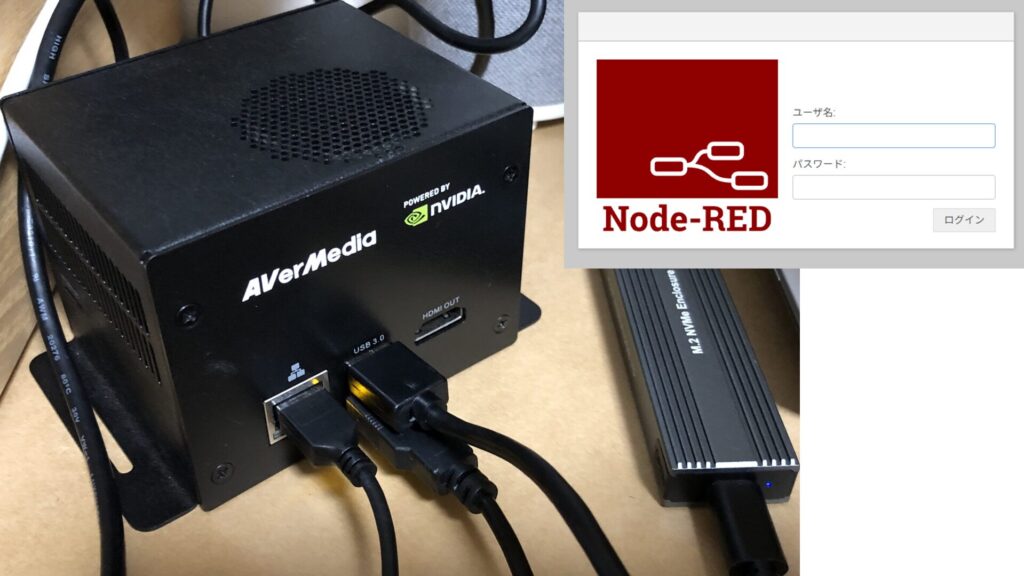
▼I confirmed that the data is being received successfully.
I noticed that the rotation speed of the LiDAR seemed to slow down when executing the code; I plan to adjust the frequency and other cycles depending on the application.
Finally
I have successfully verified the operation of the YDLIDAR X4 Pro in a Linux environment.
I am excited to mount this on a mobile robot to implement collision avoidance and map creation.
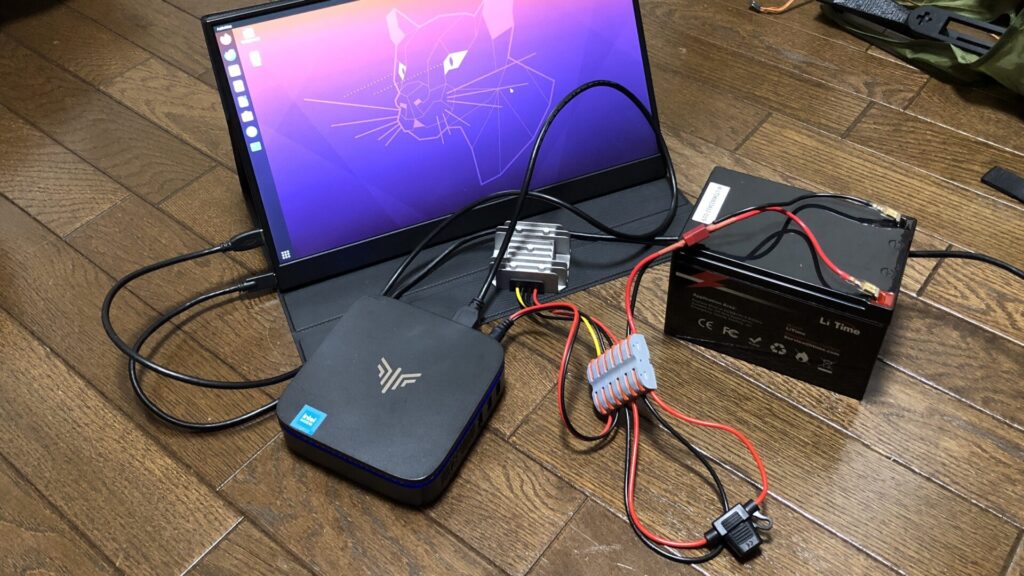
▼I have already confirmed that the Mini PC can be powered by a battery, so it should be easy to mount the entire system, including the LiDAR, onto a robot.
Trying Out Lithium Iron Phosphate Batteries Part 2 (Powering a Mini PC with LiTime 12V 12Ah LiFePO4)
Info This article is translated from Japanese to English. Introduction In this post, I tested whether I could power a mini PC using the Lithium Iron Phosphate …