Trying Out Unreal Engine 5 Part 4 (Unreal Learning Kit: Training Virtual Robots – Lesson 1)
Introduction
I recently tried out a virtual robot tutorial available in Unreal Engine 5. This is my first step toward controlling robots via simulation.
▼I referred to this page:
仮想ロボットのトレーニングを学ぼう - Unreal Engine
This time, I worked through Lesson 1. Looking at the lesson titles, the lineup seems very similar to what you’d encounter in actual robotics competitions.
By the way, the target age was listed as "Grades 8-12 (US / 13+ years old)," which means it's intended for 13 to 18-year-olds. It’s interesting how grade notations differ from those in Japan.
▼Previous articles are here:
Trying Out Unreal Engine 5 Part 1 (Datasmith, DUALSHOCK 4)
Introduction I have decided to use Unreal Engine 5 to simulate robots. I have been creating robots in both hardware and software, and I intend to use my expe…

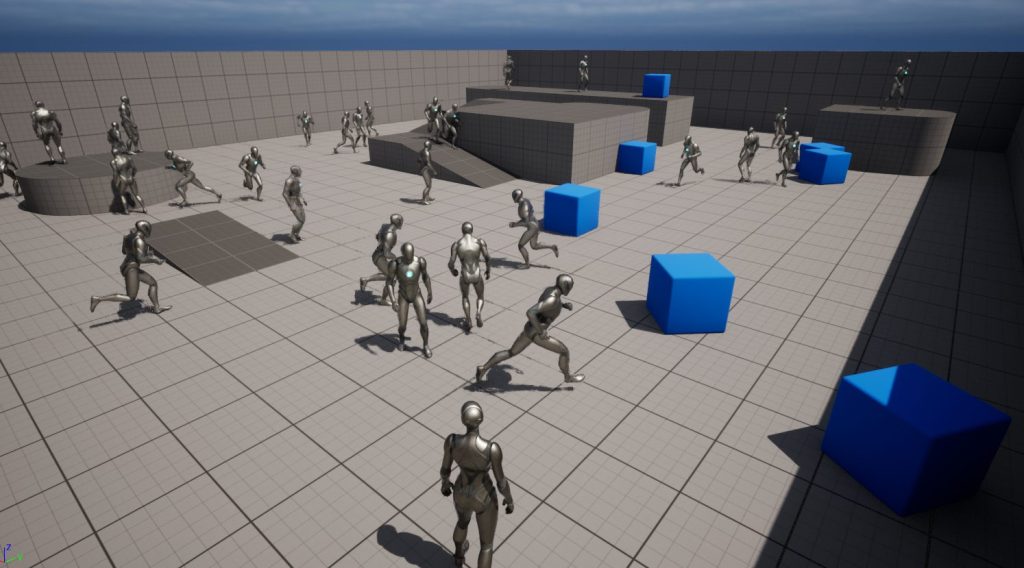
Trying Out Unreal Engine 5 Part 3 (NPC Navigation)
Info This article is translated from Japanese to English. Introduction In this post, I tried moving agents in Unreal Engine 5 (UE5). In a game context, these w…
Creating the Project
First, I needed to create the project.
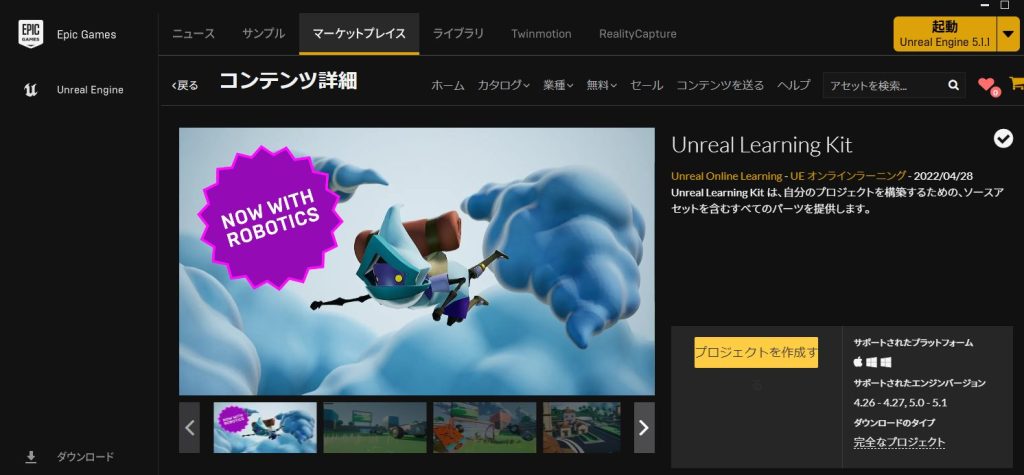
▼From the page mentioned above, I went to the course asset download page.

▼This led me to the following page, which I opened with the Epic Games Launcher:
Unreal Learning Kit:UE オンラインラーニング - UE マーケットプレイス (unrealengine.com)
▼I then created the project.
The Unreal Learning Kit contains both a Games section and a Robotics section. For this tutorial, I used the Robotics section.
When I first opened the project, the Games section screen appeared.
▼There are several helpful samples here, such as levers, buttons, and objects that disappear when touched.


Trying Out the Learning Kit Robots
Opening the Maps
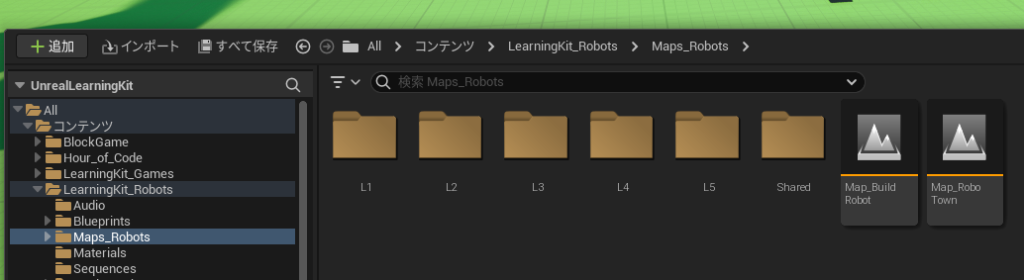
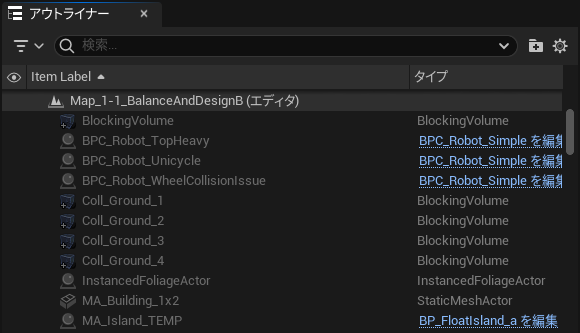
I opened the "Maps_Robots" folder within "LearningKit_Robots" from the Content Drawer to explore.
▼There are folders L1 through L5, each corresponding to the lessons on the reference page. Lesson plans and student guides are also provided.
▼The student guide for Lesson 1 is here. I followed along with this document:
unreal-engine-robotics-student-guide-1-ja-c43b9a64fd2f.pdf (unrealengine.com)
Note: While editing a level, pressing number keys may sometimes focus the camera on specific robots.
1-1:Balance and Design
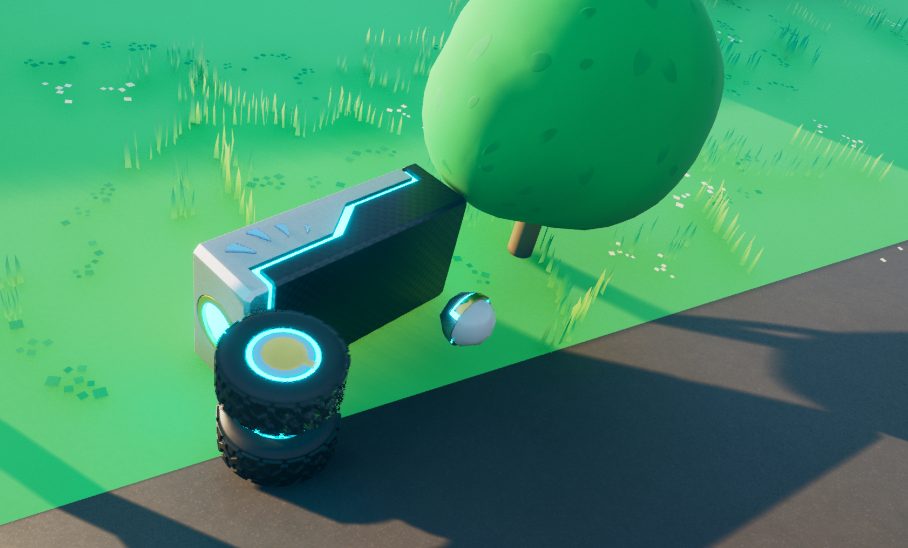
There are two versions, A and B, for Balance and Design. A shows the robot with wheels and casters in awkward positions, while B shows them correctly placed.
▼In version A, they are attached in strange spots.


▼The robot fell over as a result.
Since this is Unreal Engine, I had a strong image of programming and gaming, but it turns out you also need to consider physical placement like this.
It's not as simple as just attaching tires, spinning a motor, and expecting it to drive.
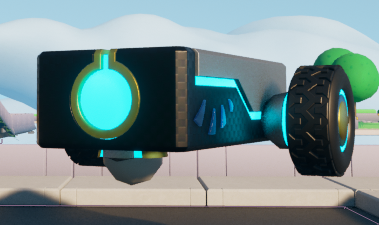
▼In version B, the layout looks like this. This one drives perfectly.
1-2:Friction Traction
The theme here is "traction." I started by looking into what traction actually means.
▼This article should be easy to understand with its illustrations.
『トラクション』 ってなんだ? 『パワー』ってなんだ? | ①大パワーのFFがない理由(トラクション効率) | TOPPER (mf-topper.jp)
In short, when the center of gravity is close to the driving wheels, the contact load increases, which increases the friction between the road and the tires, allowing for greater acceleration.
▼In a configuration where the driving wheels are far from the center of gravity, the robot couldn't climb the slope.


▼When I made them "wrestle" (Sumo), the robot with the longer legs was easily pushed out.


1-3:Moving Straight
This lesson focuses on driving straight using motors. I took a look at the Blueprint for the robot from 1-1.
▼You can open the edit screen by selecting "Edit BPC_Robot_XX" in the Outliner.
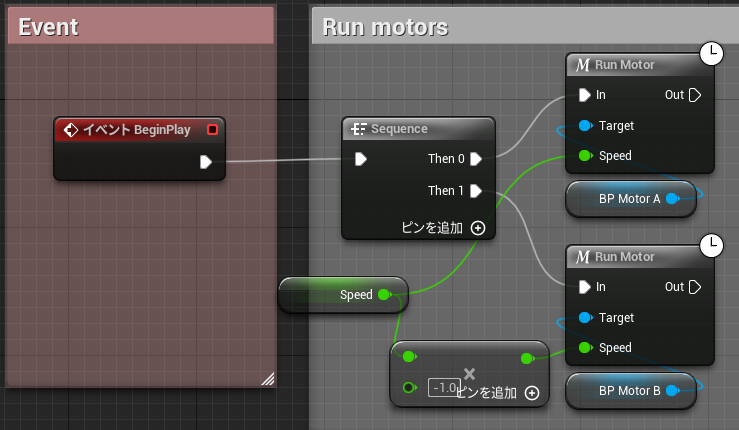
▼It uses the "Run Motor" node to rotate the motors. Since one motor is attached rotated 180 degrees, the speed is multiplied by -1.
▼In 1-3, the robot stops after driving.


▼The "Run Motor for Time" node is being used. The default value seems to be 3 seconds, after which I believe it coasts to a stop.
1-4:Turning
While 1-3 was about straight lines, 1-4 is about turning.
▼From the left, the robots perform an arc turn, a pivot turn (turning on one wheel), and a spin turn (point turn).
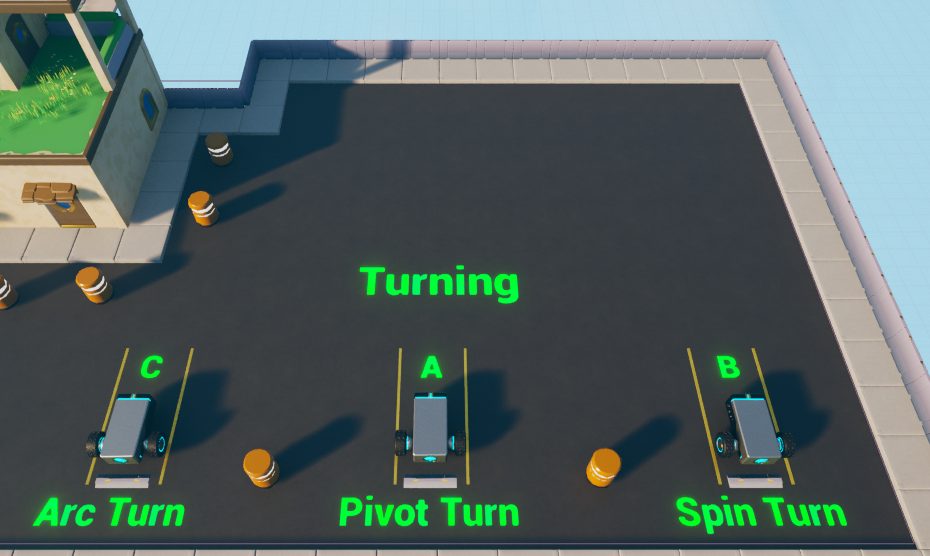
▼They were spinning around quite a bit.


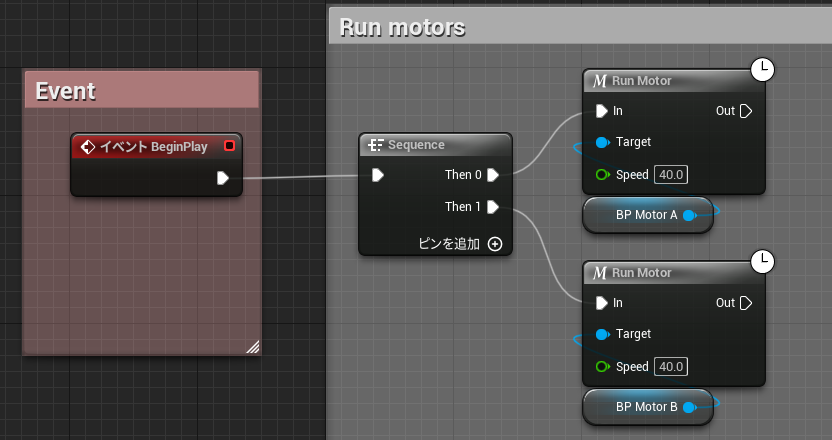
▼Here is the Blueprint for the Pivot Turn. Motor B, which serves as the pivot point, seems to be using "Linear Damping."


▼I found a documentation page regarding Linear Damping. It mentions that 100 is the minimum value to stop a physical body. It is set to 100 here as well.
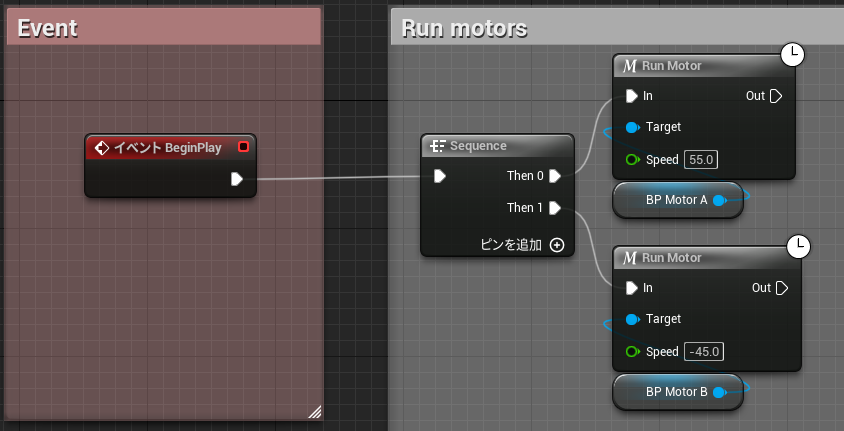
▼Here is the Blueprint for the Spin Turn. Both wheels are rotating in opposite directions.
▼And here is the Arc Turn. The rotation speeds of the two motors are set differently.
1-5:Dead Reckoning
Dead Reckoning is a navigation method where position is estimated based on movement. The error increases the further you travel.
▼In the real world, this is used in car navigation systems, combining GPS with sensors like accelerometers.
https://www.furuno.com/jp/gnss/technical/tec_dead
▼When I started the simulation multiple times, the robot followed slightly different trajectories each time.
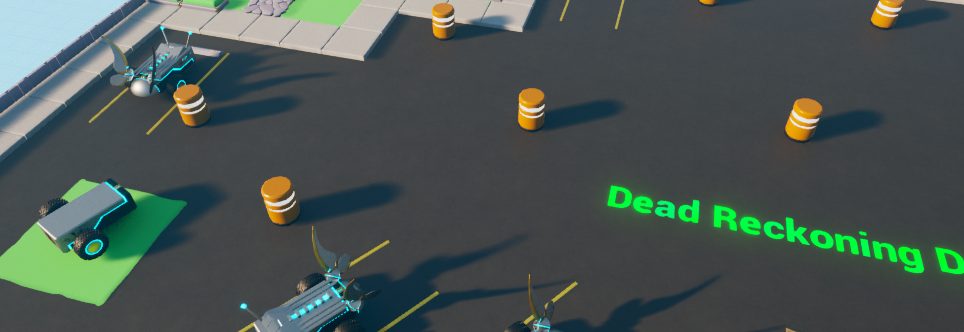
▼Sometimes it collided with obstacles, and other times a wheel got caught, causing it to spin in place. This shows the need for sensors to avoid such issues.


▼I once built a real two-wheeled robot that got caught on a chair leg and just kept spinning, exactly like this.
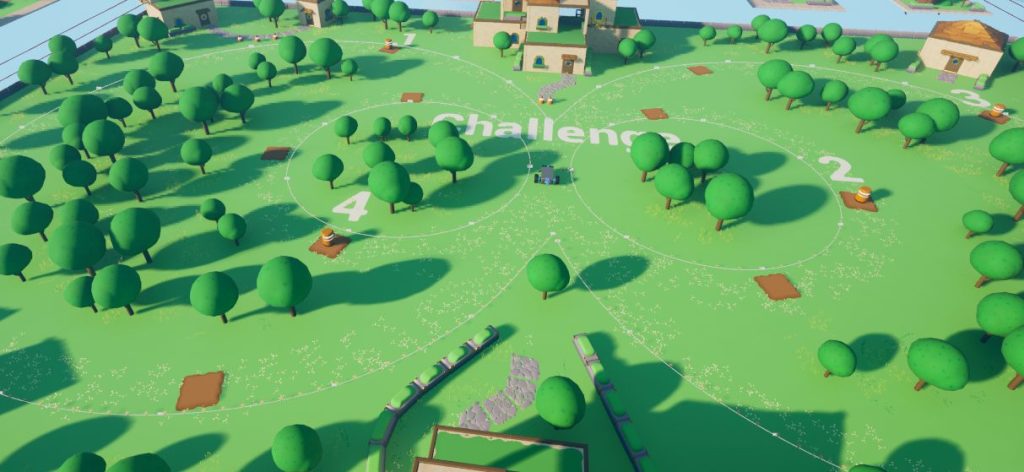
1-6:Challenge
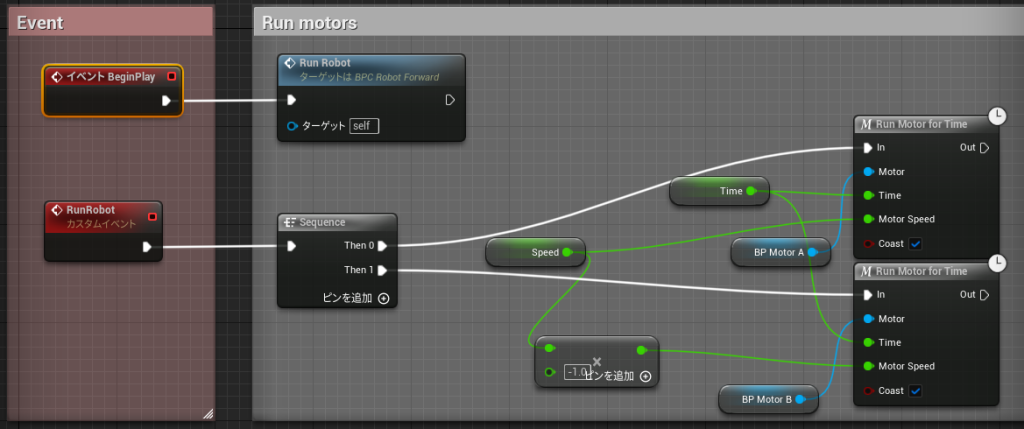
Finally, the challenge! I had to change the values to make the robot navigate through the map.
▼This is what the map looks like.
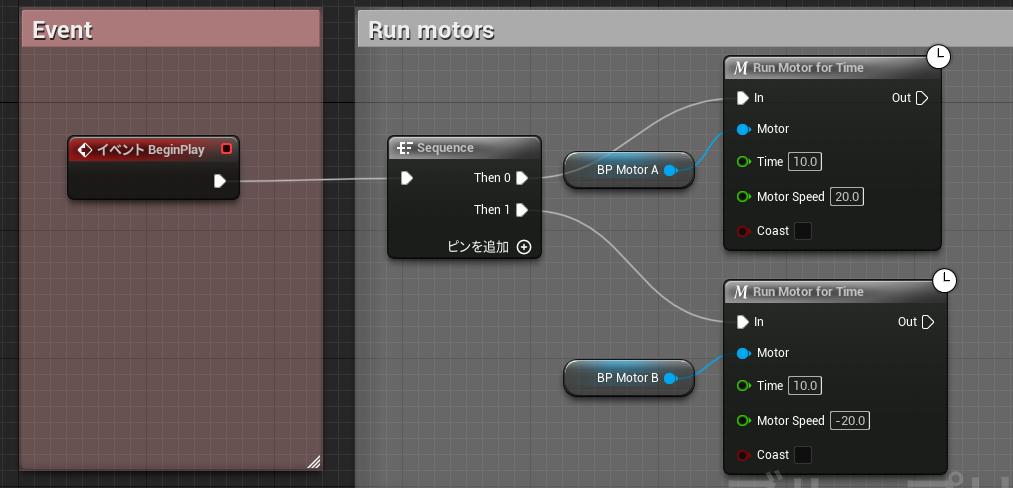
▼In the initial state, it just moves forward and stops.
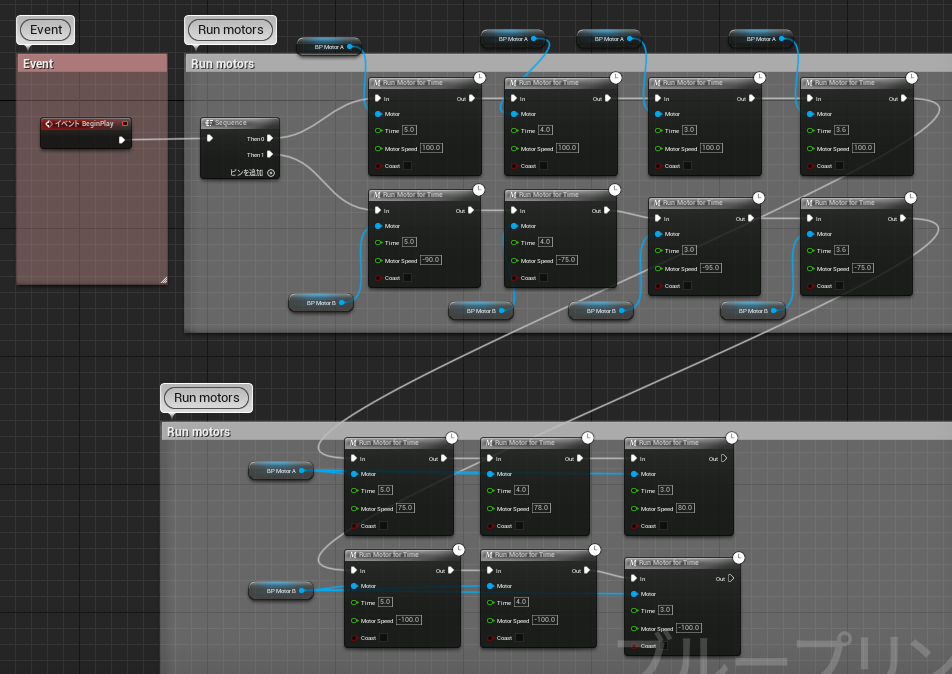
I adjusted the time and speed values and chained the commands together to make the robot draw a "figure 8."
▼Here is the overall flow. It might look cleaner if I used variables for Motor A and B and connected them one by one.
▼Here is the video of the robot in action:
As mentioned in the Dead Reckoning section, running it several times resulted in slightly different routes.
Looking Deeper into the Blueprints
I was using the "Run Motor" and "Run Motor for Time" nodes, but you can see the internal logic by double-clicking them.
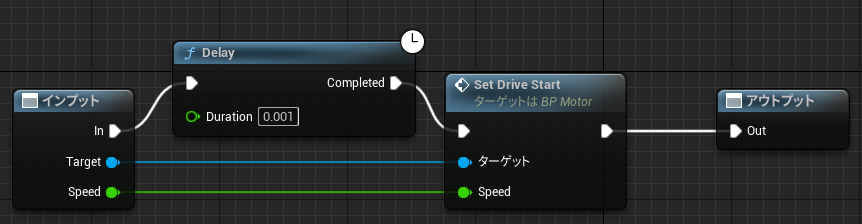
▼Here is "Run Motor." It operates using "Set Drive Start."
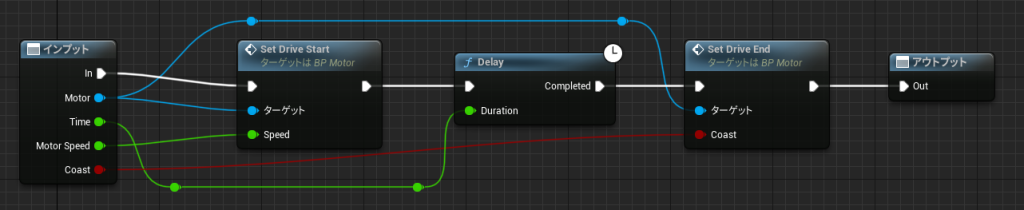
▼Here is "Run Motor for Time." This one includes a "Set Drive End."
You can dig even deeper into the contents of Set Drive Start/End.
▼Parameters like "Angular Drive Params" and "Angular Velocity Target" are used.
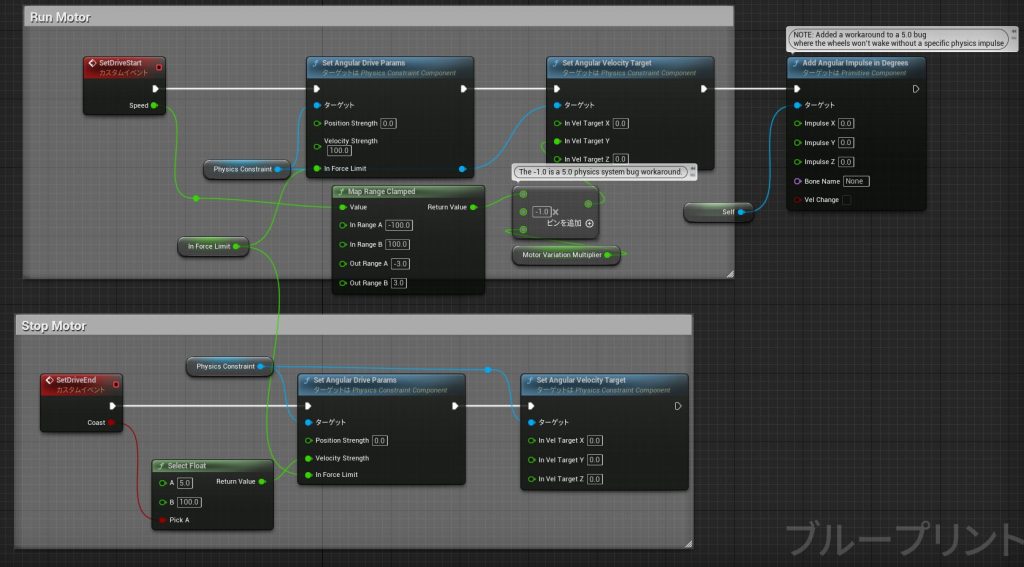
▼There is minimal documentation for "Angular Velocity Target," but it essentially sets the target angular velocity.
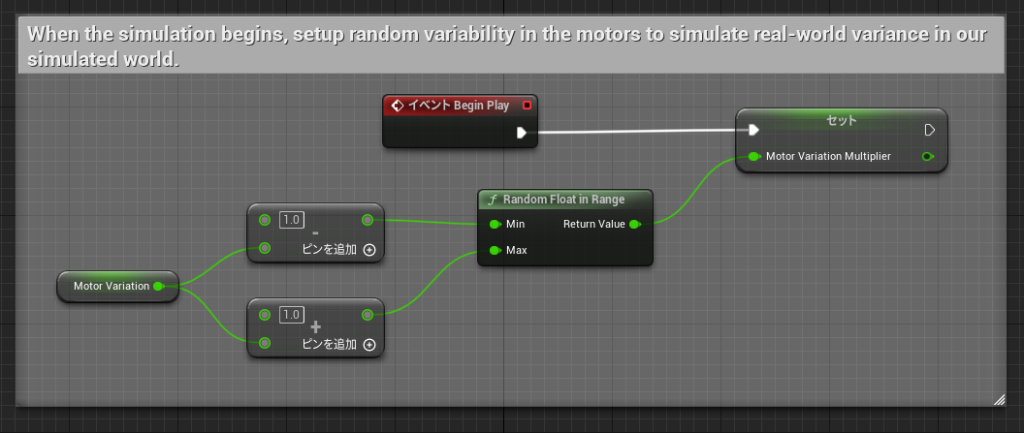
▼To make the simulation closer to the real world, random variables are also included.
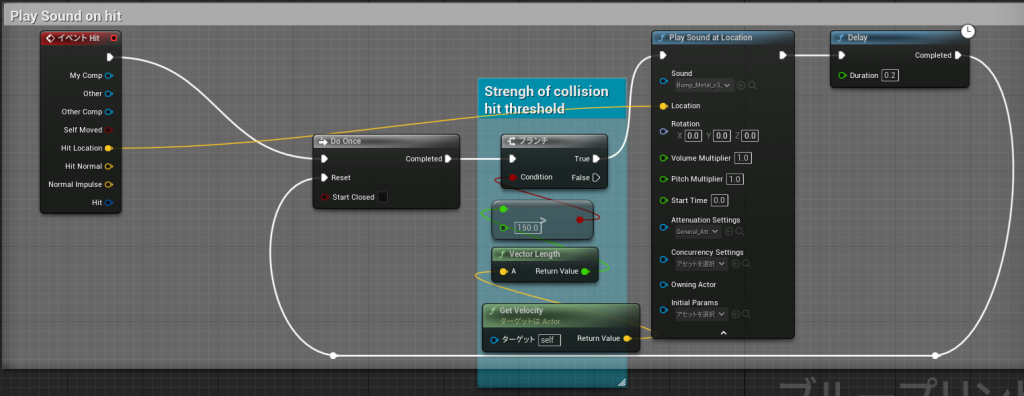
The program also includes sound effects for when the robot crashes.
▼I found this in the "Event Hit" section.
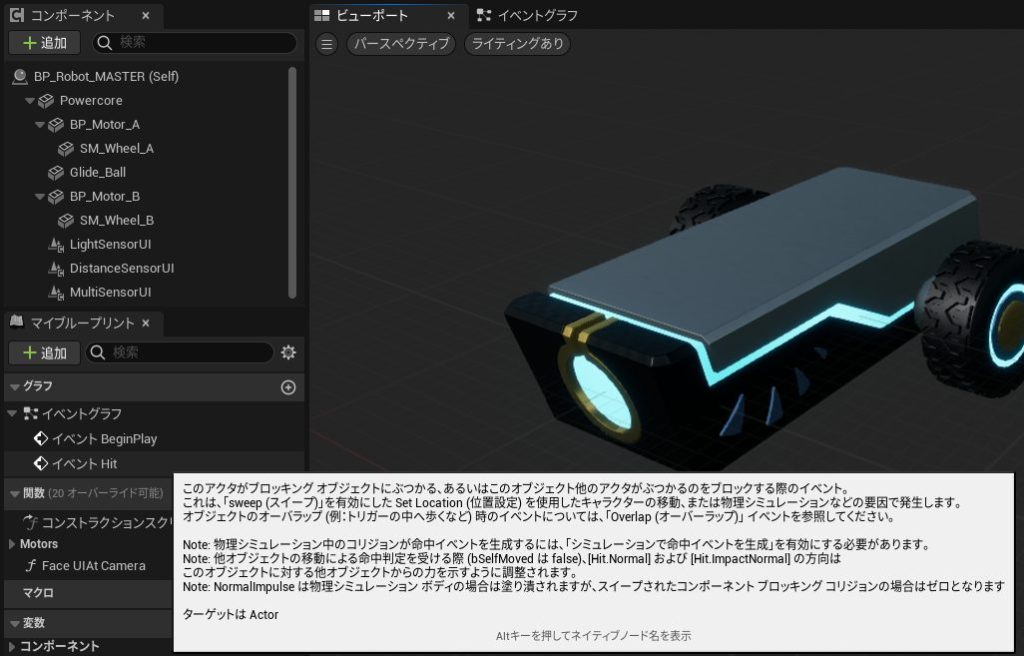
▼It seems that if the robot is moving fast enough when a collision occurs, it exceeds a threshold and triggers the sound.
Finally
The reference page mentioned that the course takes about 5 hours, but I feel it could take even longer if you dive deep into it.
Operating a robot in simulation felt very similar to adjusting parameters on a real physical robot. When I worked part-time at a robotics school, children used LEGO Mindstorms and would adjust their values bit by bit.
I expected the movements to be more "game-like" and less realistic, but I was impressed by how thoroughly the physical elements are considered. I plan to try the other lessons when I have more time.