Trying Out Luma AI’s GENIE (Generating 3D Models with Generative AI and 3D Printing the Results)
Introduction
In this post, I tried generating 3D models using the AI tool GENIE. I found a very helpful article while doing some research on the topic.
▼It was introduced in this article:
AIツールを使用して3Dモデルを生成する方法 | STYLY
本記事ではAIツールであるGENIEとTripoSRを使用して画像、テキストから3Dモデルを作成する方法を紹介します。AIを活用して効率的に作品を作り上げてみましょう。

It seems there are other AI tools out there that can generate models from images or even add animations.
I usually handle mechanical design using 3DCAD, but I have absolutely no talent for artistic design. If AI can supplement that for me, it would be a huge help. Since I had the chance, I decided to take a generated 3D model and print it using a 3D printer.
▼Previous articles are here:
Designing a Case for Raspberry Pi Zero (3D Printing)
Info This article is translated from Japanese to English. Introduction In this post, I tried creating a case for the Raspberry Pi Zero using a 3D printer.Perha…
RumiCar-C3の製作 車体設計編(Fusion 360)
はじめに 前回はRumiCar-C3の回路設計編でしたが、今回は車体設計編です。 元はといえば、コミュニティの誰でもRumiCarを作れるようにということで設計しています。ギ…
Generating 3D Models with GENIE
GENIE runs directly in your browser, so there’s no need to set up a complex environment. You can try it out immediately.
▼You can try it from this page:
https://lumalabs.ai/genie?view=create
▼Input a text description of your design image, and it will generate the model.
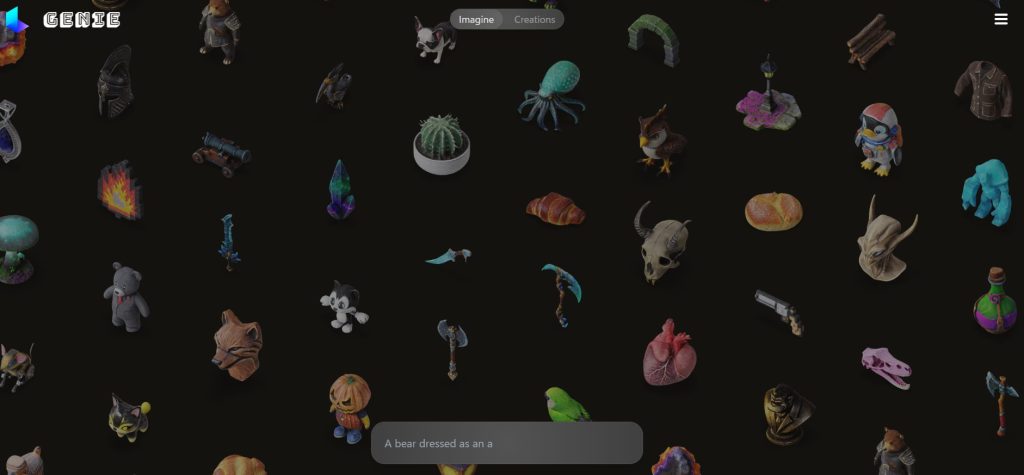
The interface shows characters with various designs. When I think about trying to design something like these myself using software, it feels completely out of my reach…
▼You can click on an item to see what text prompt was used to create it.
I tried inputting text while translating with DeepL, but I realized that putting an image into words is quite difficult in the first place.
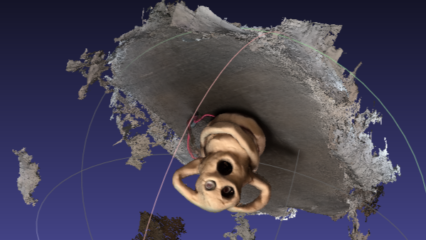
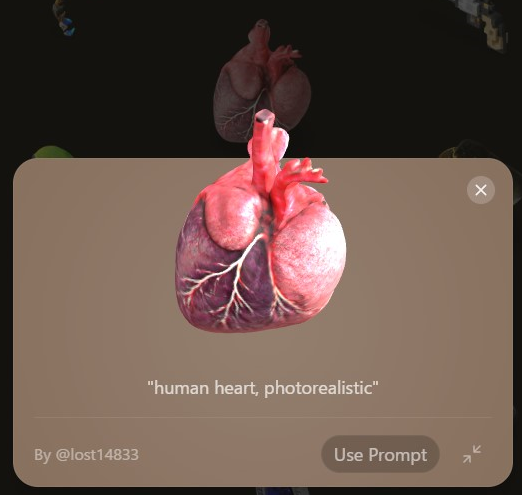
▼I had it output things like these: a satellite, a cyborg with red eyes wearing a black cloak…

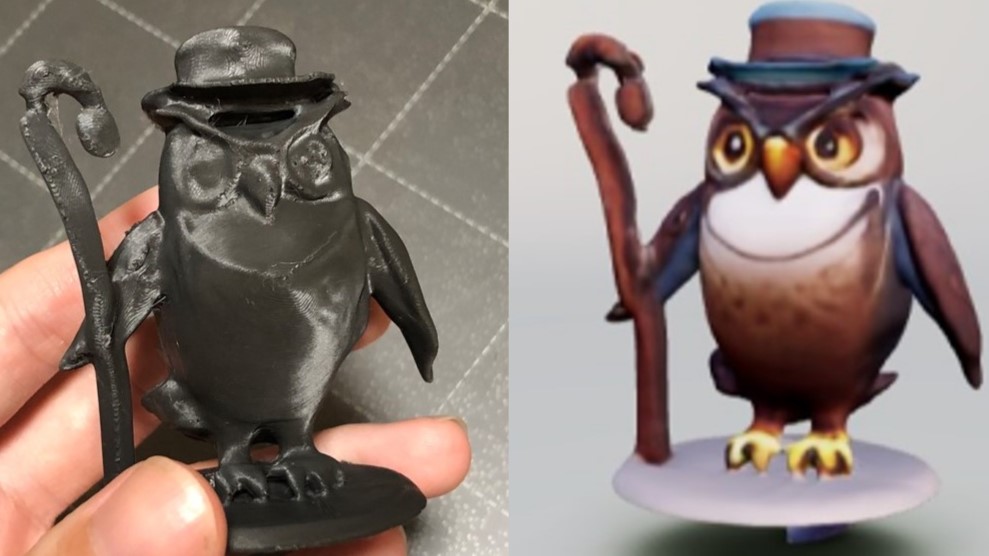
▼Personally, I really liked this owl: "A high-ranking owl wearing a hat and holding a staff."
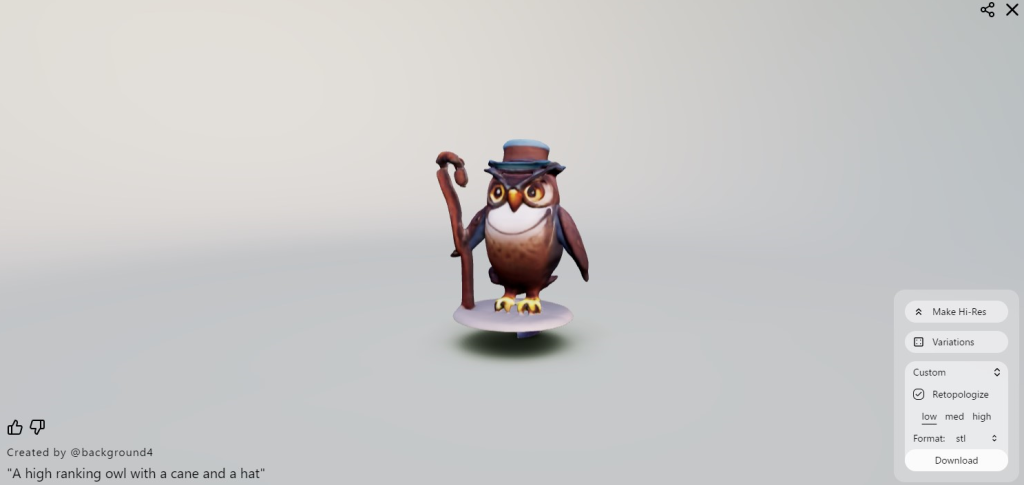
▼File formats include .stl, .obj, .fbx, and more. It looks like they can be imported into both 3DCAD and Unreal Engine.

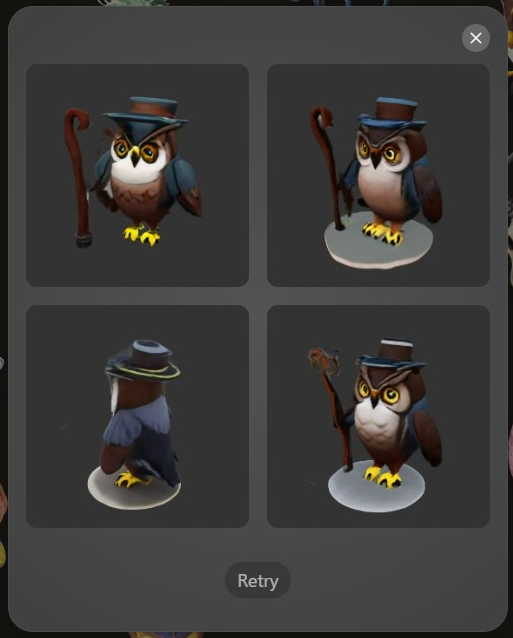
▼Selecting "Variations" displays even more versions of the model.
3D Printing the Model
I decided to print the owl model I mentioned earlier.
▼You can access it here:
https://lumalabs.ai/genie?view=one&one=617e840f-fd4b-4131-82ff-c537c835e7f8
▼I am using the Prusa MK4 3D printer.
Trying Out the Prusa MK4 (3D Printer)
Info This article is translated from Japanese to English. Introduction I finally bought my long-awaited 3D printer! The Prusa MK4!I had heard about Prusa from …

▼The Prusa MK 4 seems to be out of stock, but the MK4S appears to be available.

I downloaded the .stl file and imported it into PrusaSlicer. The original data was quite small, so I first tried printing it at 150% scale.
▼Using the coarsest settings, it took about 30 minutes.


▼Here is the result. When the model is small, removing the supports is very difficult. I ended up breaking the staff.


Printing figures like this cleanly is a real challenge. I often ask designers and creators for advice at exhibitions. Generally, it seems that resin printing (SLA) is better suited for this than filament printing (FDM).
You need to be creative, such as changing the orientation so that supports are placed on parts where the surface finish matters less. Also, I once received advice that if you're focusing on the design, it's good to print at a small size first to see how it looks. In mechanical design, you have to match specific dimensions, but for a figure, a small scale is perfectly fine.
Next, I set the scale to 300%, oriented the front side (which I wanted to be clean) upwards, and set the slicer to "Detail" mode.
▼This took about 4 hours and 40 minutes. It takes quite a while…

▼With an infill of 5%, the inside is mostly hollow.


▼It finished printing!

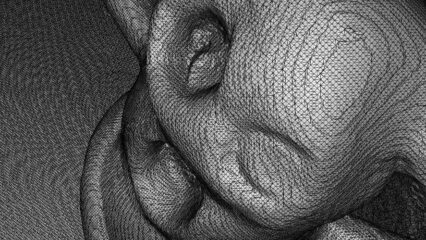
▼Here it is next to the 3D model. It makes me want to paint it.
Finally
Looking back, printing it sideways might have been a good option too. For making simple figures, this tool seems more than capable.
When I actually printed it, I noticed some odd depressions or gaps in the mesh, so there are a few points of concern. However, for minor issues, a little bit of data manual repair should do the trick.
When I exhibit at events with my neighbors, I sometimes give children things I’ve made with the 3D printer as presents. I’m thinking about using this to generate 3D models for that next time.