Trying Out 3D Gaussian Splatting Part 3 (GS2Mesh Environment Setup and Mesh Model Creation, WSL2 Ubuntu 20.04)
Introduction
In this post, I tried creating a mesh model using GS2Mesh.
This technology builds upon 3D Gaussian Splatting (3DGS), which I’ve covered in previous articles. When actually using data in game engines or as 3D models, mesh formats are often more versatile than the 3DGS point cloud format. I found this method while searching for ways to convert those splats into meshes.
It feels like research into 3D reconstruction technology is advancing rapidly. Since I am working on agricultural robot research, I hope to use these tools to help reconstruct 3D models of plants.
▼The GS2Mesh page and explanatory video are here:
▼Previous articles are here:
Unreal Engine 5を使ってみる その15(Scaniverseのデータ取り込み2回目、SuperSplat)
はじめに 今回はScaniverseで3DスキャンしたデータのUnreal Engine 5 (UE5)への取り込みについて、再び試してみました。 以前の取り込み方だとScaniverseでの見た目と…

Jetson Xavierを使ってみる その3(ROSの環境構築、USBカメラ映像のPublish)
はじめに 今回はJetson XavierでROSの環境を構築して、USBカメラの映像をPublishしてみました。 ROSの通信で画像を送信して、物体検出や遠隔操作などを試したいなと思…
Environment Setup
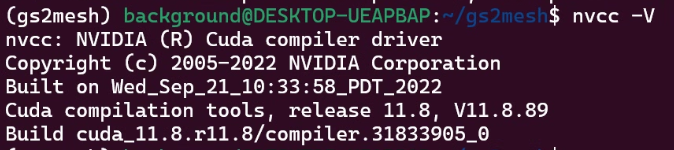
GS2Mesh includes a Gaussian Splatting repository and uses CUDA version 11.8.
▼I had already built an environment for Gaussian Splatting in a previous post. I will set up GS2Mesh within this existing environment.
Trying Out 3D Gaussian Splatting Part 1 (Environment Setup, WSL2 Ubuntu 20.04)
Info This article is translated from Japanese to English. Introduction In this post, I set up the environment to use 3D Gaussian Splatting.I have been creating…
▼I am using a gaming laptop purchased for around 100,000 yen, running Windows 11.
Shopping: New Laptop and SSD Expansion (ASUS TUF Gaming A15)
Info This article is translated from Japanese to English. Introduction In this post, I’ll be talking about replacing my PC after my previous one broke down. I …


▼I proceeded while referring to the GS2Mesh README.
https://github.com/yanivw12/gs2mesh/tree/main
First, clone the repository and activate the Conda environment.
git clone https://github.com/yanivw12/gs2mesh.git
cd gs2mesh
conda create --name gs2mesh python=3.8
conda activate gs2mesh
▼The gs2mesh Conda environment is now active.

I checked the CUDA version just to be sure.
▼It is 11.8.
Install the necessary packages.
conda install pytorch==2.3.1 torchvision==0.18.1 torchaudio==2.3.1 pytorch-cuda=11.8 cudatoolkit=11.8 colmap -c pytorch -c nvidia -c conda-forge
pip install -r requirements.txt
I also downloaded the respective weights for the models.
cd third_party/DLNR
mkdir pretrained
cd pretrained
wget https://github.com/David-Zhao-1997/High-frequency-Stereo-Matching-Network/releases/download/v1.0.0/DLNR_Middlebury.pth
wget https://github.com/David-Zhao-1997/High-frequency-Stereo-Matching-Network/releases/download/v1.0.0/DLNR_SceneFlow.pth
cd third_party/segment-anything-2/checkpoints
wget https://dl.fbaipublicfiles.com/segment_anything_2/072824/sam2_hiera_large.ptcd third_party/GroundingDINO
mkdir weights
cd weights
wget https://github.com/IDEA-Research/GroundingDINO/releases/download/v0.1.0-alpha/groundingdino_swint_ogc.pthGenerating from a Video File
I tried processing with GS2Mesh using the same video I used for the 3DGS reconstruction.
▼This is the approximately 30-second video:
Trying Out 3D Gaussian Splatting Part 2 (Reconstructing 3D Models from Image and Video Data, WSL2 Ubuntu 20.04)
Info This article is translated from Japanese to English. Introduction In this post, I tried reconstructing 3D models using 3D Gaussian Splatting (3DGS) from i…
As stated in the README, the source data should be placed in the "gs2mesh/data/custom/" folder. I created the folder first.
cd ~/gs2mesh
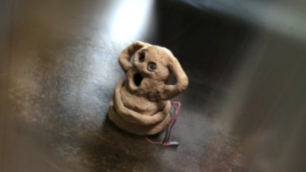
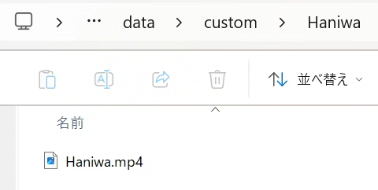
mkdir ./data/custom -p▼I placed the video in the "Haniwa" folder.
In my previous article, I encountered an error saying "SiftGPU not being supported," so I had to run colmap commands manually instead of using the scripts provided with 3DGS.
▼It was an error like this. It sometimes appeared in GS2Mesh as well.

This time, when I ran the command provided by GS2Mesh, it actually worked. I specified the folder name and the video file extension and ran the following:
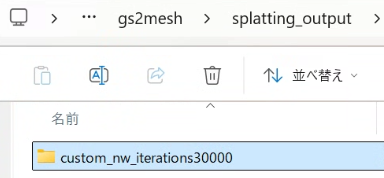
python run_single.py --colmap_name Haniwa --video_extension mp4▼The output files were located in the "splatting_output" folder.
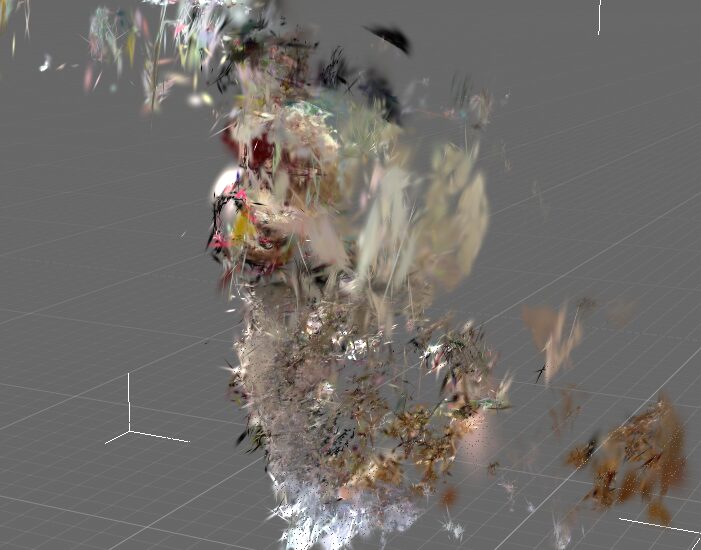
At this point, the 3DGS model reconstruction had failed. Likely because of that, the mesh model generation also failed.
▼The Haniwa figure is missing, and there is only a flat haze.
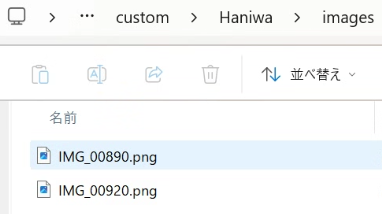
Looking at the source data folder, only two images had been extracted from the video file.
▼There were only two images in the "images" folder.
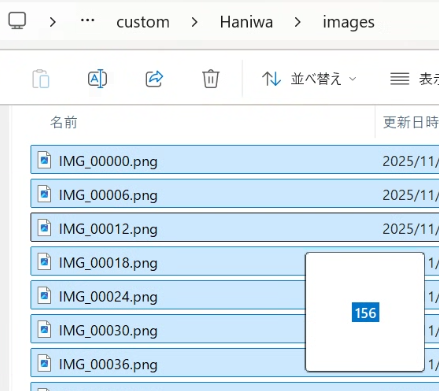
The README lists various parameters, so I changed the "video_interval" argument to increase the number of extracted images.
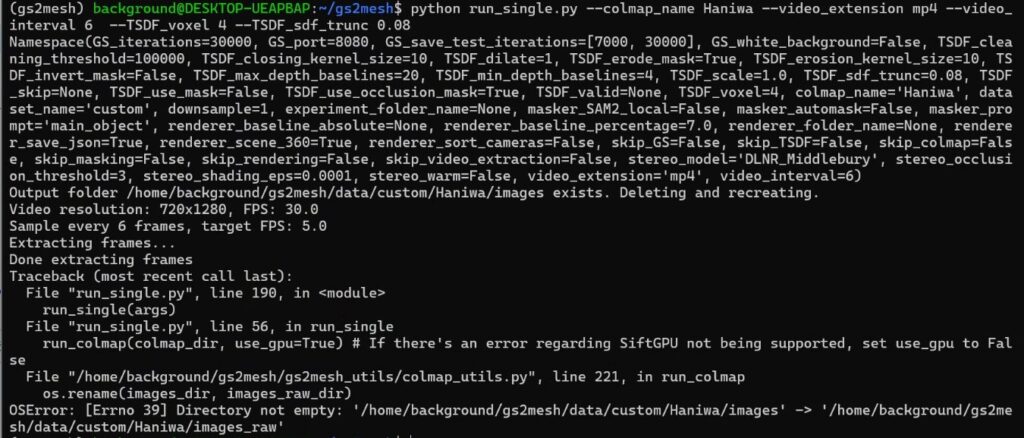
python run_single.py --colmap_name Haniwa --video_extension mp4 --video_interval 6▼This resulted in 156 images, roughly the same as last time.
▼However, "Killed" was displayed at the end, and the mesh generation seemed to fail.

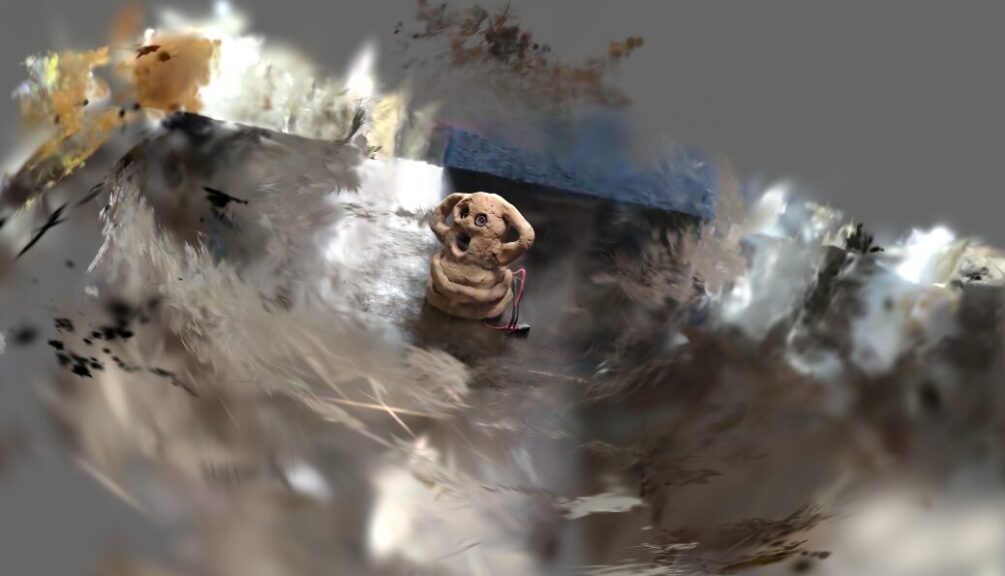
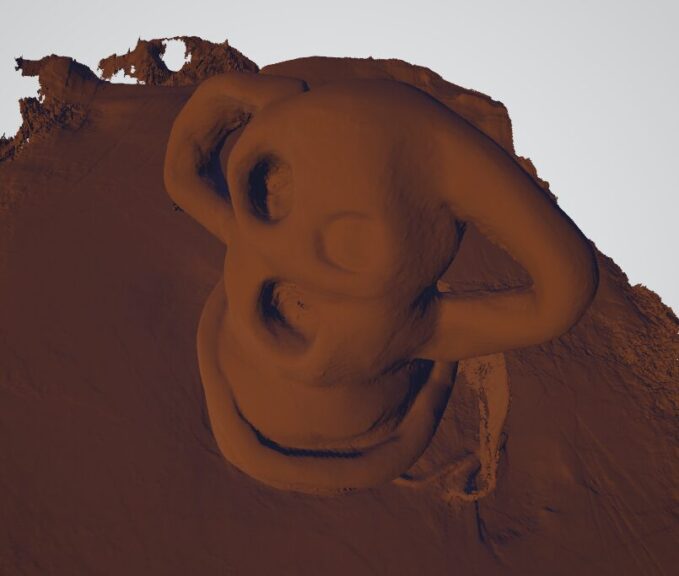
▼The 3DGS process itself resulted in a Haniwa model similar to before.
I asked ChatGPT how to adjust the parameters so that the mesh model would be generated successfully and ran the command as follows:
python run_single.py --colmap_name Haniwa --video_extension mp4 --video_interval 6 --TSDF_voxel 4 --TSDF_sdf_trunc 0.08▼If the colmap processing is already finished, you need to delete the previously generated files each time. By adding "--skip_colmap" to the arguments, the colmap process is skipped.
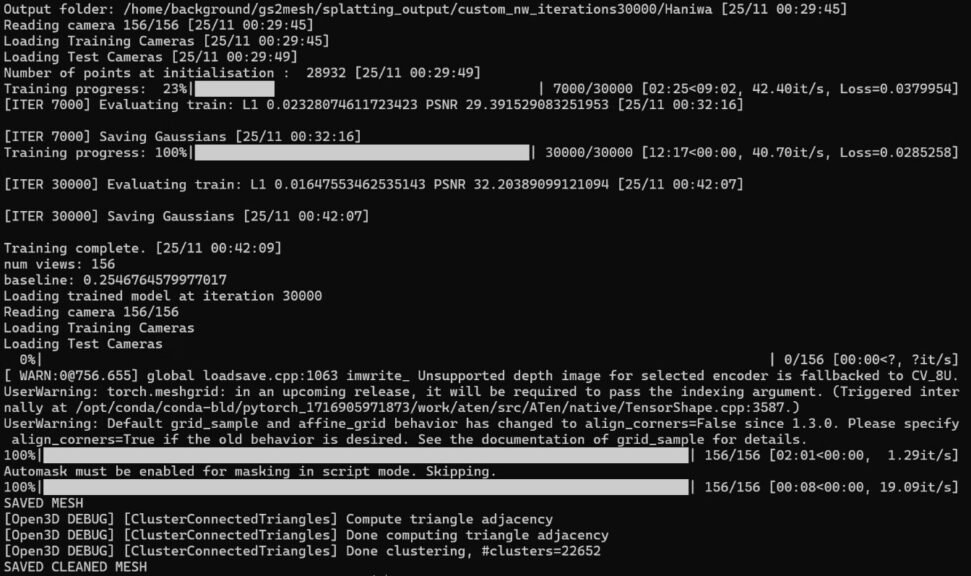
▼This time, "Killed" did not appear, and "SAVED CLEANED MESH" was displayed instead.
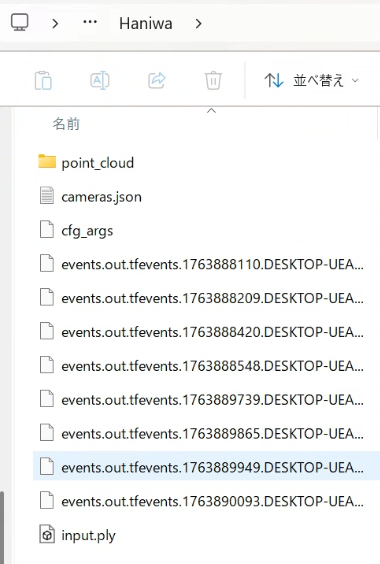
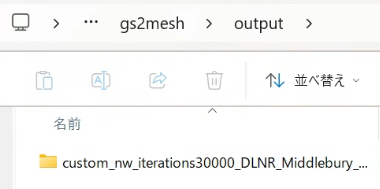
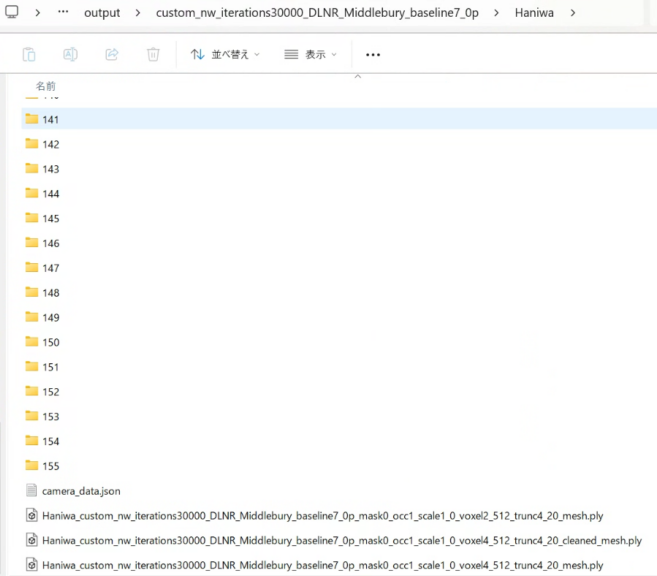
▼The data was added to the "output" folder.
▼The .ply mesh file has been added.
I checked it using the Windows 3D Viewer.
▼The .ply files output by standard 3DGS cannot be opened in this viewer.
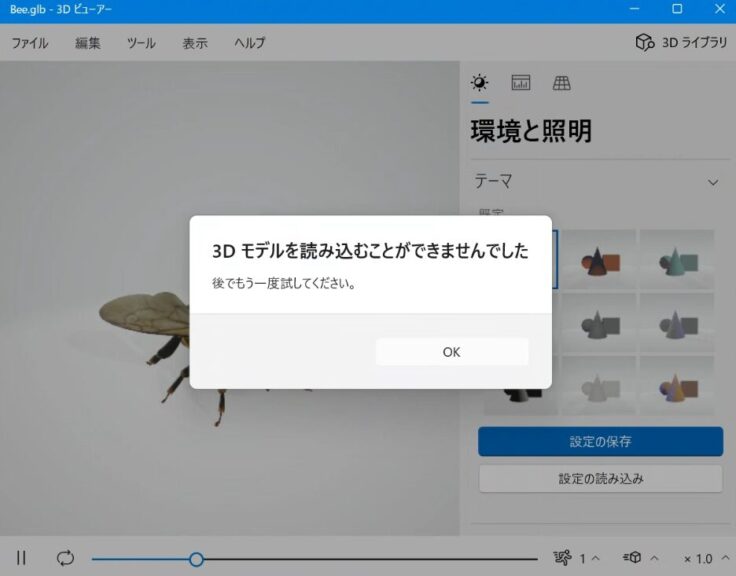
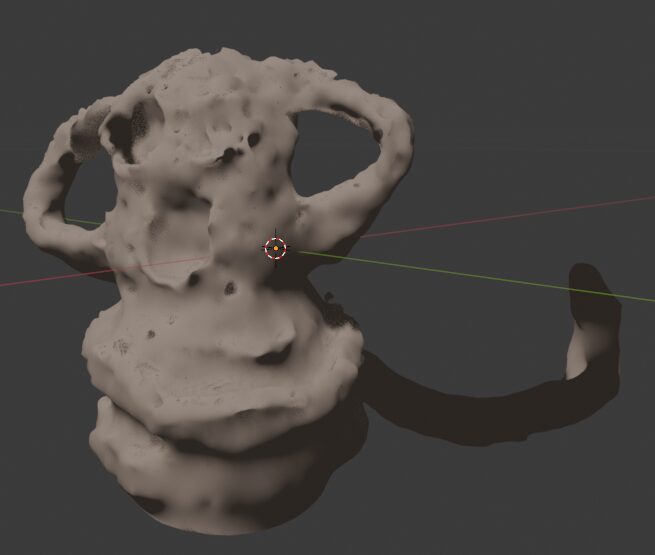
▼However, the specific .ply file output by GS2Mesh could be viewed. You can clearly see the mesh structure.
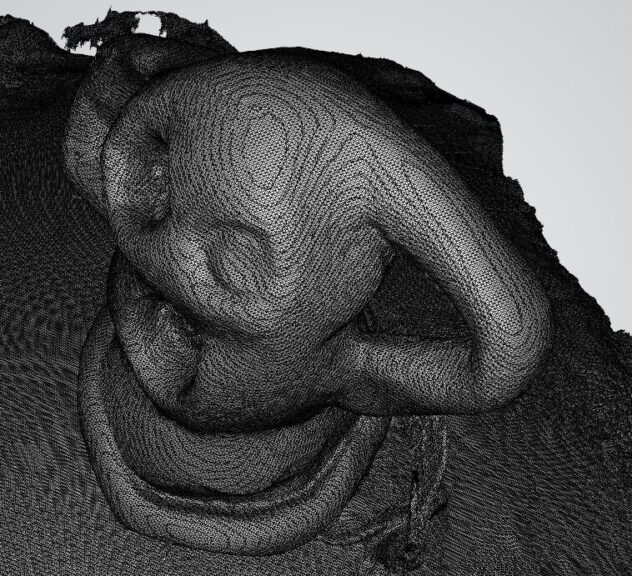
▼The data itself appears to be proper mesh data.
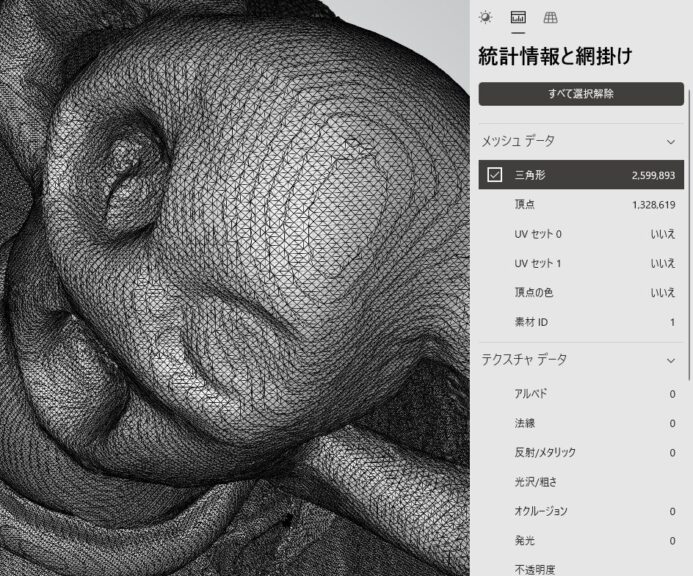
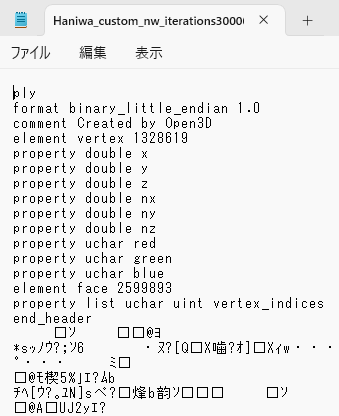
It seemed that the colors were not reflected in the viewer.
▼When I opened it with Notepad, the header information did seem to contain color elements.
Finally
In this post, I set up the GS2Mesh environment and confirmed that a mesh model could be generated.
It looks much smoother than when I tried meshing with Python. The data format seems to differ from the 3DGS format I've seen before, so I'll need to look into that further.
▼I also checked the 3DGS file format in the following article. The way the header information is written seems different from this time.
3D Gaussian Splatting形式のデータをPythonで変換する
はじめに 今回は3D Gaussian Splatting(3DGS)形式のデータをPythonで変換できるようにしてみました。 ※便宜上3DGS形式と呼称していますが、3DGSは手法で、3DGSにより…