Trying Out 3D Gaussian Splatting Part 1 (Environment Setup, WSL2 Ubuntu 20.04)
Introduction
In this post, I set up the environment to use 3D Gaussian Splatting.
I have been creating 3D models using Scaniverse, a smartphone app, and 3D Gaussian Splatting is the technology used behind it.
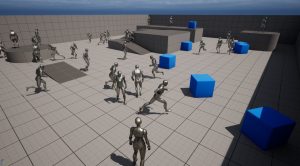
▼3D Gaussian Splatting was also featured in NVIDIA's Physical AI announcement.
Since I cannot use Scaniverse on my usual iPhone 8, I’ve been wanting to run it on my PC.
▼Previous articles are here:
Unreal Engine 5を使ってみる その10(Scaniverse、点群データの取り込み)
はじめに 今回はiPhone 15 ProでScaniverseというアプリを使って3Dスキャンしたデータを、Unreal Engine 5(UE5)に取り込んでみました。 データを取り込むにあたって…
Unreal Engine 5を使ってみる その15(Scaniverseのデータ取り込み2回目、SuperSplat)
はじめに 今回はScaniverseで3DスキャンしたデータのUnreal Engine 5 (UE5)への取り込みについて、再び試してみました。 以前の取り込み方だとScaniverseでの見た目と…

Building the Environment
Changing the CUDA Version
▼I am using a gaming laptop purchased for around 100,000 yen, running Windows 11.
Shopping: New Laptop and SSD Expansion (ASUS TUF Gaming A15)
Info This article is translated from Japanese to English. Introduction In this post, I’ll be talking about replacing my PC after my previous one broke down. I …


Building this environment involves dependencies like CUDA, and I set it up after several trials within a WSL2 Ubuntu environment.
▼The Ubuntu 20.04 environment for WSL2 was downloaded in the following article:
Trying Out WSL2 Part 3 (Ubuntu 20.04, ROS Noetic, Open Manipulator)
Info This article is translated from Japanese to English. Introduction In this post, I tried installing ROS on Ubuntu 20.04 within WSL2.The environment I built…
The README mentioned that it was verified with CUDA 11.8, so I switched to CUDA 11.8.
▼The GitHub repository is here:
https://github.com/graphdeco-inria/gaussian-splatting
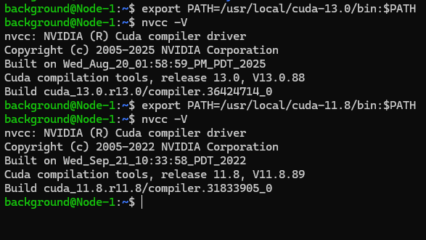
▼Checking with "nvidia-smi" beforehand showed CUDA 12.6 was installed.
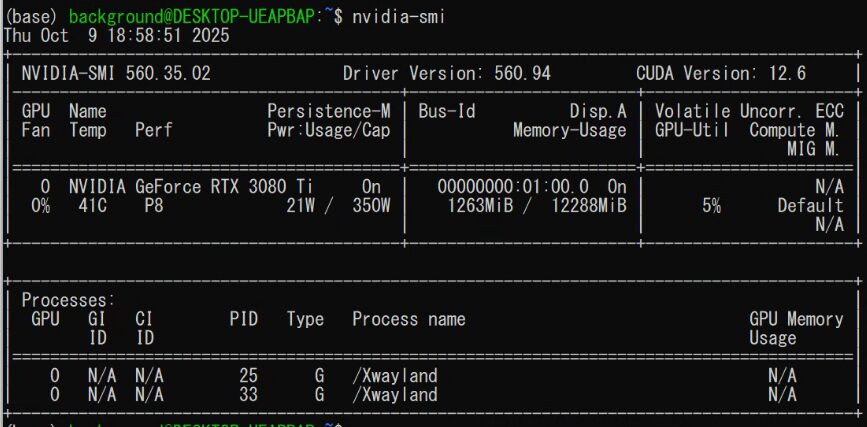
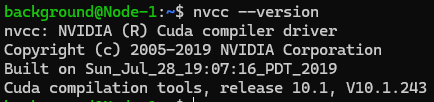
Note that "nvidia-smi" shows the CUDA version on the Windows side, while the CUDA version in the WSL2 environment can be checked with "nvcc --version."
▼Sometimes different versions are installed.
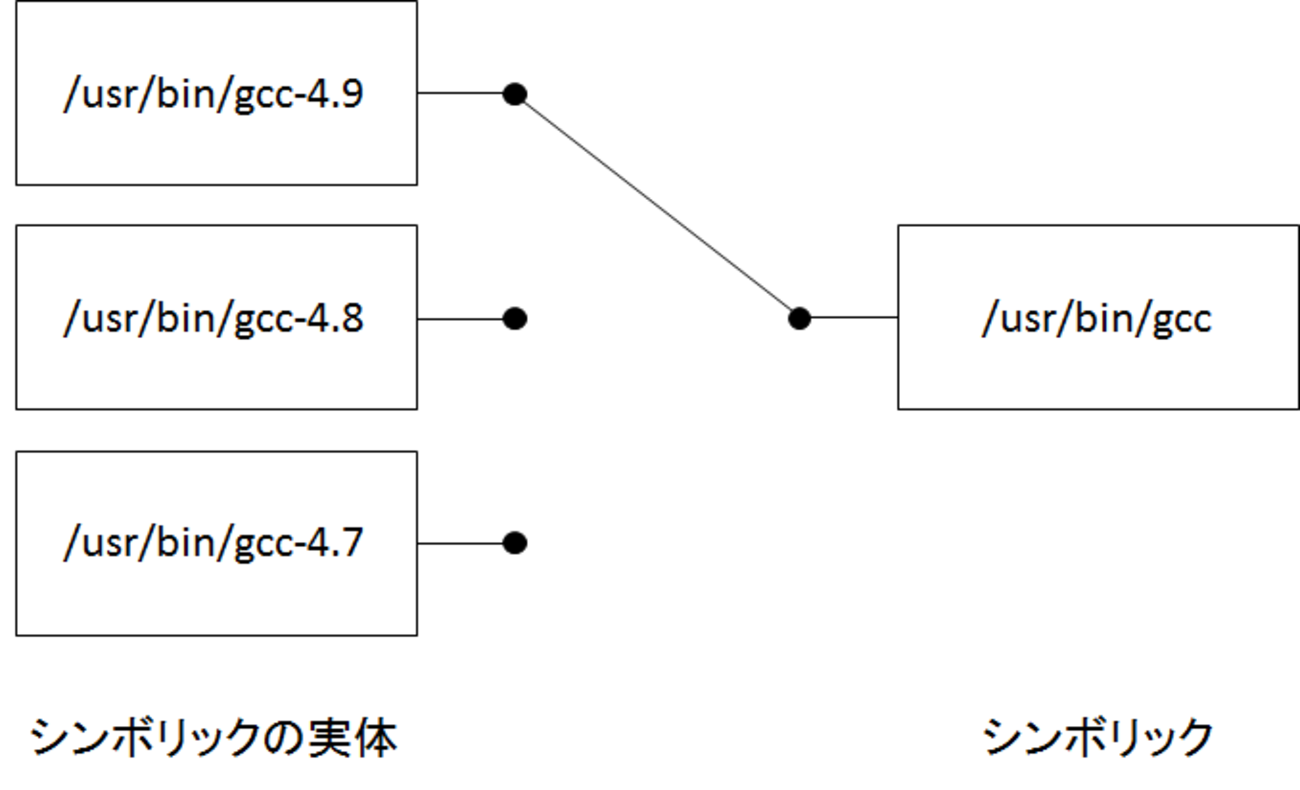
While using CUDA's "update-alternatives" seemed like a good method, I didn't try it this time. Since I’ll likely need to switch CUDA versions again in the future, I want to verify that method thoroughly another time.
▼The following articles seemed helpful:
update-alternativesの使い方 - gggggraziegrazie
update-alternativesとは Linuxを使う時、シンボリックリンクを使う時があります。例えばgccでは、生成したバイナリを動かす環境に応じて、バージョンを使い分ける必要が…
https://note.com/kmykpurin/n/n2bf91dc63f16
I executed the commands while consulting with ChatGPT.
First, I removed the existing installations:
sudo apt-get --purge remove "cuda*"
sudo apt-get --purge remove "nvidia*"
sudo apt autoremove -y
Next, I installed the packages for Ubuntu 20.04 and CUDA 11.8:
wget https://developer.download.nvidia.com/compute/cuda/repos/ubuntu2004/x86_64/cuda-ubuntu2004.pin
sudo mv cuda-ubuntu2004.pin /etc/apt/preferences.d/cuda-repository-pin-600
wget https://developer.download.nvidia.com/compute/cuda/11.8.0/local_installers/cuda-repo-ubuntu2004-11-8-local_11.8.0-520.61.05-1_amd64.deb
sudo dpkg -i cuda-repo-ubuntu2004-11-8-local_11.8.0-520.61.05-1_amd64.deb
sudo cp /var/cuda-repo-ubuntu2004-11-8-local/cuda-*-keyring.gpg /usr/share/keyrings/
sudo apt-get update
sudo apt-get -y install cuda
Finally, I added the environment variables to ".bashrc" so they are reflected whenever the terminal starts:
echo 'export PATH=/usr/local/cuda-11.8/bin:$PATH' >> ~/.bashrc
echo 'export LD_LIBRARY_PATH=/usr/local/cuda-11.8/lib64:$LD_LIBRARY_PATH' >> ~/.bashrc
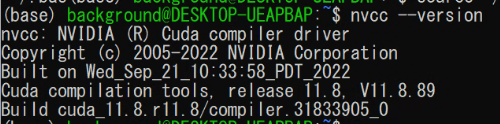
source ~/.bashrcI verified the CUDA version with "nvcc -V" or "nvcc --version."
▼It was successfully changed to 11.8.
Installing Miniconda
Since I needed to run "conda" commands, I installed Miniconda.
▼The installation method is described on the following page:
https://www.anaconda.com/docs/getting-started/miniconda/install#macos-linux-installation
I used the commands for Linux x86:
wget https://repo.anaconda.com/miniconda/Miniconda3-latest-Linux-x86_64.sh
bash ~/Miniconda3-latest-Linux-x86_64.sh
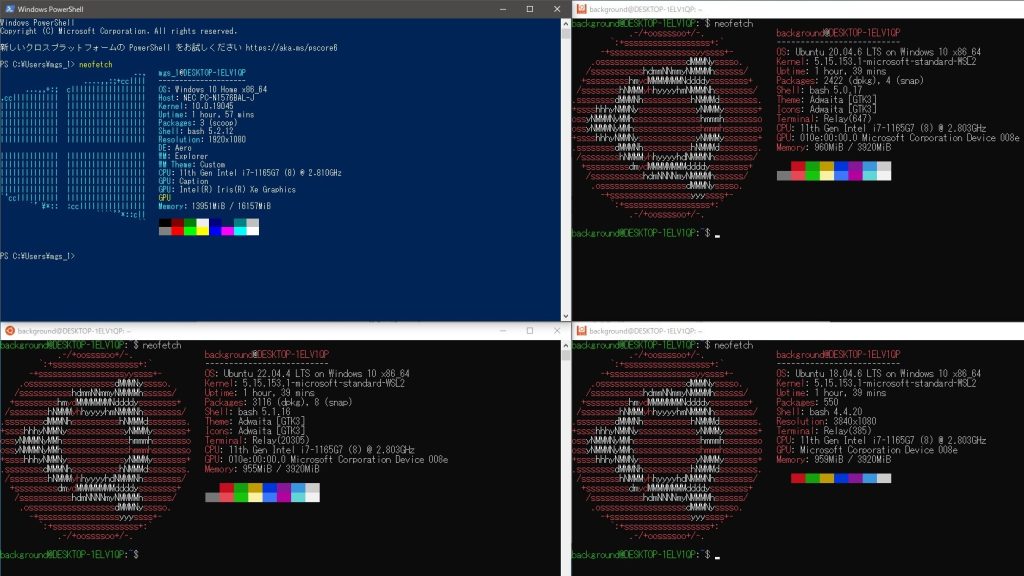
source .bashrc▼The conda environment is now activated.

Installing Gaussian Splatting
Download the Gaussian Splatting repository, then create and activate the conda environment:
git clone https://github.com/graphdeco-inria/gaussian-splatting --recursive
cd gaussian-splatting
conda env create --file environment.yml
conda activate gaussian_splatting
▼When you reopen the terminal later, running the last command will activate it again.

Running a Sample
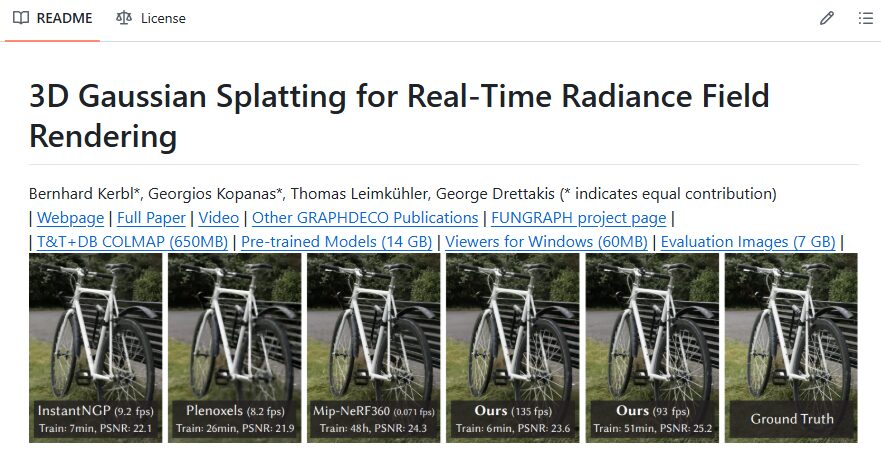
I tried reconstructing a 3D model using the provided COLMAP data.
I downloaded the "T&T+DB COLMAP (650MB)" linked at the beginning of the README.
▼The link is located at the top of the image.
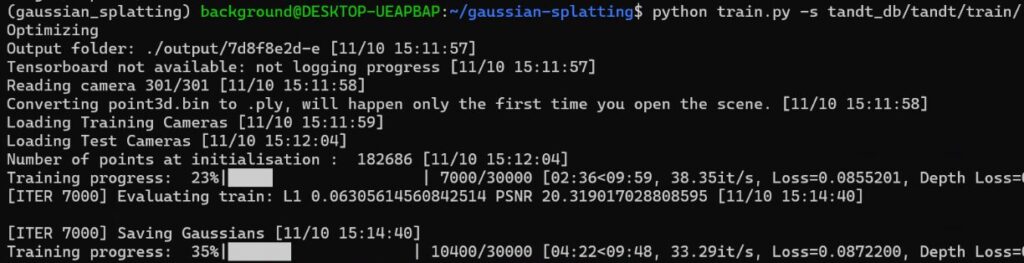
I added the downloaded folder to the execution directory and ran the command:
python train.py -s tandt_db/tandt/train/▼The process started. It appears there are iterations at 7,000 and 30,000.
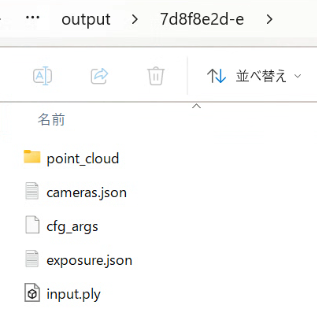
After the process finished, the results were saved in the "output" folder.
▼The .ply files are the 3D models.
I used SuperSplat, which allows you to edit 3D Gaussian Splatting .ply files in a browser, to check the results.
▼SuperSplat is here:
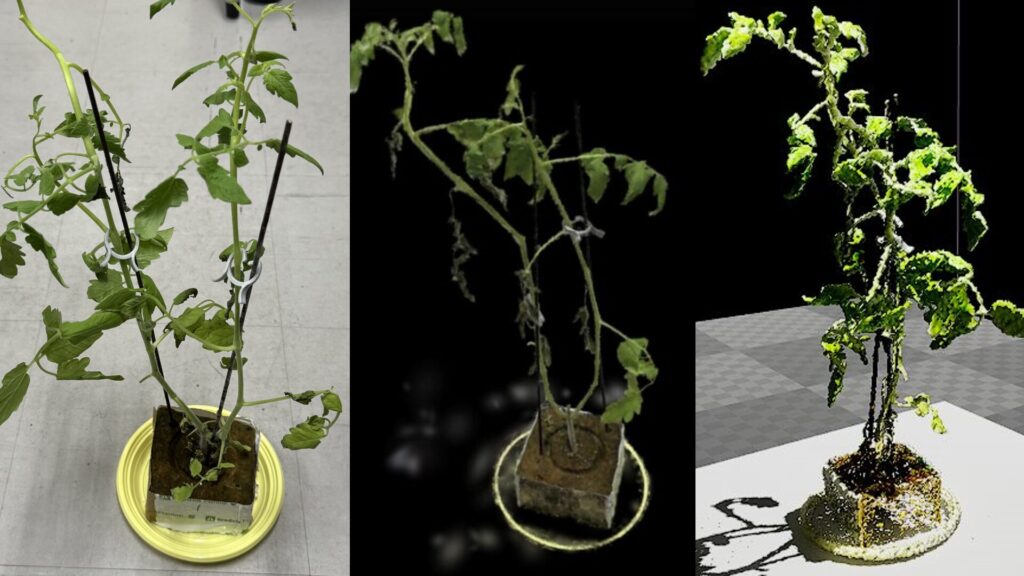
▼Result of iteration_7000:
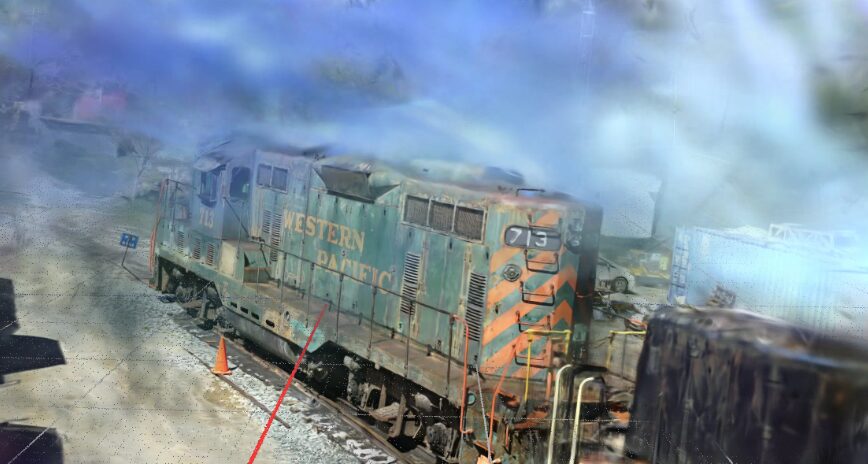
▼Result of iteration_30000:
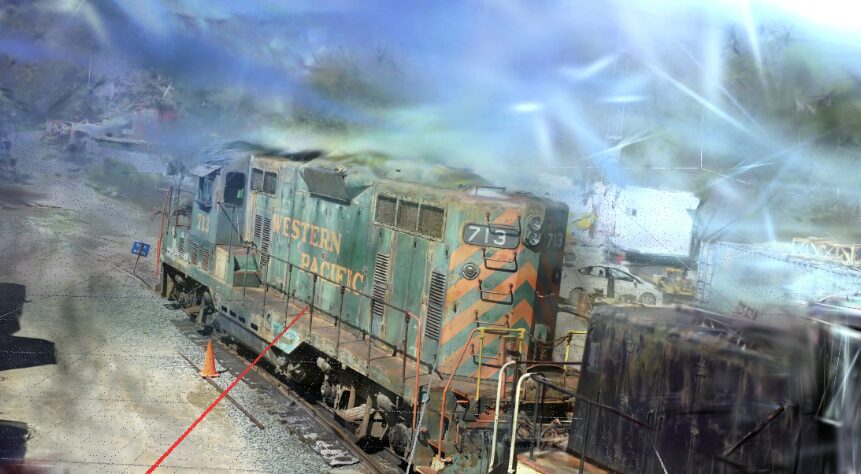
From a glance, it was hard to tell the difference between 7,000 and 30,000 iterations. My main impression was that the surrounding "mist" (artifacts) was quite noticeable.
Finally
Now that I can run 3D Gaussian Splatting on my PC, I'm curious to see if I can reconstruct 3D models for much larger environments than I could with Scaniverse. Scaniverse was convenient and easy for trimming parts I wasn't focused on, so I wonder if there are tools for PC that improve on this aspect.
Since I’ve successfully run the sample, I plan to try 3D model reconstruction from my own images and videos next.