Translating Text with Python (Googletrans, Node-RED)
Introduction
In this post, I tried out translation using Googletrans in Python.
Although I haven't written about it before, I have used deep-translator for translations in the past. While looking for other easy-to-use alternatives, I discovered Googletrans.
I also created a flow that can be easily used with the python-venv node in Node-RED.
▼I am using a gaming laptop purchased for around 100,000 yen, running Windows 11.
Shopping: New Laptop and SSD Expansion (ASUS TUF Gaming A15)
Info This article is translated from Japanese to English. Introduction In this post, I’ll be talking about replacing my PC after my previous one broke down. I …


▼Previous articles are here:
Node-REDを使ってみる その3(ui-tableノード、emailノード)
はじめに 今回はNode-REDのui-tableノードとemailノードを使ってみました。 デスクトップPCの作業を自動化して、遠隔でも状態を確認するためにdashboard画面を確認し…
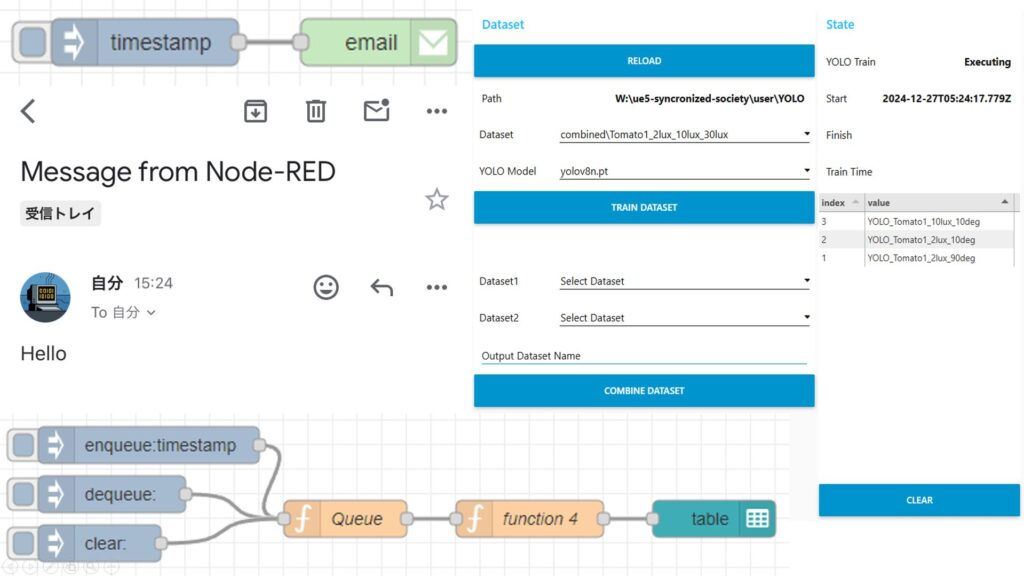
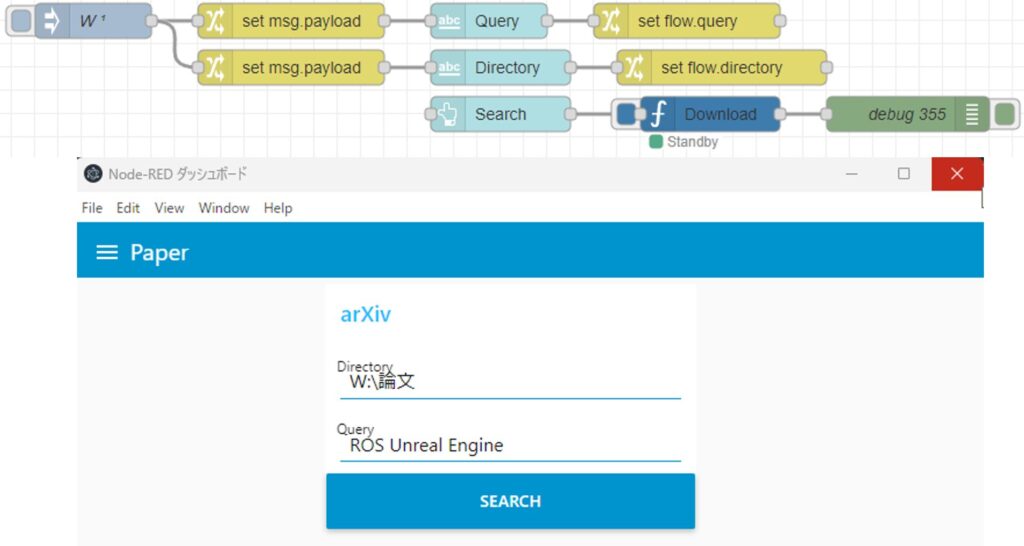
Pythonで論文を収集する その1(arXiv、Node-RED)
はじめに 今回はarXiv APIを使って、Pythonで論文を収集してみました。 普段は論文を検索するときにGoogle Scholarを使っていたのですが、プログラムで自動化したかっ…
Related Information
▼The PyPI page is here:
https://pypi.org/project/googletrans
It states, "Googletrans is a free and unlimited python library." Since it is an unofficial package, there is a possibility that it may stop working if Google changes its specifications.
It also seems to support the Auto language detection feature. Because it uses the Google Translate Ajax API, I found that it could not be executed in an offline environment.
▼The API documentation is here:
https://py-googletrans.readthedocs.io/en/latest
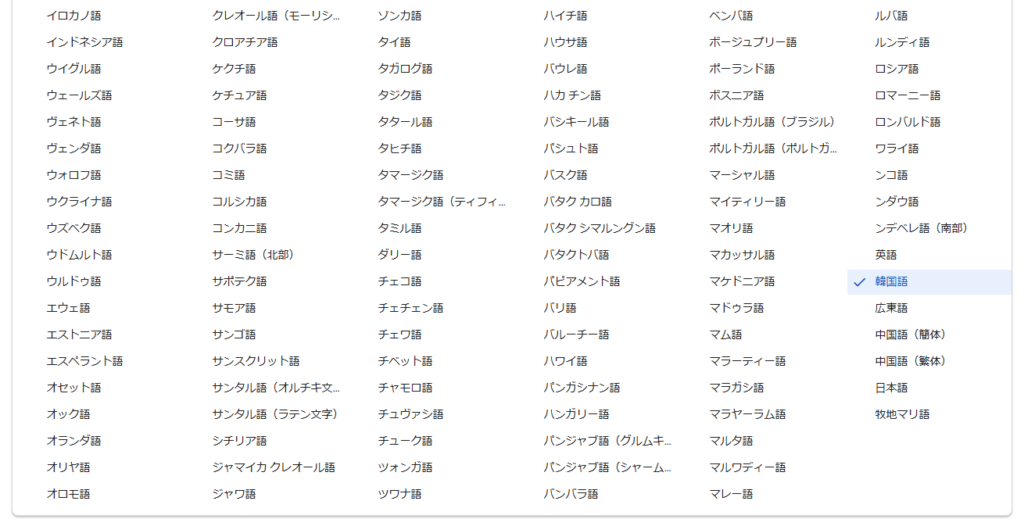
▼The translate.google.com page is here:
https://translate.google.com/?sl=auto&tl=ja&op=translate
▼Some of the languages displayed as translatable on the translate.google.com page. There were a vast number of languages I had never heard of.
Running with Python
Setting Up the Environment
The execution environment is a Windows 11 laptop with Python version 3.12.6.
First, create a Python virtual environment and install the package. I ran the following commands:
python -m venv pyenv
cd pyenv
.\Scripts\activate
pip install googletrans
▼For more details on Python virtual environments, please see the following article:
Create Python Virtual Environments (venv, Windows)
Info This article is translated from Japanese to English. Introduction In this post, I have summarized how to create a Python virtual environment.I was researc…

Running the Sample Program
I tried the sample program from the PyPI page. Since the code was intended for interactive mode, I created it as a .py file.
# https://pypi.org/project/googletrans/

import asyncio
from googletrans import Translator

async def translate_text():
    async with Translator() as translator:
        result = await translator.translate('안녕하세요.')
        print(result)  # <Translated src=ko dest=en text=Good evening. pronunciation=Good evening.>

        result = await translator.translate('안녕하세요.', dest='ja')
        print(result)  # <Translated src=ko dest=ja text=こんにちは。 pronunciation=Kon'nichiwa.>

        result = await translator.translate('veritas lux mea', src='la')
        print(result)  # <Translated src=la dest=en text=The truth is my light pronunciation=The truth is my light>

asyncio.run(translate_text())
▼Hangul text is translated into English and Japanese, and Latin is translated into English.

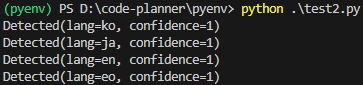
I also tried language detection. I made the following code executable as a .py file as well.
import asyncio
from googletrans import Translator

async def detect_languages():
    async with Translator() as translator:
        result = await translator.detect('이 문장은 한글로 쓰여졌습니다.')
        print(result)  # <Detected lang=ko confidence=0.27041003>

        result = await translator.detect('この文章は日本語で書かれました。')
        print(result)  # <Detected lang=ja confidence=0.64889508>

        result = await translator.detect('This sentence is written in English.')
        print(result)  # <Detected lang=en confidence=0.22348526>

        result = await translator.detect('Tiu frazo estas skribita en Esperanto.')
        print(result)  # <Detected lang=eo confidence=0.10538048>

asyncio.run(detect_languages())
▼Detection results were as follows:
It was mentioned that it could be run via command line, but an error occurred.
▼It seems an error occurs when trying to import translate from googletrans.

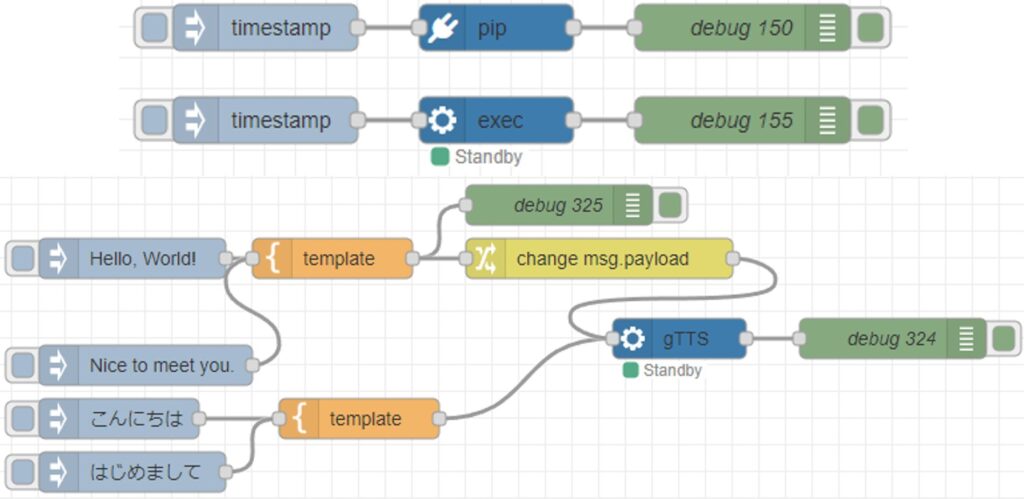
▼In the case of gTTS, an executable file was added to the virtual environment and could be run via command.
Using gTTS with Python (Text-to-Speech, Node-RED)
Introduction In this article, I used gTTS (Google Text-to-Speech) with Python. I have used VoiceVox before, but I was looking for something that could also…
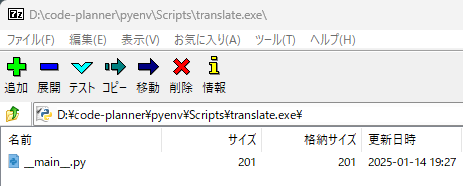
Since translate.exe was in the Scripts folder of the virtual environment, I tried opening it with 7-zip.
▼The .exe file is displayed as a .py file.
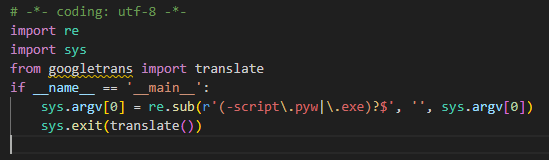
▼Indeed, it was being imported as translate instead of Translator. It might need to be fixed.
▼There is a GitHub repository, so I might take a look when I have time.
https://github.com/ssut/py-googletrans
Using with Node-RED
Executing with the inject node
I used the python-venv node I developed to run Python code in Node-RED.
▼I wrote about the transition of development at the end of last year.
https://qiita.com/background/items/d2e05e8d85427761a609
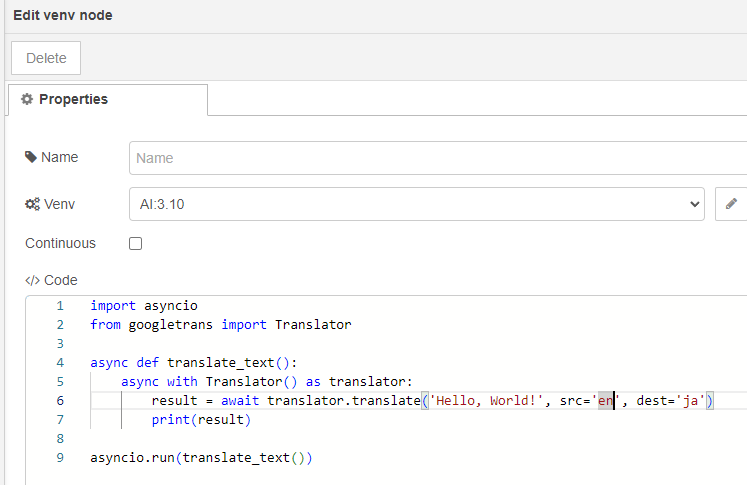
▼First, I created a flow to execute Python.
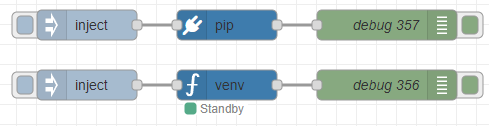
[{"id":"b141a64b0f8a1a08","type":"inject","z":"22eb2b8f4786695c","name":"","props":[],"repeat":"","crontab":"","once":false,"onceDelay":0.1,"topic":"","x":1570,"y":1100,"wires":[["f9913854e887bb20"]]},{"id":"adf376b9ee2b5f4a","type":"debug","z":"22eb2b8f4786695c","name":"debug 356","active":true,"tosidebar":true,"console":false,"tostatus":false,"complete":"false","statusVal":"","statusType":"auto","x":1870,"y":1100,"wires":[]},{"id":"f9913854e887bb20","type":"venv","z":"22eb2b8f4786695c","venvconfig":"015784e9e3e0310a","name":"","code":"import asyncio\nfrom googletrans import Translator\n\nasync def translate_text():\n async with Translator() as translator:\n result = await translator.translate('Hello, World!', src='en', dest='ja')\n print(result)\n\nasyncio.run(translate_text())","continuous":false,"x":1710,"y":1100,"wires":[["adf376b9ee2b5f4a"]]},{"id":"e82d77a5fe1489c1","type":"pip","z":"22eb2b8f4786695c","venvconfig":"015784e9e3e0310a","name":"","arg":"googletrans","action":"install","tail":false,"x":1710,"y":1040,"wires":[["9867b2268a7e2118"]]},{"id":"54b670cc83b78668","type":"inject","z":"22eb2b8f4786695c","name":"","props":[],"repeat":"","crontab":"","once":false,"onceDelay":0.1,"topic":"","x":1570,"y":1040,"wires":[["e82d77a5fe1489c1"]]},{"id":"9867b2268a7e2118","type":"debug","z":"22eb2b8f4786695c","name":"debug 357","active":true,"tosidebar":true,"console":false,"tostatus":false,"complete":"false","statusVal":"","statusType":"auto","x":1870,"y":1040,"wires":[]},{"id":"015784e9e3e0310a","type":"venv-config","venvname":"AI","version":"3.10"}]▼Based on the sample program, I am passing the text and language to be translated.
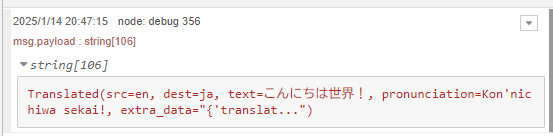
▼The result was displayed!
Since I only wanted to retrieve the "text," I changed the code as follows to get result.text.
import asyncio
from googletrans import Translator

async def translate_text():
    async with Translator() as translator:
        result = await translator.translate('Hello, World!', src='en', dest='ja')
        print(result.text)

asyncio.run(translate_text())
▼I was able to get only the text!

Combining with the http request node
Since I can use it in Node-RED, I decided to combine it with other nodes, specifically the http request node. I extract elements from an HTML file retrieved via a GET request and translate them with Googletrans. This time, I targeted https://example.com.
▼First, I extracted data in HTML format using the following flow.

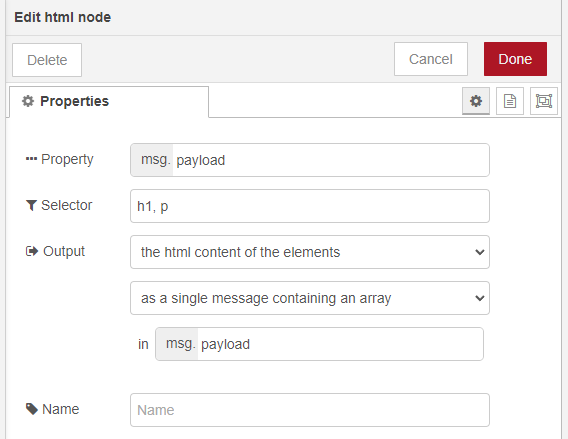
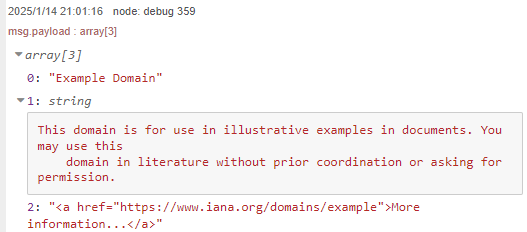
[{"id":"3cc6ec3f1ffb3148","type":"html","z":"22eb2b8f4786695c","name":"","property":"payload","outproperty":"payload","tag":"h1, p","ret":"html","as":"single","chr":"_","x":1490,"y":1220,"wires":[["24a8f14fbdf801d1"]]},{"id":"9077cd796bd1f229","type":"http request","z":"22eb2b8f4786695c","name":"","method":"GET","ret":"txt","paytoqs":"ignore","url":"https://example.com","tls":"","persist":false,"proxy":"","insecureHTTPParser":false,"authType":"","senderr":false,"headers":[],"x":1330,"y":1220,"wires":[["3cc6ec3f1ffb3148","28fcbc78d7599a7a"]]},{"id":"01dd2c5e87e46b56","type":"inject","z":"22eb2b8f4786695c","name":"","props":[],"repeat":"","crontab":"","once":false,"onceDelay":0.1,"topic":"","x":1170,"y":1220,"wires":[["9077cd796bd1f229"]]},{"id":"24a8f14fbdf801d1","type":"debug","z":"22eb2b8f4786695c","name":"debug 359","active":true,"tosidebar":true,"console":false,"tostatus":false,"complete":"false","statusVal":"","statusType":"auto","x":1650,"y":1220,"wires":[]},{"id":"28fcbc78d7599a7a","type":"debug","z":"22eb2b8f4786695c","name":"debug 360","active":true,"tosidebar":true,"console":false,"tostatus":false,"complete":"false","statusVal":"","statusType":"auto","x":1510,"y":1180,"wires":[]}]▼In the html node, I am retrieving h1 and p elements.
▼It was displayed as follows.
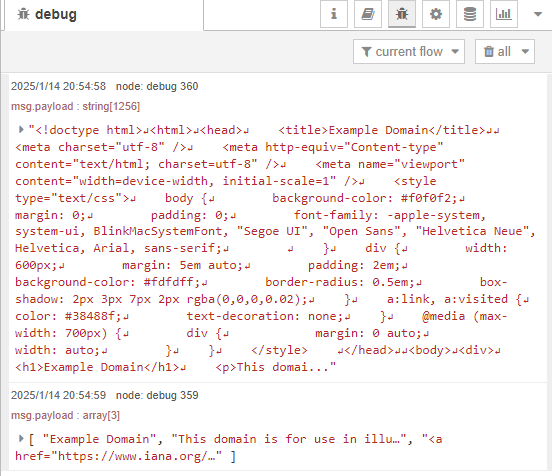
▼You can see that the output of the html node is contained in an array.
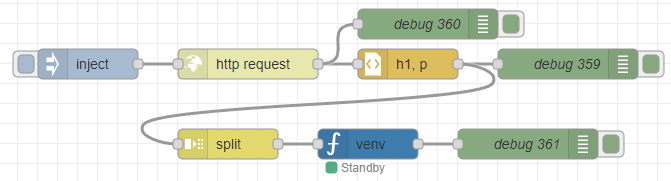
I tried splitting the array with a split node and then processing it with Python.
▼Here is the overall flow:
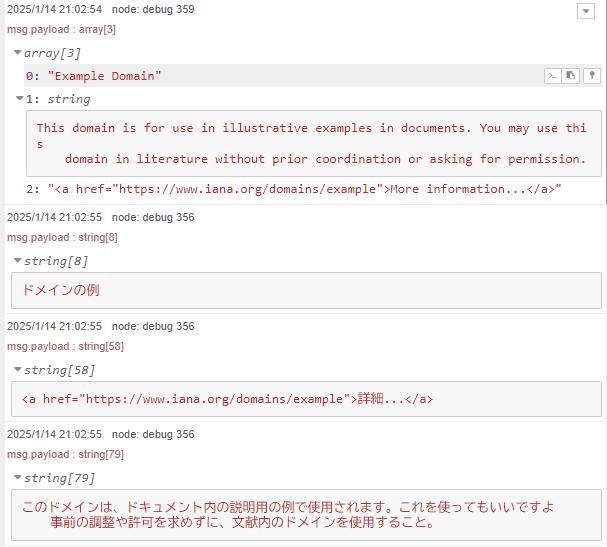
[{"id":"3cc6ec3f1ffb3148","type":"html","z":"22eb2b8f4786695c","name":"","property":"payload","outproperty":"payload","tag":"h1, p","ret":"html","as":"single","chr":"_","x":1490,"y":1220,"wires":[["24a8f14fbdf801d1","501dd26ec56cfc97"]]},{"id":"9077cd796bd1f229","type":"http request","z":"22eb2b8f4786695c","name":"","method":"GET","ret":"txt","paytoqs":"ignore","url":"https://example.com","tls":"","persist":false,"proxy":"","insecureHTTPParser":false,"authType":"","senderr":false,"headers":[],"x":1330,"y":1220,"wires":[["3cc6ec3f1ffb3148","28fcbc78d7599a7a"]]},{"id":"01dd2c5e87e46b56","type":"inject","z":"22eb2b8f4786695c","name":"","props":[],"repeat":"","crontab":"","once":false,"onceDelay":0.1,"topic":"","x":1170,"y":1220,"wires":[["9077cd796bd1f229"]]},{"id":"24a8f14fbdf801d1","type":"debug","z":"22eb2b8f4786695c","name":"debug 359","active":true,"tosidebar":true,"console":false,"tostatus":false,"complete":"false","statusVal":"","statusType":"auto","x":1650,"y":1220,"wires":[]},{"id":"28fcbc78d7599a7a","type":"debug","z":"22eb2b8f4786695c","name":"debug 360","active":true,"tosidebar":true,"console":false,"tostatus":false,"complete":"false","statusVal":"","statusType":"auto","x":1510,"y":1180,"wires":[]},{"id":"501dd26ec56cfc97","type":"split","z":"22eb2b8f4786695c","name":"","splt":"\\n","spltType":"str","arraySplt":1,"arraySpltType":"len","stream":false,"addname":"","property":"payload","x":1310,"y":1300,"wires":[["d6e7b34557df2849"]]},{"id":"eb43099b8c989866","type":"debug","z":"22eb2b8f4786695c","name":"debug 361","active":true,"tosidebar":true,"console":false,"tostatus":false,"complete":"false","statusVal":"","statusType":"auto","x":1610,"y":1300,"wires":[]},{"id":"d6e7b34557df2849","type":"venv","z":"22eb2b8f4786695c","venvconfig":"015784e9e3e0310a","name":"","code":"import asyncio\nfrom googletrans import Translator\n\nasync def translate_text():\n async with Translator() as translator:\n result = await translator.translate(msg['payload'], src='en', dest='ja')\n print(result.text)\n\nasyncio.run(translate_text())","continuous":false,"x":1450,"y":1300,"wires":[["eb43099b8c989866"]]},{"id":"015784e9e3e0310a","type":"venv-config","venvname":"AI","version":"3.10"}]I modified the code to change only the text to be translated, so that it receives the value of msg.payload.
import asyncio
from googletrans import Translator

async def translate_text():
    async with Translator() as translator:
        result = await translator.translate(msg['payload'], src='en', dest='ja')
        print(result.text)

asyncio.run(translate_text())
▼Upon execution, each element of the array was translated!
Finally
When running it as a node, the input and output are clear and easy to understand. When you input text, the translation result is output.
Language settings can also accept input from Node-RED. It seems easy to reuse by simply copying and pasting nodes.